Suspension Load Transfer: Measure, Manage, and Tune for Better Handling and Tire Life
Suspension load transfer is the shift of vertical weight between a vehicle's tires during acceleration, braking, or cornering. It directly determines how much grip each tire has, influencing handling balance and tire wear. Uncontrolled load transfer leads to reduced overall grip, uneven tire wear, and unpredictable behavior—especially in emergency maneuvers. The good news: load transfer is a tunable characteristic. By understanding and adjusting your suspension, you can manage load transfer to improve stability, cornering performance, and tire longevity.
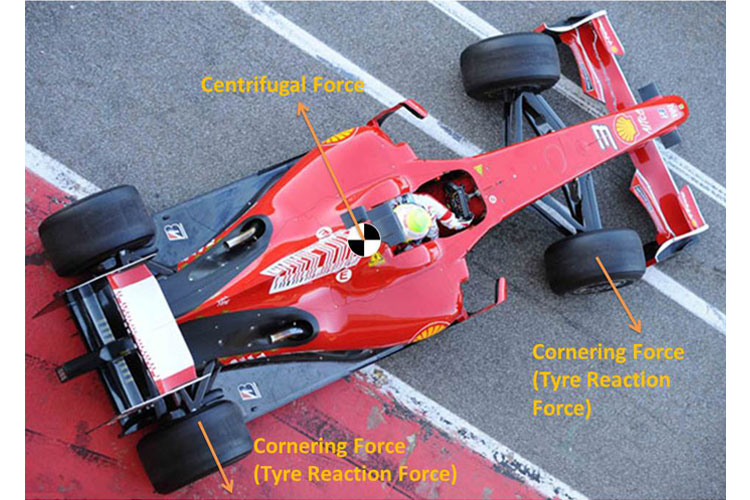
Load transfer comes in two forms: lateral and longitudinal. Lateral load transfer occurs during cornering, shifting weight from the inside wheels to the outside wheels. Longitudinal load transfer happens during acceleration and braking, shifting weight between the front and rear axles. Both types affect the traction available at each tire, and both can be influenced by suspension design and settings.
The Physics of Load Transfer: Center of Gravity, Wheelbase, and Track
The height of the center of gravity (CG) is the single most important factor in load transfer. A higher CG creates a larger moment arm, increasing the amount of weight transferred for a given acceleration or cornering force. Wheelbase (distance between front and rear axles) affects longitudinal load transfer: a longer wheelbase reduces the percentage of weight transferred during braking or acceleration. Track width (distance between left and right wheels) similarly affects lateral load transfer: a wider track reduces the weight shift during cornering.
A simple formula for lateral load transfer is: Weight transfer = Lateral acceleration × CG height / Track width. For example, a vehicle with a CG height of 20 inches and a track width of 60 inches experiencing 1.0g lateral acceleration will transfer approximately 33% of its total weight to the outside wheels. Longitudinal load transfer during braking can be estimated as: Weight transfer = Deceleration × CG height / Wheelbase. These formulas show that lowering the CG or widening the track/wheelbase reduces load transfer—key considerations for vehicle design and modification.
Cars typically have lower CG heights (18–22 inches) and narrower tracks, making them more responsive to suspension tuning. Trucks and SUVs have higher CG heights (25–35 inches) and often narrower tracks relative to their height, leading to more dramatic load transfer and a higher rollover risk. Understanding these dimensional differences is essential when selecting or adjusting suspension components.
How to Measure Load Transfer on Your Vehicle
To manage load transfer, you must first measure it. The most accurate method uses corner weight scales, which measure the static weight on each wheel. By driving onto the scales and then raising one corner or using a dynamic rig, you can observe load changes. However, dynamic load transfer during cornering or braking is best captured with data logging equipment.
A practical approach for enthusiasts: use a smartphone with a lateral accelerometer app (many are free) to record g-forces during a turn. Simultaneously, measure body roll using a simple level or an inclinometer mounted on the dashboard. With the roll angle and track width, you can estimate lateral load transfer using the formula: Load transfer = (Lateral acceleration × CG height) / Track width. For a more precise measurement, install suspension potentiometers or ride height sensors to record dynamic compression and rebound at each corner.
For a DIY baseline, park on a level surface and measure the ride height at each wheel. Then perform a steady-state cornering maneuver (e.g., a constant-radius skidpad) and measure the ride height again. The change in ride height, combined with known spring rates, allows you to calculate the load transfer. This method requires only a tape measure and a helper, yet yields useful data for tuning.
Load Transfer in Different Vehicle Types: Cars, Trucks, and SUVs
Cars, with their lower CG and often sportier suspension geometry, experience less dramatic load transfer. However, they are more sensitive to suspension tuning changes. For example, stiffening the front anti-roll bar on a car increases front lateral load transfer, promoting understeer—useful for reducing oversteer in high-power rear-wheel-drive cars. Tire wear patterns in cars often show outer shoulder wear if load transfer is excessive during cornering.
Trucks and SUVs face greater challenges due to their high CG and heavier weight. During hard braking, longitudinal load transfer can overwhelm the front tires, increasing stopping distances and causing rear-wheel lift. In cornering, lateral load transfer can lead to body roll and, in extreme cases, rollover. Solid axles in many trucks complicate load transfer distribution: when one wheel hits a bump, the axle transfers load to the opposite wheel, affecting stability. Upgrading anti-roll bars and using stiffer springs are common remedies, but they must be chosen carefully to avoid a harsh ride.
For SUVs with independent suspension, load transfer management focuses on controlling body roll and maintaining tire contact. Many SUVs come with factory-installed anti-roll bars, but aftermarket upgrades can further reduce roll. Tire wear in trucks and SUVs often shows edge wear on the outside tires if cornering load transfer is high, or center wear if tire pressures are too high—a related but separate issue.
Suspension Components That Control Load Transfer: Springs, Anti-Roll Bars, and Dampers
Springs, anti-roll bars, and dampers each play a distinct role in managing load transfer.
Springs control ride height and the natural frequency of the suspension. Stiffer springs reduce body roll and pitch, but they do not reduce total load transfer—they only change how quickly it occurs and how much is absorbed by the suspension versus the tires. Softer springs allow more body movement, which can delay load transfer and improve mechanical grip on uneven surfaces, but they increase the risk of bottoming out.
Anti-roll bars (also called sway bars) connect the left and right wheels on an axle. They resist body roll by transferring load from the inside wheel to the outside wheel during cornering. Increasing front anti-roll bar stiffness increases front lateral load transfer, causing more understeer. Increasing rear anti-roll bar stiffness does the opposite, promoting oversteer. This makes anti-roll bars the primary tool for balancing handling.
Dampers (shocks) control the speed of load transfer. They do not affect steady-state load transfer but influence transient behavior—how quickly weight shifts during turn-in, braking, or acceleration. Stiffer damping slows the weight transfer, which can improve responsiveness but may reduce grip if too stiff. Adjustable dampers allow fine-tuning of this effect.
The distribution of roll stiffness between front and rear axles—known as roll stiffness distribution—determines whether a vehicle understeers or oversteers. By adjusting anti-roll bars and springs, you can shift the balance. For example, increasing front roll stiffness transfers more load to the front outside tire, reducing its grip and causing understeer. Conversely, increasing rear roll stiffness causes oversteer.
Step-by-Step Guide to Adjusting Suspension Based on Load Transfer
Follow this systematic process to tune your suspension using load transfer principles.
Step 1: Measure baseline. Use the methods from Section 3 to record current load transfer, body roll, and handling characteristics. Note any understeer or oversteer tendencies and tire wear patterns.
Step 2: Define goals. Decide what you want to improve: reduce understeer, increase cornering grip, or even out tire wear. Your goals will guide adjustments.
Step 3: Adjust anti-roll bars. Start with the anti-roll bars because they have the most direct effect on lateral load transfer distribution. If the car understeers (pushes wide), soften the front bar or stiffen the rear bar. If it oversteers (spins out), do the opposite. Make one change at a time and retest.
Step 4: Adjust springs and ride height. Lowering the ride height lowers the CG, reducing total load transfer. However, be cautious: lowering too much can alter roll center geometry and cause bump steer. Changing spring rates affects the natural frequency and how load is transferred during transients. Softer springs may improve mechanical grip on rough roads, while stiffer springs reduce body movement for smoother surfaces.
Step 5: Fine-tune dampers. Once springs and bars are set, adjust dampers to control the speed of load transfer. If the car feels sluggish in transitions, increase rebound damping. If it feels skittish, reduce it. Use a shock dyno or test drives to find the sweet spot.
Step 6: Re-measure and validate. After each adjustment, repeat the measurements from Step 1 to quantify changes. Keep a log of settings and results. This data-driven approach ensures you are moving in the right direction.
Common Misconceptions About Load Transfer
Myth: Stiffer springs always reduce load transfer. In reality, total load transfer is determined by CG height, track width, and acceleration forces—not spring rate. Stiffer springs only change how much load is transferred through the suspension versus the tires, and they can increase tire load variation, reducing overall grip.
Myth: Lowering the car always improves handling. Lowering reduces CG height and thus total load transfer, but it can also lower the roll center relative to the CG, increasing body roll. Additionally, extreme lowering can cause bump steer and bottoming out, degrading handling. The optimal ride height balances CG reduction with proper suspension geometry.
Myth: Anti-roll bars increase total grip. Anti-roll bars redistribute load between the inside and outside tires, but they do not add grip. In fact, a too-stiff bar can lift the inside tire, reducing total traction. The goal is to balance load transfer to maximize the grip of all four tires.
Myth: Load transfer only matters for racing. Even in daily driving, load transfer affects braking distance, stability in emergency lane changes, and tire wear. A well-tuned suspension that manages load transfer can improve safety and save money on tires.
Manufacturer Insights: How Load Transfer Shapes Suspension Design
Automotive engineers design suspension components with load transfer in mind. For example, when developing a new SUV, engineers set the CG height, track width, and suspension geometry to achieve a target understeer gradient—typically mild understeer for safety. They select spring rates and anti-roll bar diameters to control body roll within acceptable limits while maintaining ride comfort.
Vehicle-specific tuning is crucial: a sports car may have a stiffer suspension and larger anti-roll bars to reduce load transfer and improve cornering, while a family sedan prioritizes comfort with softer springs and smaller bars. Aftermarket parts are designed to alter these characteristics. For instance, a performance-oriented anti-roll bar kit might increase roll stiffness by 50% to reduce body roll, but it must be paired with appropriate dampers to avoid a harsh ride.
Manufacturers also consider load transfer when designing bushings. Our range of [automotive suspension components](/products) includes rear trailing arm bushings and control arms that maintain precise suspension geometry under load. Worn bushings can introduce unwanted compliance, altering load transfer and causing vague handling. Replacing them with high-quality parts restores the intended geometry. For example, our [Large suspension bushing](/products/bushing-001-2) and [Large suspension bushing](/products/bushing-002-2) are designed to meet OEM specifications for Hyundai and KIA vehicles, ensuring consistent load transfer characteristics.
Conclusion: Key Takeaways and Next Steps
Suspension load transfer is a fundamental concept that affects every vehicle's handling and tire wear. By understanding its physics, measuring it accurately, and adjusting springs, anti-roll bars, and dampers, you can significantly improve your vehicle's performance and safety. Remember to consider your vehicle type—cars, trucks, and SUVs each have unique challenges. Avoid common myths and rely on data-driven tuning. Whether you're a DIY enthusiast or a professional mechanic, applying these principles will help you make informed decisions about suspension upgrades. For high-quality replacement components that maintain proper load transfer, explore our selection of [automotive suspension components](/products) and ensure your vehicle's suspension geometry is in top condition.