Strut Mount Replacement on VW Polo 4 (9N/9N3, 6R/6C): Diagnose First, Then Torque to Spec
A dull clunk over speed bumps on a VW Polo 4 is most often a collapsed strut mount rubber — but do not buy parts until you have ruled out the top bearing, anti-roll bar (ARB) bush, and damper. Replacing a mount that is not the noise source leaves the clunk untouched and wastes a full strut strip-down.
Confirm the Mount Is the Culprit Before You Buy Parts
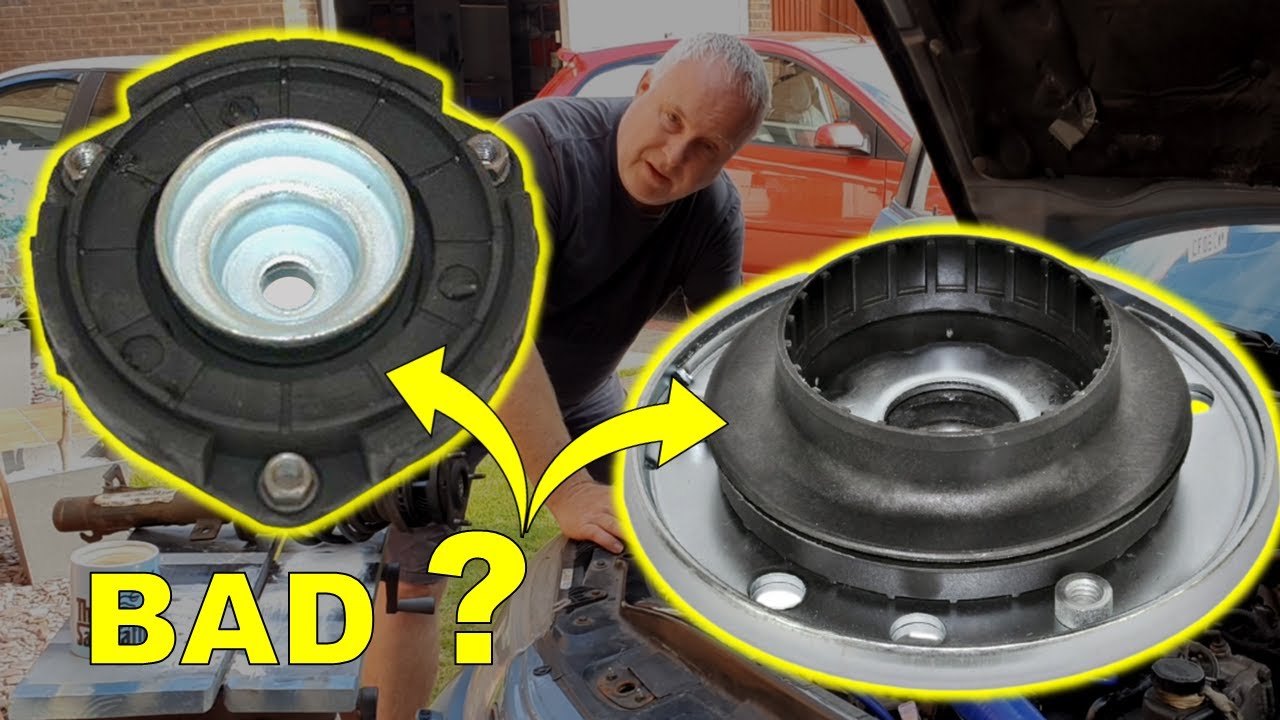
Bad strut mount symptoms on Polo 4: a dull knock over sharp bumps and rough tarmac, often worse when cold, felt through the floor or steering column rather than the steering wheel rim. The noise is structural — you feel it in the body, not the rim.
Mount vs top bearing: A failed top bearing typically produces a twanging or creaking noise when turning the steering at standstill. A collapsed mount rubber produces a dull knock over sharp bumps. If the noise only appears while turning the wheel stationary, the bearing is the prime suspect.
Mount vs ARB bush: ARB bush noise is usually a lighter rattle or squeak over small ripples and is often reproducible by pushing the front of the car side-to-side with the engine off. A mount clunk is heavier and tied to vertical wheel travel, not lateral rocking.
Mount vs damper: A worn damper produces a knocking that continues after the mount is replaced and is often accompanied by oil misting on the damper body or excessive bounce on the bounce test. If the damper body is oily or the car keeps bouncing after two rebounds, the damper is contributing.
Action: Perform a bounce test on each front corner, push the car side-to-side with the engine off, and turn the steering lock-to-lock while stationary. If the clunk is dull, vertical, and cold-sensitive, the mount is the likely culprit. If you hear twanging on turn, suspect the bearing. If you hear light rattles on ripples, suspect ARB bushes. If the damper is misting oil, budget for dampers as well.
Static Checks That Confirm the Mount
A bounce test alone is not enough. With the car raised and the front wheels off the ground, use a pry bar between the strut tower and the top mount to check for vertical play in the rubber. Any visible movement or cracking in the rubber is a failed mount. Also check the damper rod for lateral play by gripping the rod and rocking it — if it moves independently of the mount, the damper is worn. These static checks separate a mount clunk from a damper knock before you commit to parts.
Tools and Parts You Need Before You Touch a Polo 4 Strut Mount
Gather a strut nut socket (typically 21mm or 22mm depending on engine variant), a two-piece external coil spring compressor, a torque wrench, a breaker bar, penetrating oil, a jack, and axle stands. The strut nut on Polo 4 front struts often requires a counter-hold (e.g., 6mm Allen key or a dedicated strut nut socket with internal hex) to prevent the damper rod from spinning — a common DIY pitfall.
Spring compressor type matters: a two-piece external coil compressor is safer and more controllable than a single-piece 'death stick' design; ensure the compressor jaws fit the Polo 4 spring diameter. A single-piece compressor can slip and release stored energy violently.
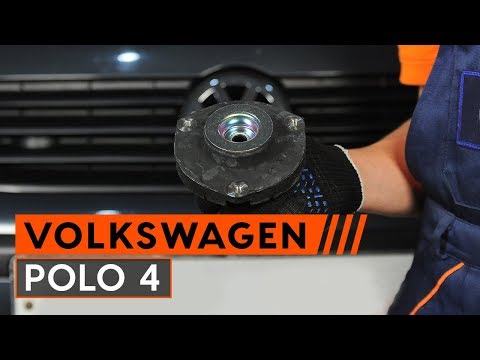
Parts: two strut mounts (one per side), optionally new top bearings and bump stops if inspection reveals wear; confirm fitment for 9N/9N3 and 6R/6C platforms separately. The 9N/9N3 and 6R/6C use different mount designs, so never assume interchangeability.
Action: Lay out all tools and parts before raising the car. If you do not own a two-piece spring compressor, rent or buy one — do not improvise. Order mounts and bearings by platform code, not by generic 'Polo' listings.
Step-by-Step: Replacing the Front Strut Mount on a VW Polo 4
Removal and Installation
Safe order: loosen wheel bolts, raise and support the car, remove the wheel, disconnect the ARB drop link and ABS sensor wiring from the strut, then remove the strut-to-knuckle bolts and the three top mount nuts. Support the knuckle to avoid stressing the brake hose.
With the strut on the bench, compress the spring evenly, counter-hold the damper rod, and remove the strut nut; note the orientation of the top bearing and mount before disassembly. Photograph the assembly before you take it apart — bearing orientation is easy to reverse.
Reassembly: fit the new mount and bearing in the correct orientation, seat the spring correctly in the lower and upper seats, and torque the strut nut to the model-specific value while counter-holding the damper rod. The spring must sit in the lower seat's step; if it is not fully seated, the assembly will sit crooked and the mount will fail early.
Refit the strut to the car, reconnect the ARB drop link and ABS sensor, and torque all fasteners to spec before lowering the vehicle. Do not fully tighten the strut-to-knuckle bolts with the car in the air; load the suspension first where specified.
Action: Work one side at a time, keep the opposite side assembled as a reference, and double-check bearing orientation against your photo before final assembly.
VW Polo 4 Strut Mount Torque Specs: What to Tighten and Where the Manual Is Incomplete
Use these model-specific torque values as a starting point, but verify for your exact engine and platform. Strut-to-knuckle bolts: typically 80–100 Nm + 90° depending on engine and platform; verify for 9N/9N3 vs 6R/6C. Top mount nuts (three): typically 20–30 Nm; strut nut: typically 40–60 Nm with counter-hold. ARB drop link nut: typically 40–50 Nm; wheel bolts: typically 110–120 Nm.
The AUTODOC manual for Polo 4 may omit some values (e.g., strut nut torque or ARB drop link) — flag these gaps and advise consulting a factory service manual or a trusted torque database. Do not guess on torque-to-yield fasteners; if the spec calls for an angle, use a protractor or torque-angle gauge.
Action: Write the torque values on a piece of tape and stick it to the strut tower before you start. If a value is missing, stop and find it — do not tighten by feel.
OEM vs Aftermarket Strut Mounts for VW Polo 4: How to Choose Without Guessing
OEM mounts typically use a specific rubber compound and bearing design validated for the Polo 4; aftermarket mounts vary widely in rubber hardness and bearing quality. Cheapest aftermarket mounts often skimp on bearing seals or use lower-grade rubber, leading to premature noise or failure; look for mounts that specify OEM-equivalent bearing and rubber specs.
Warranty: OEM parts usually carry a 2-year warranty; aftermarket warranties vary by brand and may be void if not installed with new bearings or if alignment is not performed. Concrete selection criteria: choose a mount that lists the OE reference number, specifies the bearing type (e.g., sealed vs open), and states the rubber hardness or compound where available.
Action: If you cannot find the OE reference and bearing type, treat the mount as unknown quality. For a daily-driven Polo 4, a mid-range aftermarket mount with a sealed bearing and OE-equivalent rubber is a reasonable compromise; for a performance or long-term keeper, OEM is the safer bet.
Why You Must Replace Both Sides and Get an Alignment After a Polo 4 Strut Mount Job
Replace both sides and get a wheel alignment. Replacing only one side leaves the opposite mount at a different age and wear state, causing uneven handling, premature wear on the new side, and potential noise return. A wheel alignment is required because removing the strut disturbs the camber and toe settings; driving without alignment can cause uneven tyre wear and poor steering feel.
Alignment after strut replacement is recommended by most manufacturers and is often a condition of parts warranty. Skipping alignment may also trigger ESP/ABS warnings on some Polo 4 variants if the steering angle sensor is not recalibrated.
Action: Book the alignment before you start the job, and replace both mounts in the same session. If you must replace one side due to budget, note that the other side is on borrowed time and plan for it.
Common DIY Pitfalls on Polo 4 Strut Mounts — and How to Avoid Them
Spring compression safety: never use a single-piece compressor or leave the spring compressed unattended; ensure the compressor is seated correctly on the coils. Strut nut counter-hold: failing to counter-hold the damper rod can strip the internal hex or damage the damper; use the correct socket and a steady hand. Bearing orientation: installing the top bearing upside down or misaligned causes noise and premature failure; note the orientation before disassembly. Reusing worn top bearings: if the bearing is rough or noisy when spun by hand, replace it — reusing it will reintroduce noise.
Action: Before you compress the spring, check the compressor jaws are fully engaged on the coils. Before you remove the strut nut, confirm you have the correct counter-hold tool. Before you reassemble, spin the new bearing by hand — it should be smooth and silent.
FAQ
Q: Can I replace just the strut mount without replacing the strut?
A: Yes, if the damper is in good condition (no oil misting, correct bounce test). If the damper is worn, replace it at the same time to avoid doing the job twice.
Q: How long does a Polo 4 strut mount replacement take?
A: With the correct tools and a two-piece spring compressor, expect 2–3 hours for both sides on a driveway. Add an hour if you encounter seized fasteners.
Q: Do I need an alignment after replacing strut mounts?
A: Yes. Removing the strut disturbs camber and toe. Alignment is required to prevent uneven tyre wear and to maintain steering feel.
Q: What torque for the strut nut on a Polo 4?
A: Typically 40–60 Nm with counter-hold, but verify for your engine and platform. The AUTODOC manual may omit this value; consult a factory service manual if unsure.
Q: Can I reuse the top bearing?
A: Only if it spins smoothly and silently by hand. If it is rough, noisy, or has play, replace it — reusing a worn bearing will reintroduce noise.
Conclusion
Diagnose before you buy. A dull, cold-sensitive clunk over sharp bumps points to the strut mount; twanging on turn points to the bearing; light rattles on ripples point to ARB bushes; oil misting points to the damper. Once confirmed, replace both mounts, use a two-piece spring compressor, counter-hold the damper rod, torque to spec, and get an alignment. Choose mounts by OE reference, bearing type, and rubber spec — not by price alone.
---
Related