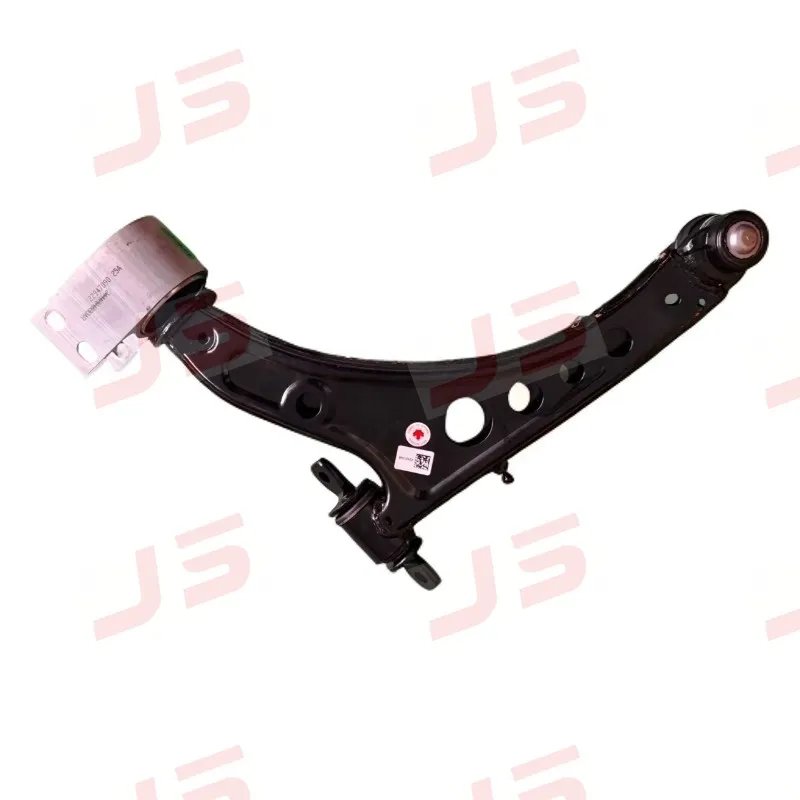
Upper vs Lower Control Arms: Differences, Symptoms and Replacement Guide
A clunk over bumps does not identify which control arm is failing. The same noise can originate from an upper arm bushing, a lower arm bushing, a ball joint, or a sway bar link. Noise type alone is not a reliable discriminator.
Searchers ask "How do I know if my control arm is bad?" but rarely ask which arm. The diagnostic gap is in differentiation, not identification. Three signals actually separate upper from lower arm failure: alignment drift direction, tire wear location, and when the noise occurs — bump, brake, or steer.
Upper arm wear typically presents as a geometry problem: camber drift, steering wander, vague on-center feel. Lower arm wear presents as a load problem: clunk over bumps, braking shimmy, accelerated tire wear. The distinction matters because replacement scope, alignment correction, and parts selection differ depending on which arm is worn.
This guide teaches you to read those signals before ordering parts.
Upper vs Lower Control Arms: Load Path and Geometry Role
Upper arms primarily guide suspension geometry — they set camber and caster relationships as the suspension travels. Lower arms carry the spring/strut load and handle the primary vertical forces transmitted from the road.
Because the lower arm is in the load path, its bushings and ball joint see higher cyclic stress. That is why lower arm wear typically presents earlier and more aggressively than upper arm wear on the same vehicle. A lower arm bushing absorbs every bump, every brake dive, every acceleration squat. An upper arm bushing primarily resists geometry change during suspension travel and steering input.
The practical consequence: upper arm wear shows up first as a geometry problem — alignment drift, wander. Lower arm wear shows up first as a load problem — clunk, shimmy, tire wear. When you inspect a high-mileage front end, check the lower arm bushings and ball joint first if the complaint is noise or shimmy. Check the upper arm first if the complaint is alignment drift or vague steering.
Symptom Differentiation Table: Matching the Pattern to the Arm
Upper arm wear signature: camber drift (visible negative camber on one side), steering wander, vague on-center feel, inner-edge tire wear. The camber change is often progressive — the driver notices the steering feels lighter or the car pulls slightly, but the alignment shop finds camber out of spec on one side with no recent impact.
Lower arm wear signature: clunk over bumps, braking shimmy, accelerated inner or outer tire wear depending on toe change, and sometimes a pop when transitioning from reverse to drive. The pop occurs because the lower arm bushing deflects under load reversal, allowing the arm to shift slightly in its mount.
Overlap zone: a clunk that occurs only over sharp bumps at low speed is more likely lower arm or sway bar link. A clunk that occurs during steering input is more likely upper arm or strut mount. Braking shimmy that appears only under moderate-to-hard braking points to lower arm bushing deflection, not a warped rotor — the bushing allows toe change under load, which the driver feels as shimmy.
Searchers ask "How do I know if my control arm is bad?" — this table answers that with pattern matching, not a generic symptom list. Match the pattern, then confirm with alignment readings.
Upper vs Lower Control Arms: Side-by-Side Comparison
| Aspect | Upper Control Arm | Lower Control Arm |
|---|---|---|
| Primary role | Guides suspension geometry (camber and caster) | Carries spring/strut load; main vertical force path |
| Load level | Low — geometry control only | High — every bump, brake dive, and squat passes through it |
| Typical failure signature | Camber drift, steering wander, vague on-center feel | Clunk over bumps, braking shimmy, rapid tire wear |
| Wear onset | Later and more gradual | Earlier and more aggressive |
| Strengths | Restores alignment geometry and steering precision | Restores load capacity and a quiet, stable ride |
| Weaknesses | Geometry symptoms are easy to misdiagnose | Higher stress means shorter service intervals |
| Replacement scope | Usually a single arm plus alignment | Often an axle pair; inspect ball joint and bushings together |
| Best stocking fit (B2B) | Alignment shops and geometry correction kits | High-volume wear item for repair shops and distributors |
Reading Alignment Angles: What Camber, Caster, and Toe Drift Tell You About the Arm
Camber drift on one side with no recent impact points to upper arm bushing collapse or upper ball joint wear. The upper arm controls the top of the knuckle; when its bushing collapses, the top of the tire tilts inward, producing negative camber that cannot be adjusted out without replacing the arm.
Caster split that cannot be adjusted into spec often indicates a shifted or worn lower arm bushing or a bent lower arm. Caster is set by the fore-aft location of the lower ball joint relative to the upper mount; a worn lower arm bushing allows the lower ball joint to move rearward under load, reducing caster on that side.
Toe change that appears only under load — braking, acceleration — suggests lower arm bushing deflection rather than a static bent component. A static bent tie rod produces constant toe error; a worn lower arm bushing produces dynamic toe change that the alignment rack may not show unless the tech loads the suspension.
If the alignment tech cannot bring one corner into spec and the adjuster is maxed out, the arm itself — not the adjustment — is the variable. That is the point where you stop adjusting and start inspecting bushings and ball joints.
Replace One Arm or Both? Bushing Age Symmetry and Load-Path Pairs
If both arms on an axle show similar bushing age and one has failed, the twin is typically not far behind — replace in pairs on the same axle. Bushing rubber ages at the same rate on both sides of the car because both see the same thermal cycles, ozone exposure, and mileage. When one lower arm bushing tears, the other is usually within a few thousand miles of the same condition.
If one arm was recently replaced (documented) and the other is original, replacing only the failed original is defensible. You are not resetting the clock on a matched pair; you are addressing the remaining original component.
Upper and lower arms on the same corner are not a "pair" in the load-path sense — they wear on different cycles. The lower arm carries spring load and sees higher cyclic stress; the upper arm primarily guides geometry. Replacing both because one failed is not automatically required. Inspect the other arm, but do not assume it needs replacement.
Searchers ask "Can I replace just one control arm?" — the answer depends on bushing age symmetry, not on a blanket rule. If the arms are age-matched, replace in pairs. If not, replace the failed arm and inspect the other.
Aftermarket vs OEM Control Arms: Bushing Material, Ball Joint Design, and Why Lower Arms Are Built Heavier
Lower arms are typically built heavier because they are in the load path — bushing durometer, arm wall thickness, and ball joint size are the variables to compare. An aftermarket lower arm that uses a softer bushing than OEM will transmit less noise but may wear faster under load. An aftermarket arm with a stiffer bushing may last longer but increase NVH.
Bushing material (rubber vs polyurethane vs hydraulic) changes NVH and wear characteristics. Polyurethane trades comfort for durability and is not always the right choice for a daily driver. Rubber bushings absorb vibration and are appropriate for most street applications. Hydraulic bushings (fluid-filled) offer the best NVH isolation but are more expensive and can leak with age.
Ball joint design (serviceable vs sealed, forged vs stamped housing) affects whether the joint can be replaced independently of the arm. A serviceable ball joint can be replaced with a press tool; a sealed joint requires replacing the entire arm. For high-mileage vehicles, a serviceable design may reduce long-term cost.
Aftermarket arms vary widely in bushing quality — the arm stamping may look identical while the bushing is the failure point. When comparing aftermarket vs OEM, ask: what bushing material is used, is the ball joint serviceable, and does the arm include new hardware? The answers matter more than brand name.
What Happens If You Keep Driving on a Worn Control Arm
Tire cupping and uneven wear accelerate — a worn arm can destroy a set of tires before the arm itself is replaced. A lower arm bushing that allows toe change under braking will scrub the tire unevenly; an upper arm bushing that allows camber drift will wear the inner edge. Once the tire wear pattern is established, it will continue even after the arm is replaced unless the tires are also replaced.
Secondary component wear: a worn lower arm bushing increases load on the strut, sway bar link, and tie rod end — turning a single-part repair into a multi-part repair. The lower arm bushing is the first line of defense against road forces; when it fails, those forces transmit to other components. A clunk that starts as a lower arm bushing can become a clunk from a worn strut mount or sway bar link within a few thousand miles.
Safety risk escalates with alignment drift — camber or caster loss changes steering response and braking stability, particularly in emergency maneuvers. A car with significant camber drift on one side will pull under braking and may feel unstable during lane changes. Caster loss reduces straight-line stability and increases steering effort.
Searchers ask "What happens if I don't replace a worn control arm?" — this section answers with the specific wear cascade, not a generic warning. The cost of deferring replacement is not just the arm; it is tires, secondary components, and reduced safety margin.
Diagnostic Flowchart: From Symptom to Probable Arm to Replacement Decision
Step 1: Record when the noise occurs (bump, brake, steer) and where the tire wear is (inner, outer, cupping). A clunk over bumps with inner-edge tire wear points to lower arm. A clunk during steering input with outer-edge wear points to upper arm or strut mount.
Step 2: Get an alignment reading — camber drift → upper arm; caster split or load-dependent toe → lower arm. If the alignment tech cannot bring a corner into spec, the arm is the variable.
Step 3: Inspect the paired arm on the same axle for bushing age symmetry — if symmetric, replace in pairs; if asymmetric, replace the failed arm only. Check for cracked, torn, or separated bushings on both sides.
Step 4: Choose aftermarket vs OEM based on bushing material and ball joint design, not brand. For a daily driver, a rubber bushing with a serviceable ball joint is often the best balance of comfort and longevity. For a performance application, polyurethane may be appropriate, but expect more NVH.
This flowchart consolidates the article into a single decision path. Start with symptom collection, confirm with alignment, decide replacement scope based on bushing age symmetry, and select parts based on design variables that affect wear life.
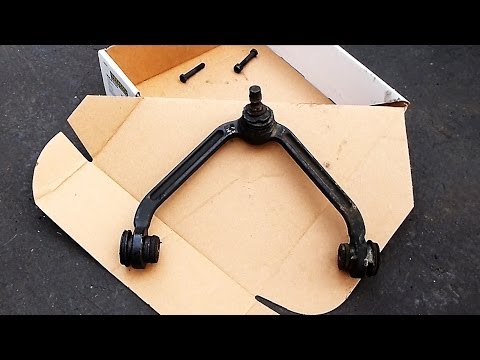
Frequently Asked Questions
How do I know if my upper or lower control arm is bad?
Match the symptom pattern first. Camber drift, steering wander, or inner-edge tire wear points to the upper arm; clunking over bumps, braking shimmy, or a pop when shifting between reverse and drive points to the lower arm. Confirm with an alignment reading before ordering parts — noise alone cannot tell the arms apart.
Which wears out first, the upper or lower control arm?
The lower control arm usually wears first because it sits in the primary load path. Its bushings and ball joint absorb every bump, brake dive, and acceleration squat, while the upper arm mainly guides geometry and fails later with alignment-drift symptoms.
Should I replace upper and lower control arms at the same time?
Not necessarily — they wear on different schedules. Replace arms in axle pairs when bushing age is symmetric (both sides have similar mileage). Upper and lower arms on the same corner are not a wear pair and are replaced independently.
Do I need a wheel alignment after replacing a control arm?
Yes. Any control arm replacement disturbs camber, caster, or toe. Skipping the alignment causes rapid tire wear and handling complaints — the most common comeback after control arm jobs.
Is it safe to drive with a bad control arm?
Short low-speed trips are usually possible, but a severely worn arm — especially a lower arm with a loose ball joint — is a safety risk. Continued driving destroys tires and overloads the strut, sway bar links, and tie rods, turning one repair into several.
Sourcing Decision Framework for B2B Buyers
If you stock or distribute control arms, run through this five-step filter before placing an order:
- Segment your demand. Repair shops turn lower arms fastest — they are the high-volume wear item. Alignment and specialty shops need upper arms and geometry correction kits.
- Match bushing material to your market. Rubber suits OE-feel comfort; polyurethane or hydraulic designs suit buyers selling on durability.
- Choose the ball joint design deliberately. Sealed joints suit fit-and-forget retail; serviceable (greaseable) joints suit fleet and workshop channels that maintain vehicles in-house.
- Stock axle pairs for high-failure applications. Technicians prefer replacing symmetric-wear arms together, and pair availability wins the sale.
- Qualify suppliers on consistency, not claims. Request dimensional inspection reports, bushing hardness consistency data, and corrosion-test documentation for the exact part numbers you buy — then verify them.
Related
Use the symptom pattern to identify the arm, the alignment reading to confirm it, and bushing age symmetry to decide between single and pair replacement. For distributors, the takeaway is simple: lower arms drive volume, upper arms drive precision work — weight your inventory toward the wear patterns in this guide for fewer comebacks and more repeat orders.