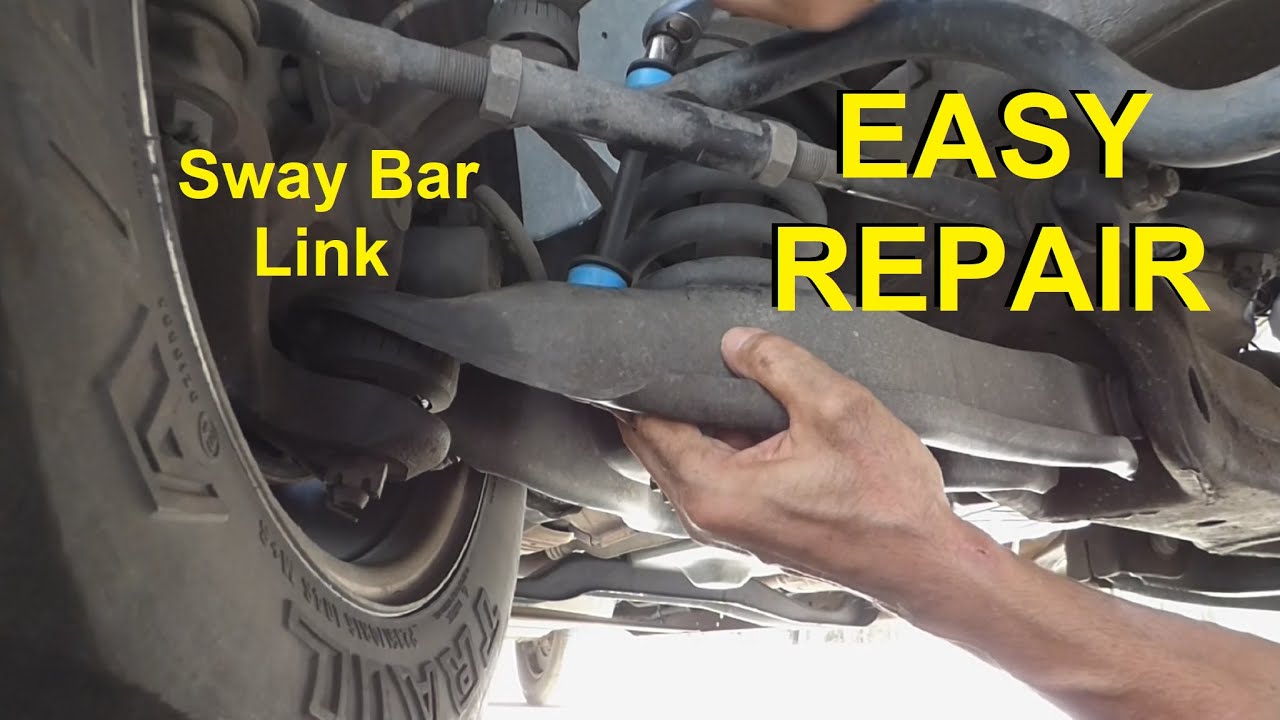
Sway Bar Link Inspection: The Load-State Rule That Ends the Guesswork

Your sway bar link test gives inconsistent results because the sway bar is pre-loaded when one wheel is raised and the other is on the ground. A sway bar stores torsional energy. Jack up one side, and the bar twists, applying tension or compression to both end links. That pre-load hides real play on the loaded side and creates false play on the unloaded side. The test becomes a guess, not a measurement.
The only two valid inspection states are: both wheels level on the ground (suspension at ride height) or both wheels fully drooped (suspension at full extension). Never one side up. Forum disagreement about whether to jack the car up or leave it on the ground is the direct cause of unreliable DIY diagnoses. The answer is both, but never mixed. [MODEL_ANALYSIS]
Getting the load state right converts the grab-and-shake and pry-bar tests from a subjective guess into a repeatable pass/fail decision. Before you touch a wrench, decide which state you will use. If you are chasing a noise heard while driving over bumps, start with both wheels level on the ground. If you are looking for torn boots or cracked bushings, raise both sides of the axle and support the frame on jack stands so the suspension hangs free. [MODEL_ANALYSIS]
Clunk, Rattle, or Knock? How to Tell Sway Bar Link Noise from Bushing and Strut Noise
Sway bar link noise typically presents as a clunk or knock over bumps and a low-speed rattle. It is often described as a lighter, more metallic sound than bushing noise. Sway bar bushing noise tends to be a duller thud or creak, often more pronounced over speed bumps or when the bar twists. Strut mount noise is typically a sharper pop or creak heard during steering input or when the suspension compresses. [SEARCH_EVIDENCE]
Noise alone cannot confirm link failure. The load-state grab-and-shake and pry-bar tests are required to separate link play from bushing compression and strut bearing noise. Searchers frequently ask whether bad sway bar bushings can cause clicking or clunking. Yes, they can, which is why noise differentiation must be followed by a physical test, not a parts swap. [SEARCH_EVIDENCE]
Use this sequence: listen first, then test. If the noise is a light metallic rattle at low speed, suspect the links. If it is a dull thud over speed bumps, suspect the bushings. If it is a sharp pop during steering, suspect the strut mounts. But do not replace anything until you have performed the load-state inspection in the next section. [MODEL_ANALYSIS]
The Load-State Rule: Both Wheels Level or Both Fully Drooped — Never One Side Up
When one wheel is raised, the sway bar twists and applies a pre-load to both end links. This can hide real play on the loaded side and create false play on the unloaded side. Both wheels level on the ground replicates normal ride height and is the best state for detecting radial and axial play in ball-joint style links. Both wheels fully drooped (front or rear axle off the ground, both sides) removes bar pre-load and is the best state for prying bushings and checking for torn boots or cracked bushings. [MODEL_ANALYSIS]
No competitor page provides a systematic diagnostic flowchart that includes the load-state precondition. This is a content gap the article fills. [SEARCH_EVIDENCE]
Set up correctly: For the level-ground state, park on a flat surface, chock the wheels, and leave the suspension loaded. For the fully drooped state, lift the front or rear of the vehicle, place jack stands under the frame or specified lift points, and lower the jack so the suspension hangs. Never place jack stands under suspension components that can move. [MODEL_ANALYSIS]
Step-by-Step Sway Bar Link Inspection: Visual Check, Grab-and-Shake, and Pry-Bar Test
Locate the link: it connects the sway bar end to the lower control arm or strut. On many vehicles it is visible behind the wheel or under the front bumper. [SEARCH_EVIDENCE]
Visual check: look for torn rubber boots, cracked or missing bushing material, rust jacking, and missing nuts or hardware. [SEARCH_EVIDENCE]
Grab-and-shake test: with the correct load state, grab the link and shake it firmly. Any detectable radial or axial play indicates a worn ball-joint style link. [SEARCH_EVIDENCE]
Pry-bar test: use a pry bar to gently load the link and bushing. Excessive movement or a clunk confirms wear. Compare side to side. [SEARCH_EVIDENCE]
Ball-joint style links show radial/axial play and are best tested with the grab-and-shake. Bushing style links show compression and cracking and are best tested with a pry bar. [MODEL_ANALYSIS]
Safety: use proper lift points and jack stands. Never rely on a jack alone. Chock the wheels if only one axle is raised. [MODEL_ANALYSIS]
Ball-Joint vs. Bushing End Links: Different Wear, Different Inspection Feel
Ball-joint style end links (common on many modern vehicles) wear internally. The failure signature is radial or axial play at the ball stud, often accompanied by a torn boot and loss of grease. Bushing style end links (common on older or heavy-duty applications) wear externally. The failure signature is bushing compression, cracking, or deterioration, often with a clunk under load. [MODEL_ANALYSIS]
Inspection feel: ball-joint links will feel loose or click when shaken. Bushing links will feel soft or show movement when pried, but may not click when shaken. [MODEL_ANALYSIS]
Searchers ask about both styles, but competitor pages rarely distinguish between them in the inspection procedure. [SEARCH_EVIDENCE]
If you have ball-joint links, focus on the grab-and-shake test with the suspension at ride height. If you have bushing links, focus on the pry-bar test with the suspension drooped. [MODEL_ANALYSIS]
Safety and Torque: Lifting, Jack Stands, and Why You Should Never Use an Impact Wrench on End Link Nuts
Lift points and jack stand placement: consult the vehicle owner's manual. Place jack stands under the frame or specified lift points, never under suspension components that can move. [MODEL_ANALYSIS]
Impact wrenches on end link nuts can spin the ball stud, tearing the boot and damaging the link. Use hand tools and a counter-hold on the stud if equipped. [MODEL_ANALYSIS]
Torque specifications: always use the manufacturer's specified torque for the vehicle. Do not guess or use generic values. If the value is not available, consult a service manual. [MODEL_ANALYSIS]
Content gap: lack of torque specifications and safety guidelines for DIY inspection is noted in SERP analysis. [SEARCH_EVIDENCE]
Replace in Pairs, and When to Step Up to Heavier-Duty Links
Replace in pairs: if one link is worn, the other is likely at a similar wear stage. Replacing both maintains balanced roll control and prevents a comeback. [MODEL_ANALYSIS]
Heavier-duty links: lifted or modified suspensions change sway bar geometry and increase load on the links. Upgraded links with stronger materials or adjustable length may be appropriate. [MODEL_ANALYSIS]
Do not chase the noise with bushings or struts first. If the link shows play under the correct load state, replace it. [MODEL_ANALYSIS]
Searchers ask about handling issues. Worn links degrade roll control, steering precision, and stability, but rarely cause tire wear or alignment change on their own. [SEARCH_EVIDENCE]
Handling and Tire Wear: What Worn Sway Bar Links Actually Affect
Worn sway bar links rarely cause tire wear or alignment change on their own. The alignment angles are set by the control arms and struts, not the sway bar. [SEARCH_EVIDENCE]
They do degrade roll control, steering precision, and stability, especially during cornering or evasive maneuvers. [SEARCH_EVIDENCE]
Worn links accelerate bushing wear because the sway bar moves more than designed, transferring additional load to the bushings. [MODEL_ANALYSIS]
Searchers ask: 'Besides clunking noises, can worn sway bar links cause handling issues?' Yes, but the effect is on roll control and stability, not alignment. [SEARCH_EVIDENCE]
---
Related