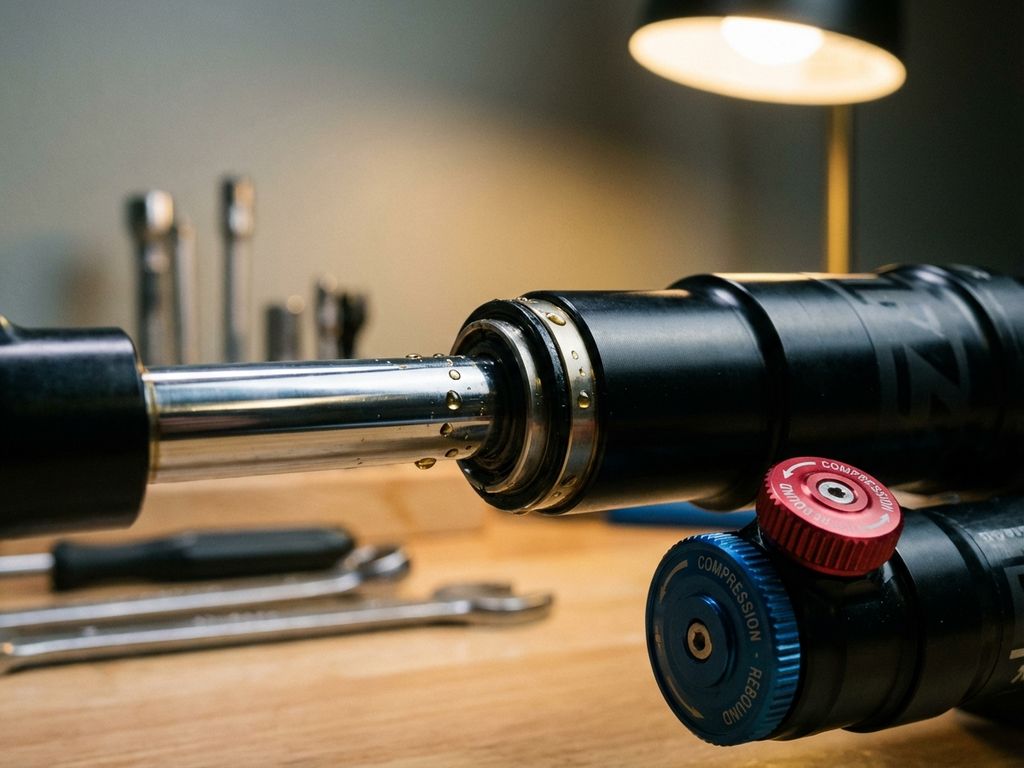
Suspension Rebound Control: Diagnose the Symptom, Then Adjust From Full Soft

Rebound damping controls how fast the spring extends after being compressed. That is the whole function. It meters the release of stored spring energy through the damper rod, and it determines whether the tire stays planted or bounces off the road after a bump.
It does not change spring rate. It is not a stiffness preference. And on most adjustable dampers it is a separate hydraulic circuit from compression, which means turning the wrong knob produces the wrong symptom change — or no change at all.
This is the practical problem: most people understand that rebound exists but cannot translate a handling or comfort symptom into a specific rebound adjustment. They are confused by H/L markings, bouncy coilovers, and conflicting forum advice on which way to turn the knob. The fix is not a spec sheet. It is a diagnosis loop plus a disciplined adjustment method.
Rebound vs. Compression: What Each Circuit Actually Controls
Rebound damping controls how fast the spring extends after being compressed. Compression damping controls how fast the suspension compresses. They are separate hydraulic circuits on most adjustable dampers.
On a damper body or remote reservoir, the markings H and L refer to high-speed and low-speed shaft velocity, not vehicle speed. High-speed circuits react to sharp, fast impacts such as curbs, potholes, and washboard surfaces. Low-speed circuits react to slower body motions such as brake dive, acceleration squat, and cornering roll. A single rebound adjuster is almost always low-speed rebound only. If a separate high-speed rebound adjuster exists, it is a second circuit on the same stroke.
Before touching any adjuster, confirm which circuit you are turning. Count the clicks from full soft to full stiff and record the range. If the knob is at the top of the rod, it is typically rebound. If it is on the reservoir or near the hose fitting, it may be compression or high-speed compression. Misidentifying the circuit is the most common reason an adjustment produces no expected change.
Symptom-to-Adjustment Map: Bounce, Cupping, Dive, Squat, and Loss of Contact Patch
This is the core of rebound work. Every symptom points at a specific circuit and a specific direction of change.
Bouncy ride after a bump
Too little rebound. The spring releases too fast, so the chassis oscillates. Increase rebound in clicks until the body settles in one motion.
Tire cupping or feathering
Often a rebound control issue. The tire is not following the road surface, so contact patch load fluctuates and wears the tread in a scalloped pattern. Check rebound before replacing tires. If the cupping is on one corner only, compare that corner's rebound setting to the opposite side.
Brake dive and acceleration squat
Primarily compression events, but rebound affects how quickly the chassis settles after the dive or squat. Excess rebound can hold the nose down longer than the spring wants, making the car feel glued to the bump stop after hard braking. If the nose stays down after you release the brake, reduce rebound slightly.
Loss of contact patch over repeated bumps
The opposite symptom: too much rebound. The suspension packs down because the spring cannot extend fast enough to follow the road. This feels harsh and skittish, not bouncy. It requires less rebound, not more. Drivers often misdiagnose this as a compression problem and stiffen the wrong circuit.
Side-to-side mismatch
If one corner is adjusted differently, the car will pull or wear unevenly. Always set left and right to the same click count from full soft. A half-click difference is enough to create a pull on a sensitive chassis.
The Adjust-From-Full-Soft Method: Baseline, Clicks, One Change at a Time
This is the repeatable procedure. Follow it in order.
- Start with rebound at full soft. Turn the adjuster counterclockwise until it stops, then count clicks inward to establish the total range. Record that number. This gives you a repeatable reference point.
- Set compression to a known baseline or leave it unchanged. Do not adjust both circuits at once. If you change rebound and compression together, you cannot isolate which change produced the result.
- Test drive on a consistent route. Note the symptom: bounce, packing, dive, squat, or grip loss. Use the same road and speed for each test so the feedback is comparable.
- Add rebound in 2–4 click increments until the bounce is controlled but the suspension still extends over repeated bumps. If it packs down, you have gone too far. Back off two clicks and retest.
- Match the opposite side to the same click count from full soft. Never set left and right by feel alone. Click counts are the only reliable way to ensure symmetry.
- Only after rebound is settled, adjust compression if needed. Changing compression changes the effective behavior of rebound, so re-check the rebound symptom after any compression change. The two circuits share the same spring energy.
Why Rebound Alone Cannot Fix an Undersprung or Oversprung Setup
Spring rate stores the energy; rebound controls the release rate. If the spring is too soft for the load, no rebound setting will stop the suspension from bottoming or floating. You can slow the release, but you cannot add load capacity with a knob.
If the spring is too stiff, excess rebound will make the ride harsh and reduce compliance. Reducing rebound can help, but the spring rate is still the root cause. A stiff spring with low rebound will still transmit impact harshness because the spring itself is not compressing enough.
Vehicle weight — including passengers, cargo, and tongue weight — changes the energy stored in the spring. A rebound setting that works solo may be wrong when loaded. Test loaded and unloaded separately, and note that load changes may require a different rebound setting or a spring change.
Changing rebound alone cannot correct ride height, spring preload, or load capacity. Those are spring and setup decisions. If the vehicle sags or bottoms regularly, address the spring first.
Rebound and Compression Interaction: How Moving One Changes the Other
Increasing compression slows the compression stroke, which can make the car feel stiffer on impact. If rebound is then increased, the suspension may pack down because it cannot extend fast enough. The two circuits fight each other when both are set too high.
Decreasing compression allows faster compression, which can make the car feel softer on impact. If rebound is too high, the spring still cannot release energy fast enough, so the ride remains harsh. Softening compression alone will not fix a rebound problem.
The practical rule: change rebound first when the problem is bounce, cupping, or loss of contact patch. Change compression first when the problem is bottoming or impact harshness. This sequence isolates the dominant symptom.
After any compression change, re-evaluate the rebound symptom. The two circuits share the same spring energy, so a compression change can shift the rebound symptom. A car that felt planted before a compression change may now feel bouncy or packed.
Condition-Specific Rebound Tuning: Wet, Rough, and Loaded Driving
On wet or low-grip surfaces, reduce rebound slightly to help the tire follow the road and maintain contact patch. Too much rebound reduces grip by packing the suspension down. The tire needs to extend quickly to stay in contact with a slippery surface.
On rough or washboard surfaces, reduce rebound to allow the spring to extend quickly over repeated bumps. Increase only if the body still floats after bumps. Washboard roads are a high-frequency input that punishes excessive rebound.
For loaded driving — passengers, cargo, tongue weight — the spring stores more energy, so rebound may need to increase to control the release. Test loaded and unloaded separately. A setting that works empty may be too soft when the vehicle is at gross weight.
For track or performance driving, prioritize rebound control for contact patch and chassis stability, but do not exceed the point where the suspension packs down. Compliance is grip. A suspension that cannot extend over a bump loses contact patch and lap time.
Comfort vs. Performance: When to Prioritize Rebound Over Compression
Prioritize rebound when the problem is bounce, tire cupping, or loss of contact patch. These are release-rate problems. The spring is releasing energy too fast or too slow, and the rebound circuit is the only one that controls that rate.
Prioritize compression when the problem is bottoming or impact harshness. These are compression-rate problems. The suspension is compressing too fast or too slow on impact, and the compression circuit controls that rate.
Compliance is grip: a suspension that cannot extend over a bump loses contact patch. Too much rebound for comfort reduces grip; too little rebound for performance allows the body to float. The trade-off is real, and there is no setting that maximizes both comfort and grip simultaneously.
There is no universal click count. The correct setting depends on spring rate, vehicle weight, damper valving, and the surface. Use the symptom-driven loop, not a spec sheet. A setting that works on one car may be wrong on another with different spring rates or weight distribution.
When Rebound Is Not Adjustable: Revalving, Replacement, and What to Check First
OEM non-adjustable dampers cannot be tuned with a knob. The options are revalving (if the damper is serviceable), replacing with an adjustable damper, or accepting the factory calibration. Most OEM dampers are not serviceable and must be replaced to change rebound.
Before revalving or replacing, verify the symptom is actually a rebound problem. Check tire pressure, tire wear pattern, spring condition, and bushing wear. A worn bushing can mimic a rebound issue. For Hyundai and Kia applications, inspect the Large suspension bushing — 54584-2D000 and Large suspension bushing — 54584-3S100 for cracks or separation before condemning the damper. Worn control arm bushings — such as Control Arm — 54500-S1AA0 or Control Arm — 54500-CG000 — can also create clunks and vague handling that feel like damping problems.
Revalving changes the internal shim stack to alter the rebound curve. It is a damper-internal change, not an external adjustment, and requires a qualified suspension shop. Expect to provide the damper and your vehicle details; turnaround varies by shop.
If the vehicle is under warranty or the damper is not serviceable, replacement with an adjustable unit is the practical path to rebound control. For Hyundai and Kia vehicles, also inspect the Rear Trailing Arm Bushing — 55274-D3000 and Rear Trailing Arm Bushing — 55274-2W000 as part of a suspension refresh.
FAQ
Q: Can I adjust rebound without adjusting compression?
A: Yes. On most adjustable dampers, rebound and compression are separate circuits. Adjust rebound first when the symptom is bounce, cupping, or loss of contact patch.
Q: What does H and L mean on my damper?
A: H and L refer to high-speed and low-speed shaft velocity, not vehicle speed. High-speed circuits react to sharp impacts; low-speed circuits react to body motion.
Q: How do I know if I have too much rebound?
A: The suspension packs down over repeated bumps and feels harsh. The tire loses contact patch because the spring cannot extend fast enough. Reduce rebound.
Q: Can rebound fix a sagging rear end?
A: No. Sag is a spring or load issue. Rebound controls the release rate, not ride height or load capacity. Address the spring first.
Q: Which way do I turn the knob to add rebound?
A: Start from full soft — turn counterclockwise until it stops — then count clicks inward. Adding rebound means turning inward from that baseline. Record the total range so you can return to a known setting.