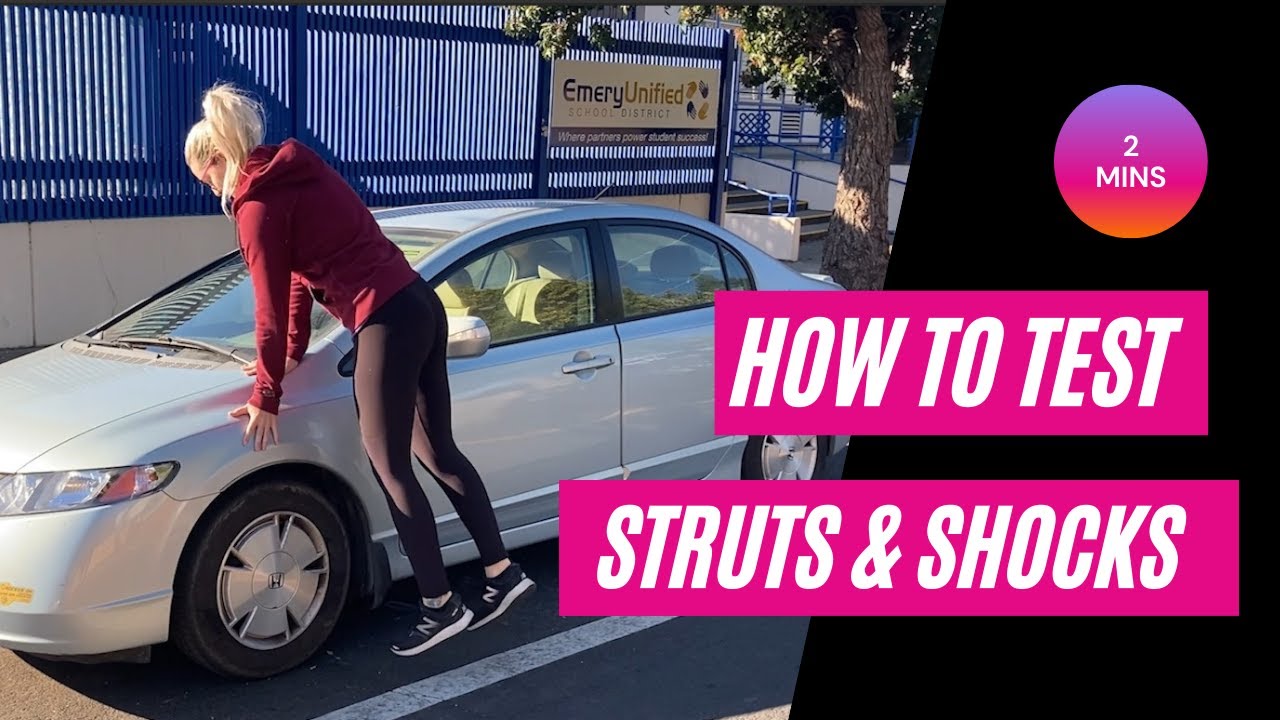
Suspension Bounce Test: How to Do It and Why It's Not Enough
Wondering if your shocks or struts are worn? The bounce test is a quick preliminary check, but its results are subjective and can mislead. For a definitive diagnosis, combine it with visual inspections and professional testing methods.
How to Perform a Suspension Bounce Test Correctly
Park the vehicle on level ground, ensure tires are properly inflated, and apply steady pressure to the bumper or fender. Push down firmly about 2–3 inches, release, and observe how many times the vehicle rebounds before settling. A healthy suspension should settle within 1–2 bounces. Test each corner separately. For struts, avoid pushing on fragile body panels—use the frame or reinforced areas.
Common mistakes that lead to false results include pushing too gently, not pushing far enough, or testing on uneven surfaces. Also, ensure the vehicle is not on a slope and that the parking brake is engaged. For vehicles with air suspension or adaptive dampers, the bounce test may not be applicable; consult the owner's manual.
Interpreting Bounce Test Results: How Many Bounces Indicate Worn Shocks?
If the vehicle bounces more than two times after you release, it suggests worn shocks or struts. However, the test is subjective and can be influenced by vehicle type, weight, and suspension design. A heavy truck may naturally settle differently than a lightweight car. Use this simple decision guide: 1–2 bounces is normal; 3 or more indicates a need for further inspection. A single bounce that is overly stiff or harsh could indicate other issues like overinflated tires or seized suspension components.
For a more definitive assessment, combine the bounce test with visual inspections and professional testing. If the bounce test suggests wear, check for fluid leaks on the shock body, uneven tire wear, or excessive body roll during driving. These additional signs can confirm the need for replacement.
The Science Behind the Bounce Test: Why It Works and Why It Can Mislead
The bounce test works on the principle that shocks control spring oscillation through damping force. When you push down, the spring compresses and then rebounds. A functional shock absorber dissipates that energy quickly, limiting the rebound to one or two oscillations. Worn shocks allow more oscillation because their internal valving can no longer generate sufficient damping force.
However, the test can mislead due to several factors. Temperature affects fluid viscosity—cold fluid is thicker and may mask wear. Internal valving and gas pressure also influence damping. A shock with internal damage, such as a broken piston rod, may still pass the bounce test because the spring alone controls the motion. Conversely, a worn shock on a heavy vehicle might not bounce excessively because the vehicle's mass overwhelms the spring's rebound. Thus, the bounce test is a rough indicator, not a definitive diagnostic tool.
Bounce Test vs. Professional Testing Methods: What You're Missing
Professional testing methods provide quantitative data that the bounce test cannot. A shock dyno measures damping force at various speeds, giving a precise curve that reveals performance degradation. Electronic suspension testers can measure suspension movement and damping efficiency in real time. Visual inspections for leaks and physical damage are also essential. These methods can detect issues like worn internal seals or gas loss that a bounce test might miss.
For example, a shock may have a slow fluid leak that doesn't affect the bounce test but will eventually cause failure. Professional testing can identify such issues early, saving you from premature replacement or unsafe driving conditions. If you're a parts buyer or mechanic, investing in professional testing equipment or partnering with a shop that has it ensures accurate diagnoses.
Common Misconceptions About the Bounce Test
Myth: A bounce test is foolproof. Reality: It's subjective and can be affected by many variables, as discussed. Myth: If the car doesn't bounce, the shocks are good. Reality: Seized shocks can also prevent bouncing, but they are still bad because they don't dampen properly. Myth: The bounce test can diagnose all suspension issues. Reality: It only checks damping, not other components like bushings or ball joints. Myth: You can test all vehicles the same way. Reality: Different suspension designs (e.g., leaf springs vs. coilovers) may respond differently. For instance, leaf-spring setups may have more inherent friction, affecting the bounce.
Understanding these misconceptions helps you avoid misdiagnosis. Always combine the bounce test with other checks for a comprehensive assessment.
When to Replace Shocks and Struts: Beyond the Bounce Test
While the bounce test is a useful indicator, you should replace shocks or struts when you observe additional symptoms: uneven tire wear (especially cupping), fluid leaks on the shock body, excessive body roll during cornering, nose diving under braking, and vibrations at highway speeds. Also, consider mileage—many manufacturers recommend replacement every 50,000 miles, but this varies by vehicle and driving conditions.
Perform a visual inspection for physical damage or leaks. If the bounce test indicates wear and you notice any of these symptoms, it's time to replace. For a decision framework: if the bounce test shows 3+ bounces and you have any other symptom, replace. If the bounce test is borderline but you have fluid leaks, replace. If the bounce test is normal but you have uneven tire wear, inspect other suspension components like bushings or ball joints.
Safety Precautions and Other Suspension Checks You Can Do at Home
When performing the bounce test, park on a flat surface, engage the parking brake, and ensure the vehicle is in park or neutral. Warn against pushing on fragile parts like plastic bumpers; use the frame or reinforced areas to avoid damage. Additionally, you can perform other simple checks: visually inspect for leaks, check tire wear patterns, and test for loose components by rocking the wheel. To check for loose ball joints or tie rods, jack up the vehicle and try to move the wheel side-to-side and up-and-down. Inspect bushings for cracks or excessive play—worn bushings can cause clunking noises and poor handling. These checks can identify issues that the bounce test might miss, giving you a more complete picture of your suspension health.
For quality replacement parts, consider our range of [automotive suspension components](/products) including control arms and bushings. Our [quality control](/quality) ensures reliable performance.
FAQ
How many bounces is normal for a suspension bounce test?
A healthy suspension should settle within 1–2 bounces. If it bounces three or more times, it suggests worn shocks or struts.
Can the bounce test be wrong?
Yes, the bounce test is subjective and can be influenced by vehicle type, weight, suspension design, temperature, and other factors. It should be combined with visual inspections and professional testing for a definitive diagnosis.
What other checks should I do besides the bounce test?
Visual inspections for fluid leaks, uneven tire wear, and physical damage are essential. You can also check for loose components by rocking the wheel and inspect bushings for cracks or play.
Is the bounce test applicable to all vehicles?
No, vehicles with air suspension or adaptive dampers may not respond appropriately to the bounce test. Consult your owner's manual for specific guidance.
How often should shocks and struts be replaced?
Many manufacturers recommend replacement every 50,000 miles, but this varies by vehicle and driving conditions. Replace when you notice symptoms like excessive bouncing, fluid leaks, or uneven tire wear.