Strut Mount Replacement on the 8th-Gen Honda Accord (2008–2013): Diagnose, Choose, and Install Without a Second Tear-Down
A light clunk over expansion joints that hardens into a metallic rattle over washboard pavement is the classic 8th-gen Accord strut mount signature. It is a different failure from a blown strut, a tired spring, or a worn bearing plate. Identify which one is making the noise before you buy parts, or you will pay for the same disassembly twice.
[MODEL_ANALYSIS] Symptom progression on this platform is predictable. Early-stage mount wear shows as a light clunk over sharp, small-amplitude bumps — expansion joints, driveway lips, broken pavement. As the rubber isolator degrades and the bond to the steel plate weakens, the noise becomes a metallic rattle or dull knock that persists over washboard surfaces and is felt through the steering wheel or floor pan. That progression is the mount, not the damper.
Symptom-to-Component Map: Mount, Strut, Spring, or Bearing
Use the table below to isolate the noise source before ordering parts. The 8th-gen Accord front suspension produces four distinct failure signatures, and they do not overlap as often as parts listings imply.
| Symptom | Most likely component | Confirming check |
|---|---|---|
| Light clunk over expansion joints and driveway lips | Strut mount rubber isolator, early wear | Lift vehicle, unload suspension, check vertical play at mount |
| Metallic rattle or dull knock over washboard pavement, felt through steering wheel or floor pan | Strut mount bond separation | Inspect rubber-to-steel bond line for separation or cracking |
| Creak or pop when turning the wheel at low speed; spring wind-up noise | Upper mount bearing plate | Rotate bearing by hand; roughness, play, or catching confirms wear |
| Hiss or knock on compression, excessive rebound bounce, oil at the seal | Strut damper | Bounce test — if it settles in one or two cycles, damper is not the noise source |
| Persistent sag, uneven ride height, visible coil corrosion | Coil spring | Visual inspection at ride height and unloaded |
Distinguishing mount from strut comes down to fluid and rebound. A blown strut leaks oil at the seal, causes excessive rebound bounce (the car floats and keeps bouncing after a dip), and produces a hiss or knock on compression. A worn mount produces noise on rebound and small-amplitude bumps without any fluid loss. If the strut body is dry and the bounce test settles in one or two cycles, the damper is not your noise source.
Bearing plate wear is a separate signature. On the 8th-gen Accord, a failing upper mount bearing typically shows as a creak or pop when turning the steering wheel at low speed, or as spring wind-up noise — the spring twisting and releasing as you steer. That is distinct from the vertical-impact clunk of a collapsed mount. If the noise only appears while turning, suspect the bearing first.
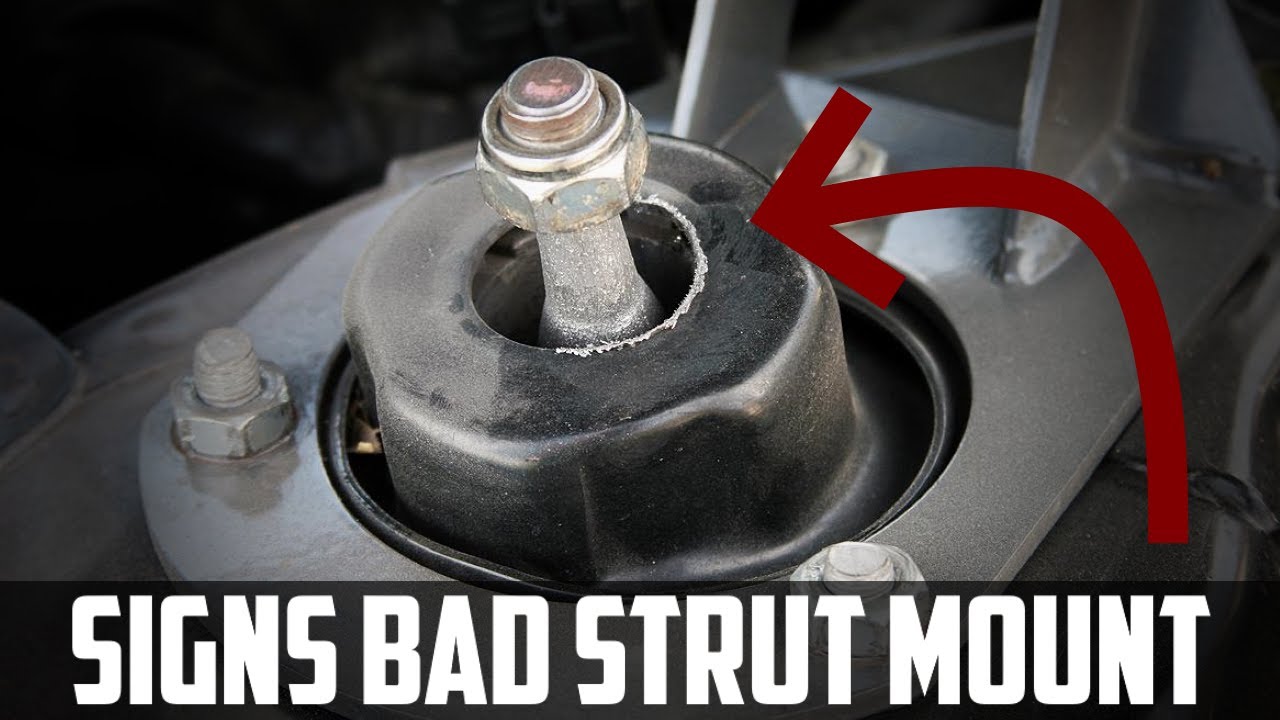
The replacement threshold is visual and measurable, not subjective. Visible rubber cracking, separation between the rubber and the metal plate, or measurable vertical play at the mount with the vehicle lifted and the suspension unloaded means the mount is done. This is not a "monitor and wait" component — once the bond separates, the mount no longer controls the spring and the noise will not self-correct.
Tools, Safety, and the Spring-Compression Step Tutorials Skip
A coil spring compressor is mandatory, not optional. The coil spring stores lethal energy — never remove the strut rod nut without a properly seated compressor on both sides of the coil, and never use impact tools on the spring compressor itself. This is the single safety point that determines whether the job is a DIY task or a shop task.
[SEARCH_EVIDENCE] The tool list for this job is consistent across parts and tool suppliers: a coil-type or wall-mounted spring compressor, a torque wrench, a socket set including deep sockets for the strut rod nuts, a hex or Torx bit for the strut rod counter-hold, a jack and jack stands, penetrating oil, and a breaker bar. Spring compressor options range from internal coil strut removers to floor-mounted units rated around 2,200 lbs — the floor-mounted style is what a shop uses, and it is why shop labor is faster and safer than a first-time DIY attempt.
[MODEL_ANALYSIS] The counter-hold problem is the step most tutorials gloss over. The strut rod nut on the 8th-gen Accord requires a hex or Torx counter-hold while turning the nut. An impact gun alone can spin the rod and damage the strut seal — and once the seal is damaged, you have converted a mount job into a strut replacement. Hold the rod, turn the nut.
Time estimates are realistic, not optimistic. A first-time DIYer should budget 2–4 hours per side with hand tools, including spring compression and reassembly. A shop with a wall-mounted compressor and a lift typically completes both sides in 1.5–2.5 hours. That gap is the labor economics you are weighing in the cost section below.
Torque Specs and Installation Sequence for 8th-Gen Accord Strut Mounts
Torque values and sequence are what separate a job that lasts from one that comes back with steering bind — and they are exactly what product listings and video tutorials leave out.
[MODEL_ANALYSIS] Torque values vary by model year, trim, and engine within the 2008–2013 Accord range. The factory service manual for your specific VIN is the authoritative source. Do not substitute a generic "Honda strut torque" figure from a forum post — the 8th-gen platform spans four-cylinder and V6 variants with different front suspension hardware.
Two fasteners govern this job:
- Strut rod nut (piston rod to mount): torque to the factory service manual value for your trim while holding the rod with the counter-hold tool. Over-torque collapses the bearing plate and causes steering bind — the wheel will feel stiff or notchy at low speed, and you will be pulling the assembly apart again. Under-torque lets the mount move on the rod and reintroduces the clunk you just fixed.
- Mount-to-body nuts: torque to the factory service manual value in a diagonal sequence, and do not fully torque until the vehicle is at ride height to avoid pre-loading the mount.
[MODEL_ANALYSIS] The correct sequence is: compress the spring, remove the strut rod nut with the counter-hold, transfer the mount and bearing, install the new mount, torque the strut rod nut to spec, install the strut to the body, lower the vehicle to ride height, then torque the mount-to-body nuts in a diagonal pattern. Doing the mount-to-body torque at ride height is what prevents the rubber isolator from being pre-loaded in the wrong direction.
Alignment is not optional. Replacing strut mounts changes camber and toe on the 8th-gen Accord front end. A professional alignment after the job is required, not a nice-to-have — and it belongs in your cost math, because skipping it will chew tires and mask the handling improvement you just paid for.
OEM vs Aftermarket Strut Mounts: What to Inspect Before You Buy
Choose a mount with a sealed bearing and a well-bonded rubber isolator — not the cheapest listing — because the labor cost of redoing the job exceeds the savings on a cheap mount. Three construction details decide whether the part lasts.
Bearing quality. The upper mount bearing carries steering load. Inspect any part before installation: the bearing should turn smoothly by hand with no roughness, play, or catching. A bearing that grinds or seizes will cause steering bind and spring wind-up noise regardless of how good the rubber looks.
Rubber-to-metal bonding. The mount's durability depends on the bond between the rubber isolator and the steel plate — visible separation or a weak bond is what fails, so bonding construction matters more than durometer claims. [MODEL_ANALYSIS] Without published durometer or durability data, treat bonding quality as the decision criterion and inspect the bond line on any part before installation.
Corrosion protection. Cars driven in salt-belt states corrode the mount plate and bearing housing. Inspect for pitting, flaking coating, or seized bearing rotation on any part you receive. If you drive on salted roads, corrosion protection is not a premium feature — it is the difference between a mount that lasts and one that seizes within a few winters.
DIY vs Shop: Cost Breakdown and the Complete-Assembly Decision Threshold
Add alignment to your DIY total — most cost breakdowns omit it, and it is a real line item. DIY cost is mount + bearing kit + spring compressor rental + alignment. Shop cost is labor hours × shop rate + parts + alignment, typically higher than DIY parts but inclusive of the spring-compression risk and backed by a warranty.
[MODEL_ANALYSIS] Pricing varies by region, part brand, and current listings — check current product pages for the 8th-gen Accord strut mount and bearing kit before committing. The decision framework below does not depend on a specific dollar figure; it depends on what your inspection finds.
Decision rule:
- Replace the mount alone only if the strut and spring are confirmed good (dry strut body, bounce test settles in one or two cycles, no coil corrosion).
- Choose a complete strut assembly if the strut is leaking, shows excessive bounce, or the spring is corroded. A complete assembly replaces mount, bearing, strut, and spring in one unit and eliminates the spring-compression step entirely — the highest-risk part of the job.
- If you are already paying for alignment and labor, doing the mount-only job on a worn strut means paying for both twice.
Why You Replace Strut Mounts in Pairs — and What Mismatched Mount Age Does to Handling
Replace both front strut mounts at the same time. Mismatched mount age on the same axle creates handling asymmetry: one side absorbs bumps differently, producing uneven steering feel and unpredictable rebound.
[MODEL_ANALYSIS] A new mount on one side and a worn mount on the other changes the effective spring and damping behavior side-to-side, which can mimic an alignment fault — you will chase a pull or wander that is actually a mount-age mismatch. Pair replacement also avoids a second disassembly and a second alignment, so the labor savings reinforce the handling argument.
On the 8th-gen Accord, the front strut mounts are commonly reported to wear at similar rates under normal use. If one side is worn, the other is typically close behind. Replacing one side now and the other in six months means paying for two alignments and two teardowns to reach the same end state.
8th-Gen Accord-Specific Failure Points: Bearing Wear, Rubber Cracking, and Salt-Belt Corrosion
Inspect three specific failure modes on your 8th-gen Accord: upper mount bearing wear, rubber cracking at the bond line, and salt-belt corrosion of the mount plate and bearing housing.
Upper mount bearing wear is a commonly reported wear point on this platform. Inspect for roughness, play, or steering bind when turning the mount by hand — a bearing that grinds or catches is done, even if the rubber looks intact.
Rubber cracking is the second check. The rubber isolator cracks and separates from the steel plate over time. Inspect for visible cracks, tears, or separation at the bond line — this is the failure mode that produces the clunk, and it is visible without any test equipment.
Salt-belt corrosion is the third. Cars driven in salt-belt states corrode the mount plate and bearing housing. Inspect for pitting, flaking coating, or seized bearing rotation. A seized bearing will not turn by hand and will cause steering bind and spring wind-up noise.
The inspection method ties it together: with the vehicle lifted and suspension unloaded, check for vertical play at the mount, rotate the bearing by hand, and inspect the rubber-to-metal bond for separation. Any one of the three failing is enough to justify replacement — and on a car this age, all three are usually present together.
FAQ
How long does a strut mount replacement take on an 8th-gen Accord?
A first-time DIYer should budget 2–4 hours per side with hand tools. A shop with a wall-mounted compressor and lift typically completes both sides in 1.5–2.5 hours.
Do I need an alignment after replacing strut mounts?
Yes. Replacing strut mounts changes camber and toe on the 8th-gen Accord front end. A professional alignment is required after the job, not optional.
Can I replace just the strut mount without replacing the strut?
Only if the strut and spring are confirmed good. If the strut is leaking or shows excessive bounce, or the spring is corroded, a complete strut assembly is usually the better economic choice.
Why do strut mounts fail on the 8th-gen Accord?
The upper mount bearing is a commonly reported wear point, the rubber isolator cracks and separates from the steel plate over time, and salt-belt cars corrode the mount plate and bearing housing. All three are inspectable with the vehicle lifted.
Should I replace both front strut mounts at once?
Yes. Mismatched mount age on the same axle creates handling asymmetry and can mimic an alignment fault. Pair replacement also avoids a second disassembly and a second alignment.
---
Related