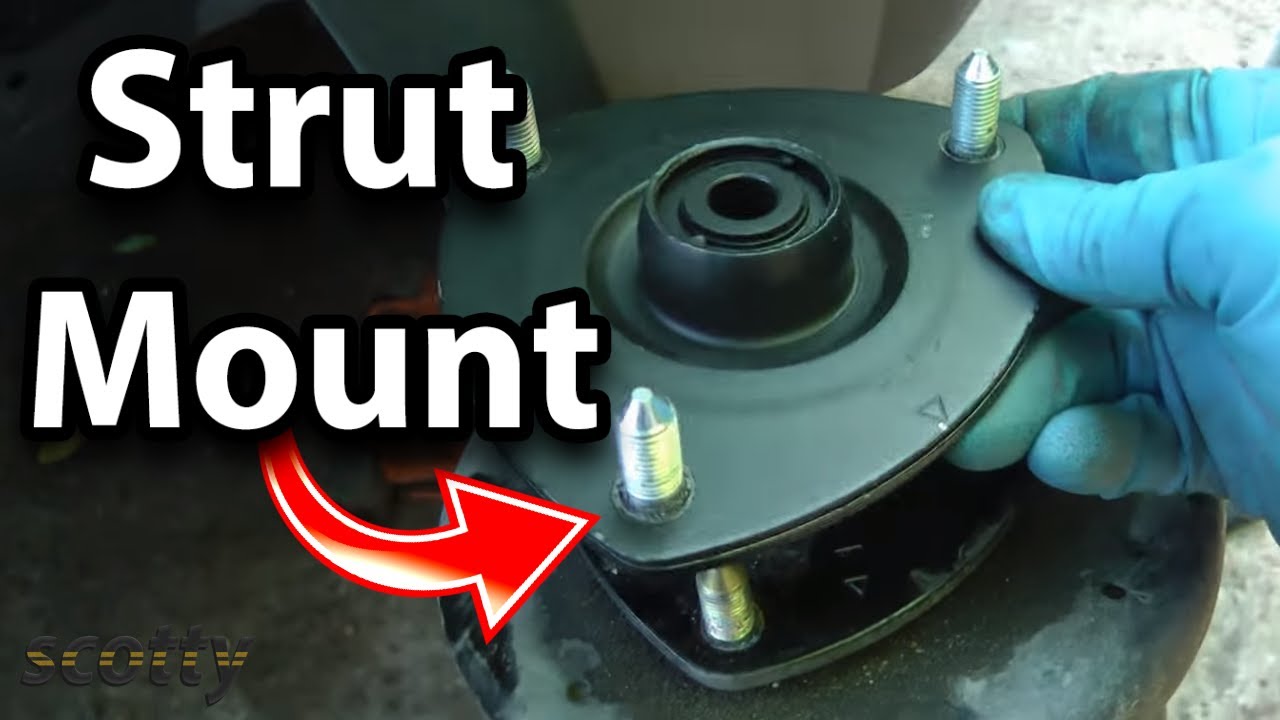
Strut Mount Inspection – Monroe: Confirm the Failed Component Before You Replace
A clunk over bumps or a pop when turning does not confirm a failed strut mount. The mount, the strut bearing, the strut itself, and other suspension components produce overlapping noises. The decision to replace the mount must come after confirming mount-specific failure — not after matching a symptom to a part.
The inspection sequence is: confirm the noise source location, isolate the mount, rule out the bearing, rule out other components, then decide replace or monitor. Skipping steps leads to replacing the wrong part.
Two physical findings justify replacement: a torn or separated rubber-to-metal bond, or bearing roughness or binding felt through the nut. Cracking alone without separation or bearing play may not require immediate replacement. Document what you find and re-check at the next service.
Visual Inspection: The Five Wear Indicators That Matter
Inspect the mount with the vehicle raised and the suspension unloaded. Look for these five indicators in order of severity.
Rubber cracking
Surface cracks from age are common. Note depth and whether cracks reach the metal bond line. Shallow surface cracks alone are not a replacement trigger.
Tearing or separation from the metal plate
A visible gap or torn rubber where the elastomer bonds to the upper or lower metal plate is a replacement indicator. This is a structural failure, not cosmetic aging.
Corrosion
Rust jacking between the rubber and metal plate can lift the bond and is a replacement indicator. Corrosion that has pushed the rubber away from the plate compromises the mount's ability to isolate noise and maintain strut position.
Bearing play
With the strut removed or the mount accessible, check for axial or radial movement in the bearing seat. Roughness or binding when turning is a replacement indicator. This is a bearing failure, not a rubber failure.
Deformation or cracking of the metal plate
A bent or cracked upper plate indicates impact damage or fatigue. Replace the mount.
Manual Tests: Pry Bar Test and Turning Nut Test
Two hands-on tests convert visual suspicion into a confirmed diagnosis.
Pry bar test
With the vehicle raised and the suspension unloaded, insert a pry bar between the mount and the strut tower or spring seat. Apply gentle leverage. Excessive movement or a clunk indicates mount degradation. Never pry against brake lines, ABS wiring, or the strut shaft itself.
Turning nut test
Turn the strut shaft nut or the mount bearing by hand. Roughness, binding, or a gritty feel indicates bearing failure, not mount rubber failure. A smooth turn with no binding points away from the bearing.
Record which test produced the noise or movement. This determines whether the mount, the bearing, or both are replaced. If the pry bar test shows movement and the turning nut test is smooth, the mount is the failed component. If the turning nut test is rough and the pry bar test shows no movement, the bearing is the failed component.
Mount vs. Bearing: Two Components, Two Different Diagnoses
The strut mount and the strut bearing are separate components with different symptoms and inspection findings. Replacing the mount when the bearing is the failed part, or vice versa, is the most common misdiagnosis.
Strut mount failure
Clunking over bumps, steering wander, and visible rubber-to-metal separation or corrosion. The mount is the elastomer-and-plate assembly that isolates the strut from the body.
Strut bearing failure
Steering pop or spring bind when turning, roughness or binding felt through the nut test. The bearing is the rotating element that allows the strut to pivot with steering.
A mount can be visually cracked but the bearing can be the source of the noise. The turning nut test is the deciding check. If both show failure indicators, replace both. If only one does, replace only the failed component unless the other is removed for access and shows wear.
Symptoms That Do Not Mean Mount Replacement
Clunking over bumps can come from sway bar links, control arm bushings, ball joints, or strut mounts. Locate the noise before condemning the mount. Use a chassis ear or have an assistant bounce the vehicle while you listen under the car.
Steering pop can come from the strut bearing, tie rod ends, or steering rack. The turning nut test isolates the bearing. If the pop occurs only when turning the steering wheel and the nut test is smooth, look at tie rods or the rack.
Wandering or vague steering can come from alignment, tire pressure, worn tie rods, or control arm bushings. Check these before replacing mounts. A mount with only surface cracking and no separation, corrosion, or bearing play may not need replacement yet. Document findings and re-check at the next service.
Replacement Decisions: Pairs, Alignment, and Safety
Replace strut mounts in pairs. Both sides see similar mileage and load, and a new mount paired with a worn one can produce uneven handling. An alignment is required after strut mount replacement because the mount affects strut position and camber/caster on many vehicles.
Driving on a failed mount with a torn bond or separated plate can allow the strut to move excessively, affecting steering control and tire wear. Treat it as a safety item, not a comfort item. If the bearing is also rough or binding, replace it at the same time. If the strut itself is worn, address it while the assembly is apart.
Documenting the Inspection: What to Record and When to Re-Check
Record which indicators were present: cracking, tearing, separation, corrosion, bearing play. Note which manual test produced a finding. Include the date and mileage so the next inspection can compare progression.
If the decision is monitor, define the re-check interval based on mileage or the next scheduled service, not a fixed calendar claim. For wholesale and parts buyers, this record helps match the failed component to the correct part number and quantity (pairs).
Frequently Asked Questions
Can I drive with a cracked strut mount?
If the cracking is surface-level and there is no separation, corrosion, or bearing play, the mount may still function. Monitor and re-check at the next service. If the rubber is torn or separated from the metal plate, replace it before driving further.
How do I know if it's the strut mount or the bearing?
The turning nut test is the deciding check. Roughness or binding when turning the nut indicates bearing failure. Excessive movement in the pry bar test without roughness in the nut test indicates mount failure.
Do I need an alignment after replacing strut mounts?
Yes. The mount affects strut position and camber/caster on many vehicles. An alignment restores proper geometry and prevents uneven tire wear.
Should I replace both strut mounts at the same time?
Yes. Both sides see similar mileage and load. Replacing only one can produce uneven handling and may lead to premature failure of the new mount due to unbalanced load.
What parts are related to strut mount inspection?
Control arms, bushings, and other suspension components can produce similar noises. Inspect these before condemning the mount. For Hyundai and KIA applications, we stock a range of automotive suspension components including control arms and bushings that may be involved in the same diagnostic process.
---
Related