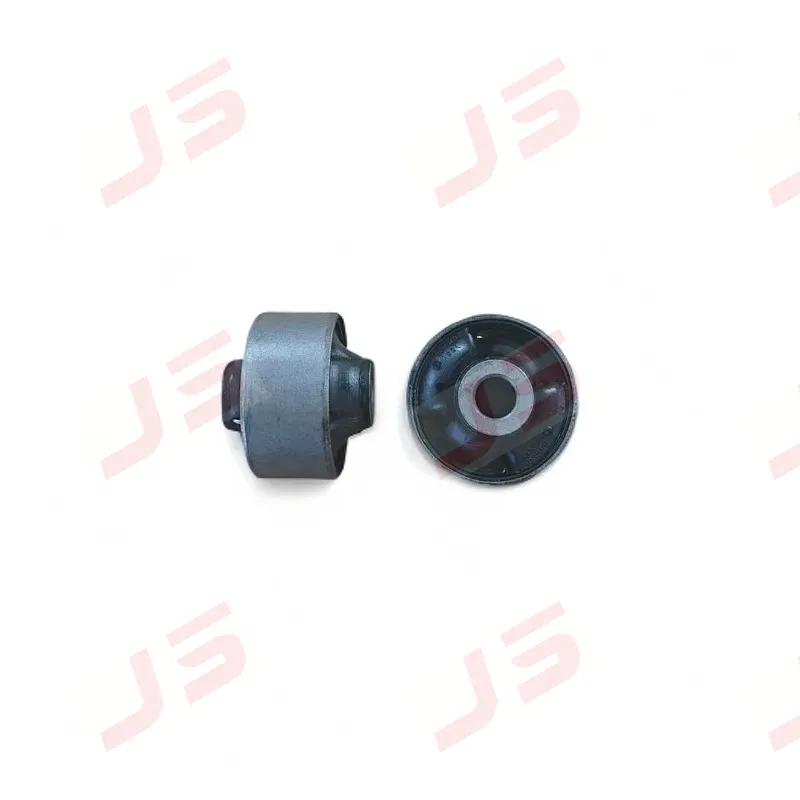
Coil Spring Seat and Isolator Failure: Diagnose the Clunk, Replace in Pairs
A failing coil spring seat or isolator announces itself with a low-speed clunk over bumps—especially when turning into driveways or crossing uneven pavement. The rubber has collapsed or disintegrated, the spring shifts, and it contacts metal. Mileage is a poor diagnostic trigger. Noise pattern, temperature sensitivity, and visual condition tell you far more.
Quick Answer: What's Failing and What It Sounds Like
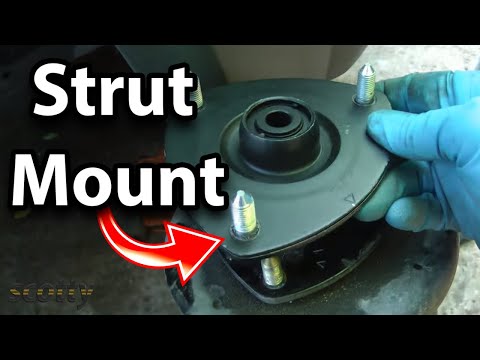
On most MacPherson strut vehicles, the failure point is the front strut upper spring seat and isolator. The signature noise is a dull vertical clunk over low-speed bumps, louder on rebound, often accompanied by a temperature-sensitive squeak or creak. If that matches what you hear, you're in the right article. If the noise is a sharp rattle over small bumps or a rotational creak when turning the wheel at a standstill, you're probably chasing a sway bar link or strut mount bearing instead—see the decision guide below.
Symptom Checklist: Separating Isolator Failure From Other Suspension Noise
- Low-speed clunk over bumps, especially when turning or entering driveways. The most common early sign. Compressed or crumbled rubber lets the spring move against the seat as load changes.
- Squeaking or creaking that shifts with temperature and humidity. Degraded rubber produces friction noise that responds to moisture and heat. Metal-on-metal failure is a sharper, more consistent clunk or scrape.
- Visible gaps, cracks, or missing chunks in the rubber during inspection. Missing material or deep cracking means replacement—there is no repair.
- Uneven ride height or a slight lean on one side. A worn-through seat no longer supports the spring correctly, changing effective spring rate and ride height on that corner.
- Shiny metal-to-metal contact marks on the spring or seat. Confirms the isolator has worn through and the spring is grinding against the seat.
- A dull thud near the spring perch during a bounce test. Push down on each corner; isolator noise is a dull thud, not a sharp metallic clank.
- Steering wander or vague on-center feel. A displaced spring seat alters spring geometry, affecting alignment and steering response.
If the clunk appears only on rebound—not compression—suspect a worn strut mount bearing or a loose sway bar link before condemning the isolator. Temperature sensitivity is your best clue: rubber squeaks change with humidity; metal noises do not.
Diagnostic Flowchart: Isolator, Strut Mount, Sway Bar Link, or Control Arm Bushing?
All four components produce similar noises, and misdiagnosis is expensive. Work this sequence before buying parts.
Step 1: Reproduce the noise
Drive over a known bump at low speed and note whether the clunk occurs on compression, rebound, or both. Isolator noise is often present in both directions but louder on rebound. Sway bar link noise is a sharp rattle over small bumps. Strut mount bearing noise is a creak or pop when turning the wheel at a standstill.
Step 2: Static bounce test
With the vehicle parked, push down firmly on each corner and release. Isolator noise appears as a dull thud near the spring perch. A metallic clank points to a worn strut mount or loose hardware.
Step 3: Inspect the spring seat and isolator with the vehicle raised
Look for cracked, missing, or displaced rubber. Check for shiny metal-to-metal contact marks on the spring. If the rubber is intact but the noise persists, continue.
Step 4: Isolate the sway bar link
Disconnect one end of the link and test-drive. If the noise disappears, the link was the culprit. Reconnect and torque to spec.
Step 5: Check control arm bushings
Use a pry bar to check for cracks, separation, or excessive play. Worn control arm bushings typically clunk when braking or accelerating, not just over bumps.
Decision Guide: Match the Noise, Pick the Next Test
- Dull vertical clunk over low-speed bumps, louder on rebound → most likely the coil spring seat / isolator. Next test: raise the vehicle, inspect the rubber for cracks or missing chunks; look for shiny metal contact marks on the spring.
- Rotational creak or pop when turning the wheel at a standstill → most likely the strut mount bearing. Next test: turn the wheel lock-to-lock while parked and listen; inspect the bearing race when the assembly is apart.
- Sharp rattle over small bumps, especially at low speed → most likely the sway bar link. Next test: disconnect one end of the link and test-drive; if the noise disappears, replace the link.
- Clunk on braking or acceleration, not just over bumps → most likely the control arm bushing. Next test: pry bar test for cracks, separation, or excessive play.
A common misdiagnosis is replacing the strut mount when the isolator is at fault. The strut mount bearing fails with a rotational creak; the isolator fails with a vertical clunk. If the noise changes with steering input, suspect the mount. If it changes with vertical suspension travel, suspect the isolator or seat.
What Ignoring Early Spring Seat Failure Costs You
A collapsed isolator lets the spring contact the strut mount or seat metal-to-metal, accelerating wear on both. What starts as a $30 rubber part can become a $300 strut and mount replacement.
Spring seat failure changes spring geometry, leading to uneven tire wear and reduced handling stability. The spring may rotate or seat incorrectly, risking sudden loss of ride height or spring dislocation. In severe cases, a broken or displaced spring seat can let the spring dislodge under full droop—a safety hazard.
Secondary damage to struts, mounts, and tires often exceeds the cost of replacing the isolator and seat proactively. A tire with uneven wear from a shifted spring seat may need replacement before its tread life is exhausted. A strut with a scored rod from metal contact will fail prematurely.
The decision framework is simple: if you hear the clunk and see rubber degradation, replace the isolator and seat now. Waiting for complete failure increases repair scope and risk.
Replacement Cost: OEM vs Aftermarket by Vehicle Type
Labor for coil spring seat and isolator replacement typically runs 1.5 to 3 hours per side, depending on whether the strut assembly must be removed and compressed. On many front strut designs the assembly comes out; on rear multi-link setups the spring may be separate and easier to access.
OEM isolators often cost 2–3 times more than quality aftermarket equivalents, but price alone does not guarantee longer life. Rubber compound and design matter more than the logo on the box. Aftermarket isolators from reputable manufacturers may use equivalent or superior rubber formulations—such as high-temperature EPDM or polyurethane—compared to OEM.
Cost expectations by vehicle type:
- Compact sedans (e.g., Hyundai Elantra, Kia Forte): $150–$250 per side in parts and labor for aftermarket; $250–$400 for OEM.
- Mid-size SUVs (e.g., Hyundai Santa Fe, Kia Sorento): $200–$350 per side aftermarket; $350–$500 OEM.
- Performance/luxury models: $300–$500 per side aftermarket; $500–$800 OEM, often due to more complex disassembly.
Cost ranges are typical U.S. independent shop estimates as of the article date and vary by region, labor rate, and whether the strut assembly must be removed.
Replacing both sides at once adds parts cost but saves labor and prevents a second alignment and disassembly later. If one side has failed, the other is likely close behind—same rubber, same age, same heat exposure.
OEM vs Aftermarket: Material and Fitment Checklist
| Decision factor | OEM | Quality aftermarket |
|---|---|---|
| Rubber compound | Often EPDM or equivalent; formulation not always published | Ask the supplier directly; reputable manufacturers will state EPDM or polyurethane |
| Durometer (hardness) | Application-specific; not always published | Ask for the durometer; too soft wears quickly, too hard transmits noise and can crack under point loads |
| Ozone / UV resistance | Generally good | Varies widely; ozone-resistant compounds are the single biggest longevity factor |
| Fitment verification | Guaranteed by VIN | Must be verified by the supplier for your specific model |
| Price | 2–3x aftermarket typical | Lower, but quality varies widely |
| Best use case | Leased or short-term ownership | Vehicles kept beyond 60,000 miles |
When choosing between OEM and aftermarket, ask three questions: What rubber compound is used? Is the durometer appropriate for the application? Does the supplier provide verified fitment for your specific model? A quality aftermarket part with ozone-resistant rubber can outlast a cheaper OEM equivalent.
Step-by-Step Replacement: Torque Specs, Sequence, and the Case for Pairs
Always replace coil spring seats and isolators in pairs. Uneven rubber degradation on one side means the other is likely close behind, and mismatched parts can cause handling imbalance. The incremental parts cost is small compared to a second alignment and labor.
Tools required: quality spring compressor, torque wrench, socket set, jack stands, penetrating oil, replacement isolator and seat, new strut mount bearing if worn.
- Raise and support the vehicle. Remove the wheel on the side you're working on.
- Remove the strut assembly. Disconnect the sway bar link, brake line bracket, and ABS sensor wire as needed. Remove the lower strut bolts and the upper mount nuts. On some vehicles, compress the spring slightly to clear the control arm.
- Compress the spring. Use a quality spring compressor seated securely on the coils. Compress evenly until the spring is free from the upper mount.
- Remove the strut mount nut. Hold the strut rod to prevent spinning. Remove the nut and lift off the mount, bearing, and upper spring seat. Note the orientation of the bearing plate and upper insulator—many assemblies use a bearing plate that must be replaced with the isolator, and reusing a worn bearing will reintroduce noise.
- Remove the old isolator and seat. Note their orientation and the spring's clocking. Clean the spring and seat surfaces.
- Install the new isolator and seat. Ensure correct orientation. On vehicles with a lower seat pocket, index the spring end into the pocket before compressing—mis-indexing causes a side load and premature isolator failure. Install the new strut mount bearing if replacing.
- Reassemble. Compress the spring, reinstall the mount, and torque the strut mount nut to the manufacturer's specification. This value varies by vehicle—consult the factory service manual. Do not guess.
- Reinstall the strut assembly. Torque all fasteners to spec. Lower strut bolts are typically high-torque (often 100–150 ft-lbs, but verify for your model). Upper mount nuts are usually lower (20–40 ft-lbs).
- Repeat on the other side.
- Alignment. A professional alignment is required after reassembly to reset camber and toe.
Inspect the strut mount bearing and spring while the assembly is apart. Replace any compromised components. A worn bearing will cause steering creaks even with a new isolator.
> Preventive maintenance decision rule: If the strut is out for any reason, replace the seat and isolator. The incremental parts cost is low compared to repeat labor, and the old rubber has already seen the same heat cycles as the strut.
Material Science: Why Some Isolators Last 30,000 Miles and Others 100,000
Ozone and UV exposure cause surface cracking in natural rubber; EPDM and other ozone-resistant compounds resist this degradation far better. This is the single biggest factor in isolator longevity. A cheap natural rubber isolator may crack within 30,000 miles in sunny, high-ozone environments, while an EPDM part can exceed 100,000 miles.
Heat cycling from the exhaust and road friction accelerates rubber hardening and loss of elasticity. Isolators near hot components—such as rear springs close to the exhaust—fail faster. A high-temperature compound resists this hardening.
Load distribution matters too. A properly designed isolator spreads spring force evenly. Cheap parts with insufficient fillers or poor geometry develop stress cracks and collapse prematurely. Durometer (hardness) affects both noise isolation and durability: too soft wears quickly, too hard transmits noise and can crack under point loads.
When evaluating aftermarket isolators, ask for the rubber compound and durometer. A reputable manufacturer will provide this. If they can't, the part is a gamble. Polyurethane offers higher durability but can transmit more road noise—a trade-off, not a universal upgrade.
FAQ: Five Questions Buyers and Mechanics Ask
What are the symptoms?
Clunking over bumps at low speed, squeaking that changes with temperature, visible rubber cracks or missing chunks, and uneven ride height. The clunk is the most reliable early sign. See the symptom checklist for the full list.
How much does it cost?
$150–$400 per side typical for parts and labor, depending on vehicle type and whether you choose OEM or aftermarket. For a decision rule: if you keep the vehicle beyond 60,000 miles, choose an ozone-resistant EPDM or polyurethane isolator with verified fitment; if the vehicle is leased or short-term, OEM may be acceptable. See the OEM vs aftermarket checklist for the full comparison.
Can I drive with a bad isolator?
Short-term yes, but risk of secondary damage increases with time. Avoid aggressive driving and have it inspected promptly. A dislodged spring is a safety hazard. The cost of ignoring early failure section explains what's at stake.
How do I confirm the isolator is bad?
Visual inspection for rubber degradation and metal contact marks. Noise pattern differentiation: vertical clunk over bumps points to isolator; rotational creak when turning points to strut mount bearing. Use the decision guide to map your noise to the next test.
Do I need to replace both sides?
Yes. Replace in pairs to maintain balanced handling and avoid a second repair. The other side has seen the same age and heat cycles. See the replacement section for the full procedure.
Preventive Maintenance: When to Inspect and Replace
Inspect isolators and seats every 30,000 miles or whenever struts are serviced. This is a visual check—look for cracks, missing rubber, and metal contact marks. It takes minutes with the vehicle raised.
Replace isolators and seats whenever the strut assembly is removed for any reason. The incremental parts cost is low compared to repeat labor. If you're already paying for strut replacement, adding new isolators and seats is a no-brainer.
Watch for early signs: slight squeaks, small cracks in rubber, or a subtle change in ride height. Addressing them early prevents secondary damage to struts, mounts, and tires.
Choose quality aftermarket parts with ozone-resistant rubber and verified fitment to maximize service life. Ask your supplier for the rubber compound and durometer. A part that lasts 100,000 miles costs less per mile than a cheap part that fails at 30,000.
For related suspension components, inspect control arm bushings and sway bar links at the same interval. Worn bushings can mimic isolator noise and are often replaced at the same time. Our automotive suspension components include bushings and control arms for Hyundai/Kia applications, manufactured with quality rubber compounds. If you're evaluating aftermarket quality, our quality control process ensures consistent durometer and ozone resistance. For wholesale inquiries, about our company provides an overview of our manufacturing capabilities.