Strut Assembly Installation – Monroe: A Decision-First Guide for DIYers and Shops

For most daily-driver strut jobs where the spring and upper mount are also worn, a Monroe Quick-Strut is the right choice — and the job is a system replacement, not a parts swap. Treat it that way and it is a legitimate DIY and independent-shop job. Treat it as a bare-strut swap and it becomes a comeback.
Quick-Strut arrives with the spring, upper mount, boot, and strut already matched and pre-loaded. You remove the old unit as a complete assembly and install the new one the same way. No spring compressor, no spring transfer, no reusing a fatigued spring or a cracked mount.
Traditional strut replacement requires you to disassemble the old assembly, compress the coil spring, transfer the spring, mount, and boot to a new strut, and reassemble. That process demands a wall-mounted or clamshell spring compressor, adds 30–60 minutes per side in labor, and concentrates the entire job's safety risk into the spring compression step. A compressed coil spring stores enough energy to cause serious injury if a compressor slips or a cheap tool fails.
Decision framework: choose Quick-Strut if you lack a quality spring compressor, if the old spring or mount shows any wear, or if you're paying for labor by the hour. Choose traditional replacement only if you already own a professional-grade compressor, the old spring and mount are verified good, and you're comfortable with the safety risk.
On cost: a bare strut is cheaper at the counter, but you still need a spring, upper mount, boot, and possibly a bearing plate. Add those separately and the gap narrows. Actual prices vary by vehicle and supplier — check current Monroe and retailer pricing for your application rather than assuming a universal cost advantage. For a shop, the labor savings can justify the assembly price on every job.
Confirming the Correct Monroe Quick-Strut Part Number for Your Vehicle
Ordering the wrong part is the most common pre-installation mistake, and it's entirely preventable with a three-step verification. Start with year, make, model, and trim — and on many vehicles, engine and suspension code as well. Trim level matters because a sport suspension or a different engine can change spring rate and strut valving.
Step one: look up the Quick-Strut number in the Monroe catalog using those exact vehicle attributes. Step two: cross-check that number against the vehicle's OEM strut number. If the OEM number on your old strut doesn't match the application data for the Quick-Strut you're considering, stop and re-verify. Catalog errors happen, and the OEM number on the part in your hand is the ground truth.
Step three: confirm the assembly is complete. A genuine Quick-Strut includes the spring, upper mount, and boot. If the listing shows a strut only, it is not a Quick-Strut and you'll be back to needing a spring compressor.
Do not reuse old springs, mounts, or boots with a Quick-Strut. The assembly is engineered as a matched system — spring rate, valving, and mount geometry are designed to work together. Mixing a new strut with a 100,000-mile spring defeats the purpose and can produce incorrect ride height and handling.
Step-by-Step Quick-Strut Installation: No Spring Compressor Required
Safety first: secure the vehicle on jack stands rated for the load, on level ground, with the parking brake set and the opposite axle chocked. Never work under a vehicle supported only by a jack. You'll need a torque wrench, hand tools, penetrating oil, and safety glasses.
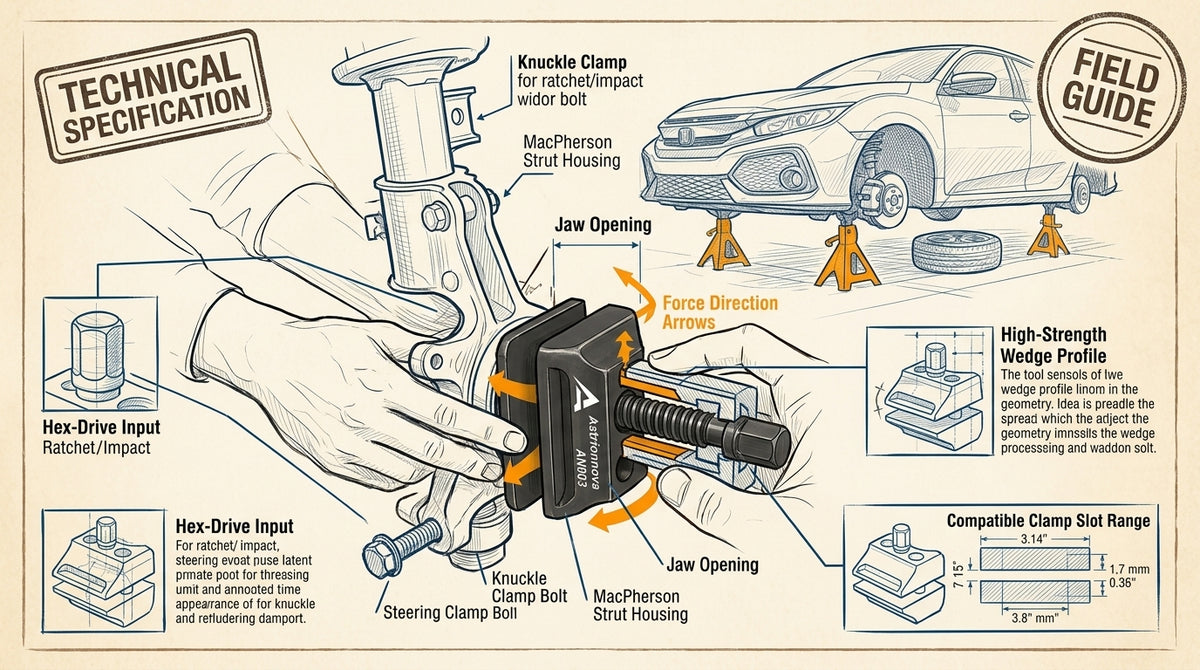
Remove the old strut assembly as a unit. Support the knuckle with a jack stand or a strap before you disconnect anything — this prevents the brake line and ABS wire from being stretched or torn when the knuckle drops. Disconnect the brake line bracket and ABS sensor clip from the strut, then remove the upper mount nuts and the lower pinch bolt or mounting bolts. The old assembly comes out whole.
Install the Quick-Strut by aligning the upper mounting studs with the tower holes and the lower mount with the knuckle. Do not force it. If the studs don't line up, the assembly is likely rotated or the knuckle is misaligned — adjust rather than hammer. Hand-thread the upper nuts and the lower fastener.
Do not fully torque the lower mounting bolts until the vehicle is on the ground and at ride height. Torquing at full droop pre-loads the bushing and can cause premature failure and incorrect ride height. Snug them, lower the vehicle, bounce the suspension to settle it, then torque to spec.
Torque Specifications for Critical Fasteners: Pinch Bolt, Mounting Studs, and Brake Line Brackets
Always use the OEM torque specifications for the vehicle, not generic values. Torque values are set by fastener size, grade, and the clamped joint — not by the strut brand. The OEM service manual for your year, make, and model is the correct source. Monroe does not publish universal torque values for every vehicle application; the included instructions may carry assembly-specific notes, but the OEM service manual remains the primary reference.
Aftermarket assemblies may have different stud sizes, grades, or coatings than the original. Decision rule:
- If the stud size and grade match the OEM fastener, use the OEM torque value.
- If the stud is a different size or grade, do not assume the OEM value transfers. Consult Monroe's included instructions for any assembly-specific value; if none is given, use the torque value published for that fastener size and grade in a standard torque table, and confirm with Monroe technical support before final assembly.
- If the fastener is coated (zinc, phosphate, or similar), reduce torque per the coating's published friction guidance — coated fasteners reach the same clamp load at lower torque, and using dry-spec values can over-stretch the stud.
The pinch bolt is a critical fastener. It clamps the strut to the knuckle and directly affects alignment and safety. Torque it to OEM spec with the vehicle at ride height. Under-torquing allows the strut to shift; over-torquing can deform the knuckle or snap the bolt.
Torque the upper mounting studs in a star pattern to the specified value. Do not use an impact wrench on the studs — impact torque is uncontrolled and can stretch or snap them. Use a torque wrench.
Brake line brackets should be snug but not over-torqued. These fasteners hold a thin steel line; excessive torque crushes the line and creates a leak or a restriction. Tighten until the bracket is secure with no movement, then stop.
Post-Installation Alignment: When It's Mandatory and What Happens If You Skip It
An alignment is mandatory after replacing struts. The new assembly changes the suspension geometry — camber and toe will be off from the moment you lower the vehicle, even if you installed everything perfectly.
Skipping alignment causes uneven tire wear, pulling, and poor handling. The most common result is accelerated inner or outer tire wear that costs more than the alignment itself within a few thousand miles. A vehicle that pulls or wanders is also a safety issue.
Signs the vehicle needs an alignment: an off-center steering wheel, drifting on a straight road, or uneven tire wear. After a strut install, assume it needs one regardless of how it drives.
Get an alignment immediately after installation. Do not wait. Driving on an unaligned suspension wears tires and can mask a separate installation problem.
Common Installation Mistakes and How to Avoid Them
Damaging brake lines by letting the knuckle hang unsupported is the most expensive mistake. Support the knuckle before disconnecting the strut, and inspect the brake line and ABS wire for tension before you lower the vehicle.
Misaligning mounting studs by forcing the assembly into place bends studs and cracks mounts. If the assembly doesn't seat with light hand pressure, find out why — don't force it.
Reusing old springs, mounts, or boots defeats the purpose of Quick-Strut. The assembly is a matched system; reusing worn components reintroduces the failure modes you paid to eliminate.
Improper torque — over-tightening or under-tightening critical fasteners — causes noise, shifting, and in extreme cases, separation. Use a torque wrench on every critical fastener.
Forgetting to transfer ABS sensors or brake line brackets leaves the system disconnected or the line unsupported. Make a checklist: brake line bracket, ABS clip, wheel speed sensor, and any ride-height sensor.
When to Replace Struts in Pairs vs. Individually, and How to Diagnose Worn Struts
Replace struts in pairs — both front or both rear. A new strut on one side and a worn strut on the other creates a handling imbalance that's most noticeable in emergency maneuvers and on uneven roads.
Diagnostic checklist — any single fail is a reason to inspect further and plan replacement:
- Fluid leak: oil streaks or wet residue on the strut body. Fail.
- Bounce test: push down hard on the corner and release. More than one rebound cycle after the body returns is a fail.
- Tire cupping or uneven wear: scalloped or cupped tread across the tire face. Fail.
- Nose dive under braking or float over dips: excessive body motion compared to when the vehicle was new. Fail.
If one strut is worn, the other is likely close behind. They've seen the same roads and the same mileage. Replacing individually saves money now and costs more later when the second one fails and you pay for a second alignment.
Consider replacing other suspension components if they show wear during the job. Ball joints, tie rods, and control arms are accessible with the strut out, and worn ones will need replacement soon. Inspect them before you reassemble.
Post-Installation Test Drive and Inspection: What to Check Before You Call It Done
After installation, lower the vehicle and torque the lower mounting bolts to spec at ride height. Then re-check the upper mount nuts and the brake line bracket.
Test drive at low speed first, listening for noises and checking steering feel. A clunk over bumps often indicates a loose mount nut or an incorrectly seated spring. A pull indicates alignment is needed — which it is anyway.
Inspect brake lines and ABS wires for proper routing and no tension. Turn the wheels lock-to-lock and verify the lines don't bind or stretch.
Check ride height and ensure the spring is properly seated in the lower and upper seats. An unseated spring causes noise and can shift under load.
Schedule an alignment immediately after the test drive. The test drive confirms the installation is safe; the alignment confirms the geometry is correct.
Frequently Asked Questions
Do I need a spring compressor for Monroe Quick-Strut? No. The assembly is pre-assembled with the spring, mount, and boot. You remove the old unit and install the new one without compressing a spring.
Can I reuse my old springs with a Quick-Strut? No. Quick-Strut is a matched system. Reusing old springs, mounts, or boots defeats the purpose and can cause incorrect ride height and handling.
How long does a Quick-Strut installation take? For a DIYer with hand tools, expect 1–2 hours per side depending on rust and vehicle design. A shop with a lift can do it faster.
Do I need an alignment after installing Quick-Strut? Yes. An alignment is mandatory because the new assembly changes suspension geometry.
What torque should I use for the pinch bolt? Use the OEM torque specification for your vehicle — look it up in the factory service manual for your year, make, and model. Do not use a generic value. If the OEM value is unavailable, use the torque published for that fastener size and grade, and confirm with Monroe technical support before final assembly.
How do I know if my vehicle has a sport suspension that changes Quick-Strut fitment? Check the vehicle's RPO codes, build sheet, or VIN decode for a sport or performance suspension option, then verify the Quick-Strut application against that specific trim in the Monroe catalog. If the catalog lists different Quick-Strut numbers for base and sport trims, the trim determines the correct part — do not assume the base number fits.
What if the OEM strut number on my old strut is illegible? Use the VIN to look up the OEM strut number through a dealer parts department or an OEM parts catalog, then cross-check that number against the Monroe catalog for your vehicle. If the VIN lookup and the catalog disagree, contact Monroe technical support with the VIN before ordering.
Conclusion: Restoring Ride Quality with Monroe Quick-Strut
Monroe Quick-Strut turns a high-risk, tool-intensive job into a controlled assembly replacement. The decision comes down to whether you value the elimination of spring compression, the matched spring-and-mount system, and the time savings enough to choose the complete assembly over a bare strut. For most DIYers and independent shops, the answer is yes.
Install it as a unit, torque critical fasteners to OEM spec, support the knuckle, and get an alignment immediately. Do those four things and the job is done right the first time.
---
Related