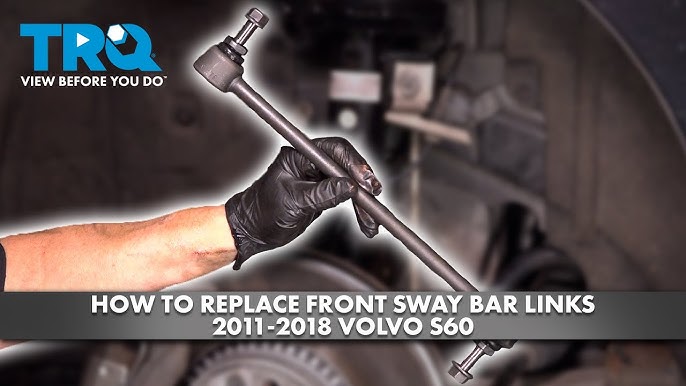
Stabilizer Link Replacement: Diagnosis, Cost, and Step-by-Step Guide
If you're hearing a clunking noise over bumps and suspect a bad stabilizer link, the good news is that replacement is a straightforward DIY task that can save you $100-$200 in labor costs. With basic tools and about 1-2 hours per side, you can restore your vehicle's handling and safety. This guide provides a decision framework for DIYers and professionals, covering symptoms, diagnosis, part selection, installation with torque specs, and cost breakdowns.https://www.youtube.com/results?search_query=stabilizer+link+replacement
Symptoms of a Bad Stabilizer Link: How to Tell If Yours Needs Replacement
The most common symptom is a clunking or rattling noise from the suspension, especially when driving over bumps or during turns. You may also notice excessive body roll when cornering, uneven tire wear, or a loose feeling in the steering. Visually inspect the links for damaged bushings, broken links, or excessive play. Differentiate from other suspension issues like ball joints or control arms: ball joint noise is often a creak or pop when turning, while control arm issues cause wandering or vibration. If the noise is a sharp clunk over bumps, it's likely the stabilizer link.
Can I Replace a Stabilizer Link Myself? Tools and Skill Level Required
Yes, you can replace a stabilizer link yourself if you have basic mechanical skills and tools. The difficulty is moderate; you'll need a jack, jack stands, lug wrench, socket set, torque wrench, penetrating oil, and possibly a pry bar. Plan for 1-2 hours per side for a beginner. Safety is critical: always support the vehicle with jack stands, never work under a car supported only by a jack.
Step-by-Step Stabilizer Link Replacement with Torque Specifications
Follow these steps to replace a stabilizer link. Torque specs vary by vehicle; common examples are provided below.
- Safely lift and support the vehicle. Loosen the lug nuts before jacking, then raise the vehicle and secure it on jack stands.
- Remove the wheel to access the stabilizer link.
- Remove the old link: Spray penetrating oil on the nuts and studs. Hold the stud with a wrench (or use a ball joint tool) and loosen the nut. Remove the link from the sway bar and the control arm.
- Install the new link: Position the new link, hand-tighten the nuts, then torque to spec. Common torque specs: Honda Civic (front) 32 lb-ft, Toyota Camry (front) 36 lb-ft, Ford F-150 (front) 59 lb-ft. Always verify for your specific vehicle.
- Reinstall the wheel and lower the vehicle. Torque the lug nuts to spec.
Handling Seized Bolts and Common Pitfalls
If the bolts are seized, apply penetrating oil and let it sit for 10-15 minutes. Use a breaker bar for extra leverage, but be cautious not to strip the nut. If the link is rusted, you may need to cut it off with a reciprocating saw. Always use a ball joint separator if the link is stuck to the sway bar or control arm. Never use heat near fuel lines or brake components.
OEM vs Aftermarket Stabilizer Links: Which Should You Choose?
OEM links guarantee fit and factory quality, often include a warranty, but cost more and may have limited availability. Aftermarket links are cheaper, offer variety (e.g., polyurethane bushings), and often meet or exceed OEM specs, but quality varies by brand. Choose reputable aftermarket brands that match or exceed OEM specifications. For most drivers, high-quality aftermarket links are a good value if installed correctly.
Comparison Table: OEM vs Aftermarket
| Factor | OEM | Aftermarket |
|--------|-----|-------------|
| Cost | Higher ($50-$150 per link) | Lower ($20-$80 per link) |
| Durability | Meets factory specs | Varies; premium brands can exceed OEM |
| Warranty | Typically 1-2 years | Varies; some offer lifetime warranty |
| Performance | Standard | Polyurethane options offer firmer handling |
| Fitment | Guaranteed | Usually matches OEM, but verify |
Recommendations Based on Driving Conditions
- Daily commuting on smooth roads: OEM or budget aftermarket links are sufficient.
- Off-road or rough terrain: Choose heavy-duty aftermarket links with polyurethane bushings for better durability.
- Performance driving: Consider adjustable aftermarket links for fine-tuning roll stiffness.
How Much Does Stabilizer Link Replacement Cost? Parts and Labor Estimates
Parts cost $20-$100 per link, depending on vehicle and quality. Labor runs $50-$150 per hour, typically 1-2 hours total. A professional replacement costs $100-$300 per axle. DIY cost is only parts, plus tools if you don't own them. Factors affecting cost: vehicle make/model, location, and whether you choose OEM or aftermarket.
Cost Breakdown by Vehicle Type
- Sedans: Parts $20-$50, labor $100-$200, total $120-$250 per axle.
- SUVs: Parts $30-$70, labor $150-$250, total $180-$320 per axle.
- Trucks: Parts $40-$100, labor $200-$300, total $240-$400 per axle.
To get accurate quotes, call local shops and ask for a breakdown of parts and labor. Online estimates can vary, so confirm with a professional.
How Long Do Stabilizer Links Last? Maintenance and Longevity Tips
Stabilizer links typically last 50,000 to 100,000 miles, but this varies with driving conditions and part quality. Harsh roads, aggressive driving, and low-quality parts shorten lifespan. To extend life, inspect links regularly, avoid overloading the vehicle, and replace them in pairs. Watch for cracked bushings, rust, or play in the link—these are signs of wear.
DIY vs Professional Installation: Which Should You Choose?
Consider your skill level, tools, and budget. If you have basic mechanical skills and tools, DIY can save you $100-$200. However, if you lack confidence or the vehicle has complex suspension geometry, professional installation ensures proper torque and alignment. Use the following decision flow:
- Do you have the tools and space? If not, professional is easier.
- Are you comfortable working under a car? Safety is paramount.
- Is the vehicle under warranty? Professional installation may be required to maintain warranty.
- Do you have time? DIY takes 2-4 hours total.
FAQs
Q: Can I drive with a bad stabilizer link?
A: Yes, but it's unsafe. The link affects stability during cornering, and a broken link can cause loss of control in emergency maneuvers.
Q: Should I replace both stabilizer links at the same time?
A: Yes, replace them in pairs to ensure even wear and handling.
Q: What tools do I need for stabilizer link replacement?
A: Basic sockets, wrenches, torque wrench, penetrating oil, jack and jack stands. A pry bar may help.
Q: How do I know if my stabilizer link is bad?
A: Listen for clunking over bumps, check for torn bushings or play, and inspect for rust or damage.
Conclusion
Replacing a stabilizer link is a manageable DIY task that improves ride quality and safety. Diagnose symptoms early, choose quality parts, and follow torque specs. Whether you DIY or hire a pro, understanding the process helps you make informed decisions and avoid overpaying.