Is It Really the Rear Bearing? Symptom-to-Diagnosis Mapping

A humming or growling noise that changes pitch when you corner is the strongest indicator of a failing rear wheel bearing. But rear bearing noise is harder to isolate than front: you sit farther from the source, and the rear axle doesn't steer. A road test with a passenger listening from the rear seat is more reliable than a solo drive.
How Rear Bearing Noise Differs from Front
Rear bearing noise typically manifests as a constant hum or growl that increases with vehicle speed. It may become louder when load shifts onto that side during cornering—turning left loads the right rear bearing, making the noise more pronounced. Front bearing noise often changes with steering input; rear noise is less affected by steering and more by speed and load.
Step-by-Step Rear Bearing Diagnosis (Jack Up, Spin, Road Test)
- Jack up the vehicle and support it on jack stands. Remove the rear wheel.
- Spin the hub by hand. Listen for roughness, grinding, or a dry bearing sound. Compare both sides.
- Check for play: Rock the tire at 12 and 6 o'clock. Excessive play indicates a worn bearing, but a noisy bearing can exist without noticeable play.
- Road test: Drive at various speeds and note when the noise occurs. Cornering in both directions can help pinpoint which side is failing.
Rear-Specific Diagnostic Decision Table
Use this table to separate bearing noise from the most common rear-end confounders before you buy parts. Each row maps a symptom to the likely cause and the next test.
| Symptom | Likely Cause | Next Test |
|---|---|---|
| Constant hum/growl that rises with speed and changes with cornering load | Rear wheel bearing | Road test with passenger; spin hub by hand; check play at 12/6 o'clock |
| Speed-dependent drone or flat-spot thump, often on AWD vehicles | Tire cupping, flat-spotting, or uneven wear | Rotate tires; if noise moves, it is tire-related |
| Rhythmic scrape or grind that follows wheel speed, sometimes with brake drag | Brake rotor scoring or stuck caliper | Inspect rotor surface and caliper slide; compare both sides |
| Constant whine that changes with throttle, not cornering | Differential noise | Note throttle dependence; check differential fluid and pinion play |
| Clunk or rattle over bumps, especially on independent rear suspension | Worn trailing-arm bushing or CV joint | Inspect bushing play and CV boots; listen for clicking on turns |
Ruling Out Tires, Brakes, and Differential Noise
Tire cupping or uneven wear can mimic bearing noise. Rotate tires and see if the noise moves. Brake rotor scoring or a stuck caliper can create a rhythmic scraping. Differential whine is usually constant and changes with throttle, not cornering load. Each has a distinct pattern: speed-dependent (tires), load-dependent (bearings), cornering-dependent (bearings), or throttle-dependent (differential).
Press-In Bearing or Bolt-On Hub? How Rear Design Changes Everything
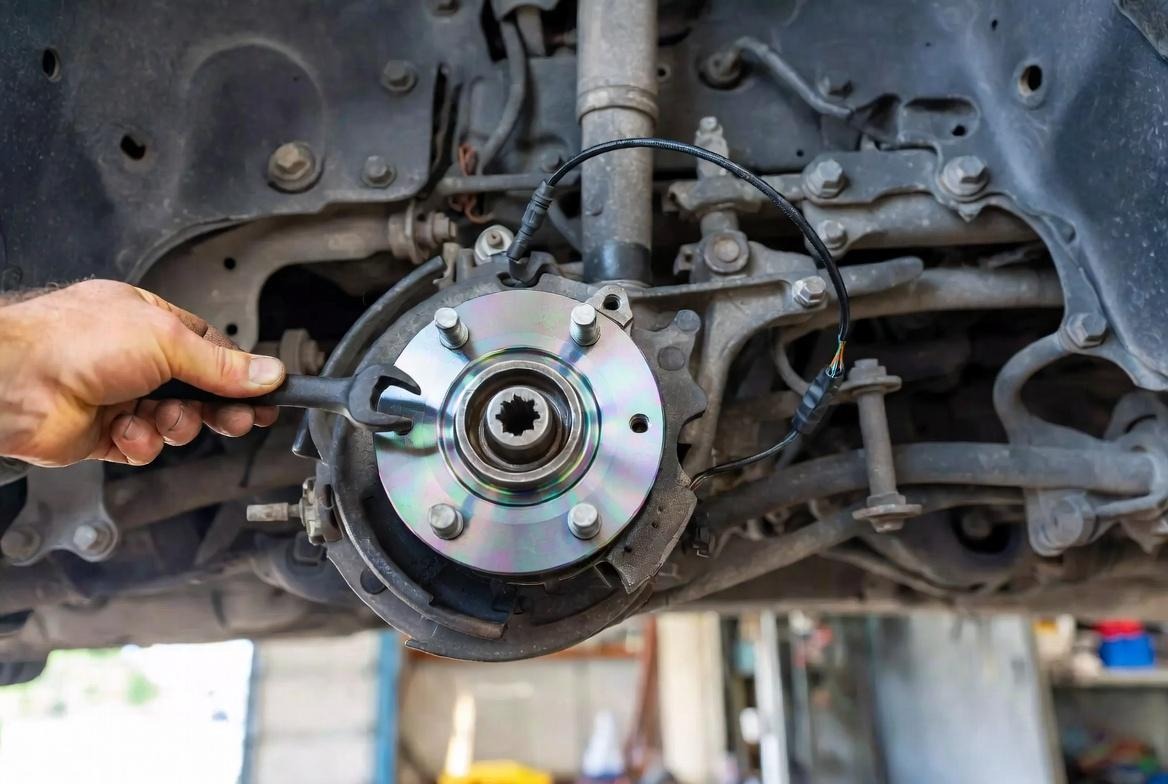
Your vehicle's rear bearing design determines parts cost, labor time, and whether you can do the job yourself. Integrated hub assemblies (bolt-on) include the bearing, flange, and ABS tone ring in one unit; they unbolt from the knuckle and typically require no press. Press-in bearings are sold as a separate bearing that must be pressed out of and into the knuckle or trailing arm using a shop press or bearing kit; the hub flange is reused.
Identification Method Without a Parts Catalog
You can identify the design by looking at the back of the rear knuckle or trailing arm:
- Bolt-on hub assembly: Look for four mounting bolts visible from behind the knuckle. The hub unbolts as a complete unit. No press is required.
- Press-in bearing: Look for a snap-ring or a staked/crimped axle nut. The hub flange is separate from the bearing, and the bearing must be pressed out. Access often requires disassembly.
If you see four bolts, you have a bolt-on hub. If you see a snap-ring or staked nut and no mounting bolts, you have a press-in bearing.
Why Rear Press-In Jobs Can Be More Labor-Intensive
Rear press-in jobs are often more labor-intensive than front press-in jobs because of parking brake hardware, ABS sensor routing, and trailing-arm geometry that limits press access. This is not a universal rule—labor time depends on the specific vehicle—but it explains why a rear press-in quote can exceed a front press-in quote on the same car.
Rear Wheel Bearing Replacement Cost: Parts, Labor, and What Moves the Number
Realistic per-wheel ranges for rear bearing replacement fall between $350 and $900, with the spread driven primarily by hub vs press-in design and local labor rates. A bolt-on rear hub assembly typically costs more than a standalone press-in bearing, but the press-in job adds labor hours for removal and pressing. Labor rate varies by region and shop type; a $1,000 quote is not automatically a rip-off if the job is a press-in rear bearing on a vehicle with parking brake and ABS complications, but it should be itemized.
Cost Formula and Example Calculations
Use this formula to evaluate any quote:
Parts + (Labor Hours × Labor Rate) + Shop Supplies = Fair Price
Ask the shop for the labor hours and the labor rate separately. Then compare to these examples:
- Bolt-on hub example: Hub assembly $150–$300 + 1.0–1.5 hours × $100–$150/hr + $20 supplies = $270–$545 per wheel.
- Press-in bearing example: Bearing $40–$100 + 2.0–3.0 hours × $100–$150/hr + $20 supplies = $260–$570 per wheel.
The ranges overlap, but the parts-vs-labor split is different. A quote that is high on parts for a press-in job, or high on labor for a bolt-on job, is the one to question.
Variables That Move the Number
- Make/model and design (hub vs press-in)
- Whether both rear bearings are replaced
- ABS sensor condition
- Parking brake hardware condition
- Whether an alignment is included
DIY Rear Bearing Replacement: Tools, Access, and Rear-Specific Obstacles
A bolt-on hub assembly is a realistic DIY job for a competent home mechanic; a press-in rear bearing often requires a shop press and is better outsourced unless you have the tooling and experience.
Required Tools
- Slide hammer
- Bearing press or hub puller
- Torque wrench
- Axle nut socket
- For press-in bearings: bearing splitter and installation kit
Rear-Specific Obstacles
Parking brake shoes and hardware must be removed or secured. ABS sensor wiring must be disconnected without damage. Trailing-arm or knuckle geometry may limit press access. Axle nut torque is critical and varies by vehicle; reusing a staked or crimped axle nut is not acceptable—a new nut is required.
Bearing Type and Preload Notes
Rear bearings can be tapered roller, ball, or sealed cartridge types. Tapered roller bearings require preload or endplay adjustment per the manufacturer's specification; sealed cartridge and ball bearings are typically torque-to-spec and do not use a separate preload adjustment. Always consult the vehicle-specific service manual for torque values and preload/endplay specs before reassembly.
After the Job: ABS Behavior, Test Drive, and When Alignment Matters
A light that comes on immediately after replacement usually indicates a sensor or tone-ring issue; a light that stays off through a test drive indicates a correct install. Test drive should include low-speed and highway-speed segments, cornering in both directions, and braking to confirm the noise is gone and no new vibration exists. Alignment is not always required after a rear bearing replacement, but it is warranted if the job involved separating suspension components that affect rear toe or camber. Re-torque the axle nut and wheel lugs after the first short drive if the manufacturer specifies it; check for leaks or unusual heat at the hub.
Driving on a Failing Rear Bearing: Why Rear Failures Are Less Forgiving
A rear wheel bearing that fails completely can allow the wheel to seize or the axle to walk, which is more dangerous at speed because the rear axle is not steered. Continued driving on a worn rear bearing can damage the axle shaft, spindle, or knuckle, turning a bearing job into a much larger repair. Rear bearing failure is less forgiving than front in terms of driver feedback: the driver has less direct feel for rear-end degradation, so the failure can progress further before it is noticed.
Decision Rule for Driving on a Failing Rear Bearing
- If you hear grinding or feel wheel play: Park the vehicle. Do not drive. Tow it to a shop.
- If it's a faint hum that only appears at certain speeds: Schedule service within a week. Avoid high-speed driving and heavy loads until inspected.
- If the noise is accompanied by vibration or ABS light: Treat as urgent. Park and inspect before further driving.
Rear Wheel Bearing FAQ: Direct Answers to the Questions Buyers Actually Ask
How long can I drive on a bad rear wheel bearing?
Treat it as a prompt repair. If you hear grinding or feel wheel play, park the vehicle and tow it. If it's a faint hum, schedule service within a week and avoid high-speed driving. Continued driving risks axle and spindle damage.
Do I need an alignment after rear wheel bearing replacement?
Only if suspension geometry was disturbed. Many rear hub jobs do not require it. If the job involved separating components that affect rear toe or camber, get an alignment.
Can I replace just the bearing, or do I need the whole hub?
Depends on whether the rear design is press-in or integrated hub. Press-in allows bearing-only replacement; hub design requires the assembly. Check for four mounting bolts (hub) vs a snap-ring or staked nut (press-in).
What is a reasonable labor fee for rear wheel bearing replacement?
It depends on design and local rate. Ask for labor hours and rate separately, not a single number. Use the formula: parts + (labor hours × rate) + supplies. Compare to the examples above to judge fairness.
---
Related
- Rear Trailing Arm Bushing — 55274-D3000
- Rear Trailing Arm Bushing — 55274-2W000
- Rear Trailing Arm Bushing — 55274-4T000
---
Written by a suspension parts specialist with over a decade in the aftermarket, focusing on rear-specific diagnosis and repair decisions.