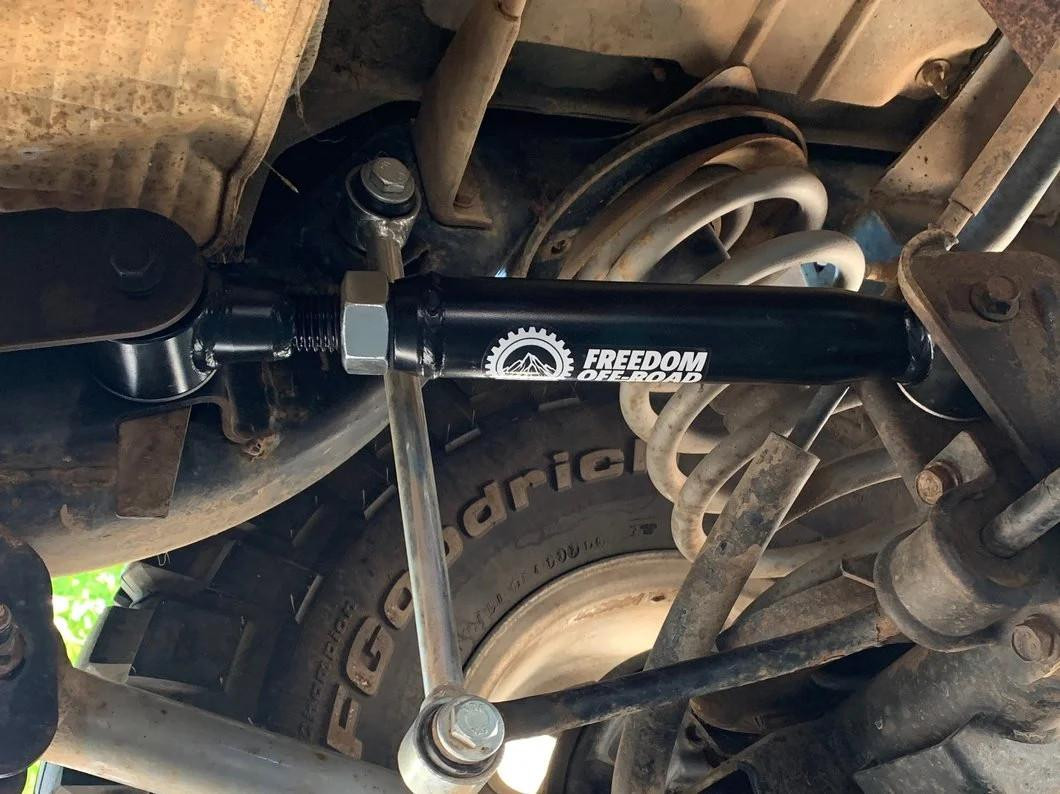
Rear Upper Control Arm Symptoms, Replacement & Buying Guide
A failing rear upper control arm produces a specific symptom cluster: a sharp clunk over bumps, rear-end steering during lane changes, camber-driven edge tire wear, and wheel hop under load. The arm carries camber and toe loads as the suspension compresses and rebounds, so any play in its bushing or ball joint changes the rear knuckle angle under load. That geometry is why the symptoms feel like the whole rear end is loose rather than one corner.
Symptoms That Point to the Arm, Not the Whole Rear Suspension
Clunking over bumps is most pronounced when the rear upper control arm bushing or ball joint has play. The arm is loaded and unloaded every time the suspension cycles, so a worn joint makes noise at the exact moment of load reversal. Rear-end steering—often described as a vague or wandering rear end during lane changes—occurs when the upper control arm allows the rear knuckle to change angle under cornering load. Uneven rear tire wear, especially inner or outer edge wear on one side, points to a bent or bushing-compromised rear upper control arm altering camber. Wheel hop under acceleration or braking suggests the arm is not controlling axle wind-up, but this symptom overlaps with trailing arm and lower control arm faults, so it cannot confirm the diagnosis alone.
Decision: If you have clunking plus rear-end steering plus one-sided edge wear, the rear upper control arm is the primary suspect. If you only have wheel hop, inspect the trailing arm and lower control arm before ordering parts.
Symptom-to-Component Mapping
| Symptom | Rear Upper Control Arm | Trailing Arm | Toe Link | Lower Control Arm |
|---|---|---|---|---|
| Clunk over bumps | Primary suspect when noise occurs at load reversal | Possible if bushing is worn | Less likely | Possible if bushing is worn |
| Rear-end steering / wandering | Primary suspect when camber/toe changes under cornering load | Possible if bushing allows lateral movement | Primary suspect if toe changes dynamically | Possible if toe is altered |
| One-sided edge tire wear | Primary suspect when camber is altered | Less likely | Possible if toe is altered | Possible if camber is altered |
| Wheel hop under load | Possible but overlaps with other arms | Primary suspect if axle wind-up is uncontrolled | Less likely | Primary suspect if bushing is worn |
| Vibration at highway speed | Less likely unless ball joint is severely worn | Possible if bushing is collapsed | Possible if toe link is loose | Possible if bushing is collapsed |
Use this table to narrow the suspect list before you put the car on stands. It does not replace the physical tests below.
Diagnostic Tests That Isolate the Rear Upper Control Arm
With the rear wheels off the ground, grasp the rear tire at 12 and 6 o'clock and rock it. Excessive play indicates wheel bearing or upper control arm ball joint wear. Play at 3 and 9 o'clock points to toe link or lower control arm bushings. This single test separates vertical-plane faults from horizontal-plane faults before you touch a pry bar.
Next, use a pry bar between the rear upper control arm and the knuckle to check for bushing deflection and ball joint looseness. Any movement beyond factory spec confirms the arm as the source. Inspect the arm for corrosion-related fatigue, especially in salt-belt vehicles, where the arm can crack or bend without obvious bushing failure. Compare the rear upper control arm angle and shape side-to-side; a bent arm from curb impact or pothole will show a visible difference and cause camber misalignment.
Diagnostic Decision Tree
- 12/6 rock test shows play → suspect wheel bearing or upper control arm ball joint. Proceed to pry bar test at the upper arm.
- Pry bar confirms movement at the upper arm → rear upper control arm is the confirmed component. Replace the complete assembly.
- 12/6 rock test shows no play, but 3/9 rock test shows play → suspect toe link or lower control arm bushings. Inspect those components before ordering anything.
- Pry bar shows no movement, but visible bend or corrosion is present → rear upper control arm is confirmed as bent or compromised. Replace the complete assembly.
- No play and no visible damage, but symptoms persist → re-check trailing arm and lower control arm bushings; the upper arm may not be the source.
Decision: Perform the 12/6 and 3/9 rock test first, then the pry bar test, then the side-to-side shape comparison. If the 12/6 test shows play and the pry bar confirms movement at the upper arm, you have isolated the rear upper control arm. If the 3/9 test shows play, inspect the toe link and lower control arm bushings before ordering anything.
Can You Drive with a Bad Rear Upper Control Arm?
Driving with a rear upper control arm that has confirmed bushing or ball joint play is unsafe at highway speeds because it can cause sudden rear-end steering and loss of control. A bent rear upper control arm from impact should be replaced immediately; continuing to drive will accelerate tire wear and may cause the arm to crack. If the rear upper control arm is corroded but not yet cracked, the vehicle may be drivable at low speeds to a repair shop, but any clunking or instability means it should be towed.
Ignoring a bad rear upper control arm can lead to secondary damage to the rear knuckle, wheel bearing, and tires, increasing total repair cost. The rear knuckle and wheel bearing absorb the misalignment loads the arm can no longer control, so a small arm failure can become a much larger repair if you wait.
Decision: Confirmed play at highway speed equals tow. Corrosion without cracking equals low-speed drive to a shop. Bent arm equals immediate replacement.
Bushing-Only vs. Complete Rear Upper Control Arm Replacement
Replacing only the bushing is cost-effective only if the ball joint is tight and the arm is not bent or corroded. Otherwise, the new bushing will not restore full function. Complete assembly replacement is the recommended path when ball joint play is present, because the ball joint is typically not serviceable separately on many rear upper control arms.
Labor for bushing replacement can exceed the cost of a complete assembly due to the need to press out the old bushing and press in the new one, plus the risk of damaging the arm. Complete assembly replacement simplifies the job, reduces downtime, and ensures all wear points are renewed. That is why the editorial position favors complete assembly replacement when any play is confirmed.
What the Job Actually Involves
Support the rear knuckle with a jack stand before removing the arm. Mark camber and toe reference points on the adjustment cams or eccentric bolts so you have a baseline for the alignment shop. Remove the arm-to-knuckle and arm-to-subframe fasteners. If the hardware is corroded, replace it—do not reuse pitted bolts. Install the new assembly, hand-tighten the fasteners, then torque to the manufacturer's specification for your vehicle. Do not guess torque values; consult the service manual. Lower the vehicle and drive directly to an alignment shop at low speed.
Decision: If the ball joint is tight, the arm is straight, and the bushing is the only failed component, bushing-only is viable. If the ball joint has any play, or the arm shows corrosion or bending, replace the complete assembly. If you are paying shop labor, the math usually favors the complete assembly because press time is billed at the same rate as replacement time.
Rear Upper Control Arm Replacement Cost: Parts, Labor, and DIY vs. Shop
Parts cost varies by OEM vs. aftermarket and by vehicle make and model. Aftermarket assemblies are generally the budget-friendly option, while OEM parts cost more but offer guaranteed fitment. Shop labor for rear upper control arm replacement is typically billed by the hour per side, with rates varying by region; a four-wheel alignment after replacement is mandatory and adds to the total whether you do the job DIY or at a shop.
DIY replacement requires basic hand tools, a jack and jack stands, and a torque wrench; a press is not needed for complete assembly replacement, making it accessible to intermediate DIYers. Going the DIY route saves the labor charge but you still need to budget for the alignment. Ask your shop for an itemized quote covering parts, labor, and alignment before authorizing the work.
Decision: DIY saves on labor but requires tools, time, and a separate alignment appointment. A shop bundles parts, labor, and alignment into one job with a warranty on the work. Get an itemized quote either way.
Buying a Rear Upper Control Arm: Material Quality, Warranty, Brand Reputation, and Counterfeit Risk
OEM rear upper control arms offer guaranteed fitment and often better corrosion resistance, but cost more; aftermarket arms vary widely in quality. Look for arms with forged or stamped steel construction and high-quality rubber or polyurethane bushings; cheap arms may use inferior materials that fail prematurely.
Warranty length is a proxy for manufacturer confidence: lifetime warranties on bushings or arms indicate better quality, while 12-month warranties suggest lower durability. Counterfeit parts are a real risk when buying online; purchase from reputable sellers and check for brand markings, packaging, and country of origin.
Buying Criteria Tied to Failure Mode and Use
- Bushing failure only, daily driving: OEM or reputable aftermarket with rubber bushings and a lifetime bushing warranty. Rubber isolates noise better than polyurethane for street use.
- Ball joint play confirmed: Complete assembly with a sealed, non-serviceable ball joint from a brand that offers a lifetime warranty. Avoid arms where the ball joint is pressed in and not replaceable.
- Bent or corroded arm: Forged or stamped steel with corrosion-resistant coating. In salt-belt regions, prioritize OEM or aftermarket arms with proven coating durability.
- Heavy-duty or track use: Forged construction and polyurethane bushings. Expect more noise and vibration but better deflection control under load.
- Counterfeit risk: Buy from authorized distributors. Check for brand markings, packaging quality, and country of origin. If the price is significantly below market, treat it as suspect.
Decision: For daily driving, OEM or a reputable aftermarket brand with a lifetime bushing warranty is the safe choice. For heavy-duty use, prioritize forged construction and polyurethane bushings. For any purchase, verify the seller's return policy and inspect the part for brand markings before installation.
Fitment Note
Fitment varies by vehicle. The rear upper control arm is not a universal part; the same platform may use different arms across trim levels or model years. Verify fitment by VIN with your parts supplier before ordering. The related trailing arm bushings below are listed for specific applications—confirm your vehicle's fitment before purchase.
Alignment and ADAS Recalibration After Rear Upper Control Arm Replacement
A four-wheel alignment is non-negotiable after rear upper control arm replacement because the new arm changes rear camber and toe settings. If the vehicle has ADAS features like lane-keeping assist or blind-spot monitoring that rely on rear sensors, recalibration may be required. Some vehicles with rear-mounted radar or camera systems require recalibration after suspension work; check the owner's manual or dealer service information for your specific vehicle. Skipping alignment can cause uneven tire wear, poor handling, and premature failure of the new arm due to incorrect load angles. ADAS recalibration typically requires a shop with the proper equipment—ask whether your vehicle needs it and budget accordingly.
Decision: Book the alignment immediately after replacement, and ask the shop whether your vehicle's ADAS features require recalibration. If you are doing the job DIY, drive directly to an alignment shop at low speed and avoid highway driving until the alignment is set.

FAQ
How do I know if my rear upper control arm is bad?
Clunking over bumps, rear-end steering during lane changes, and one-sided edge tire wear are the primary indicators. Confirm with a 12/6 o'clock rock test and a pry bar check at the arm-to-knuckle joint.
Can I replace just the rear upper control arm bushing?
Only if the ball joint is tight and the arm is not bent or corroded. If the ball joint has play, replace the complete assembly.
Do I need an alignment after replacing a rear upper control arm?
Yes. The new arm changes rear camber and toe, so a four-wheel alignment is mandatory.
How much does rear upper control arm replacement cost?
It depends on OEM vs. aftermarket parts, your region's labor rates, and whether you do the job DIY or at a shop. A four-wheel alignment is always required and adds to the total. Get an itemized quote covering parts, labor, and alignment before authorizing the work.
Can I drive with a bad rear upper control arm?
Only at low speed to a repair shop if there is no clunking or instability. Confirmed play at highway speed is unsafe and requires a tow.
Do I need to replace both sides at once?
Not automatically. Replace the failed side if the opposite arm passes the pry bar and visual inspection. Replace both sides if the vehicle has high mileage, both arms show corrosion or bushing degradation, or you want to avoid a second alignment and labor charge soon after. The decision rule: if the opposite arm has any play or visible damage, replace both.
---
Related