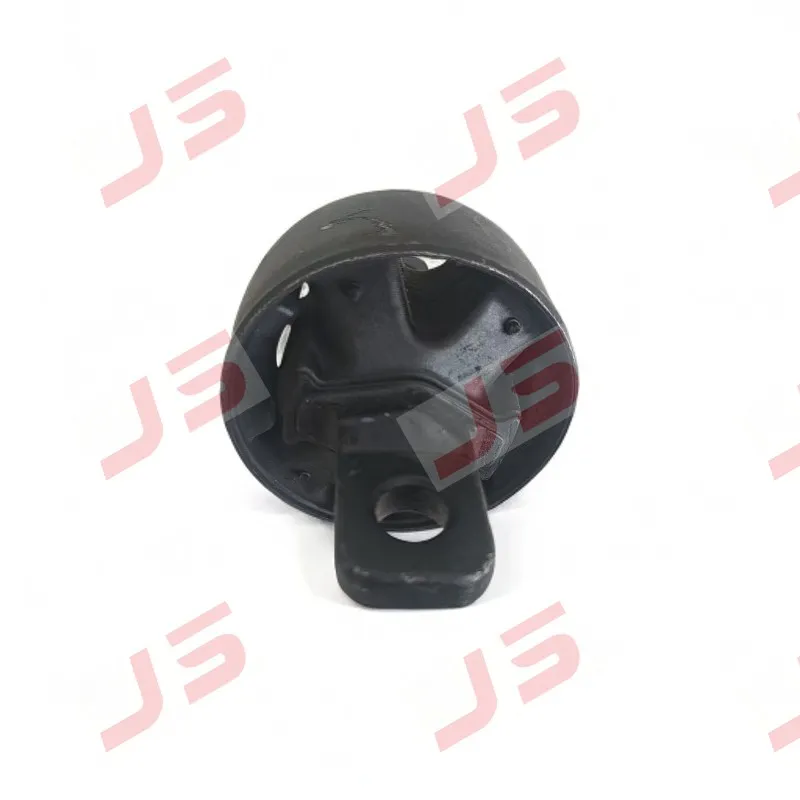
Rear Trailing Arm Bushing Symptoms: Diagnosis and Replacement Guide
A failing rear trailing arm bushing produces a dull, low-frequency clunk from the rear floor or quarter panel when the suspension compresses over expansion joints, speed bumps, or driveway transitions. The sound comes from the trailing arm shifting inside a worn elastomer shell. It is not a sharp metallic rattle — that points elsewhere.
Rear trailing arm bushings are elastomer or polyurethane inserts connecting the trailing arm to the body and axle. When the rubber degrades, the arm moves beyond its designed range, producing both audible and tactile symptoms.
Three other symptoms reliably accompany the clunk:
- Rear-end looseness or "wag" during lane changes and cornering. The bushing deflects under lateral load, allowing the trailing arm to shift and changing rear toe dynamically. You feel the rear steering itself slightly — a vague, disconnected sensation that worsens with speed.
- Uneven or accelerated rear tire wear, especially cupping or inner-edge scalloping. As the bushing flexes, rear toe changes under load. The tire scrubs unevenly, creating a scalloped pattern that shortens tire life and makes the vehicle unstable in wet conditions.
- Symptoms that worsen with load. Passengers or cargo increase static load on the trailing arm, amplifying deflection. The clunk is often more pronounced at low speeds over broken pavement than at highway speed, where road noise masks the frequency.
These symptoms rarely appear alone. A worn bushing produces a cluster of complaints — noise, handling vagueness, and tire wear — that together justify a physical inspection.
Pry-Bar Test: Step-by-Step Trailing Arm Bushing Inspection with Pass/Fail Criteria
A pry-bar test is the definitive field diagnostic for trailing arm bushing failure. It takes fifteen minutes with basic hand tools and gives a binary answer: serviceable or not.
Step 1: Lift and support the rear of the vehicle. Raise the rear axle and place jack stands under the frame or manufacturer-approved lift points. Lower the jack until the suspension settles at ride height or slightly loaded. Inspecting at full droop — wheels hanging — unloads the bushing and can mask play that appears under normal load.
Step 2: Locate the trailing arm mounting points. The trailing arm runs fore-aft between the body and the rear axle or spindle. The bushing is the elastomer or poly insert pressed into the arm or its mounting bracket. You will find one bushing at the body-side pivot and another at the axle-side pivot. Inspect both.
Step 3: Apply controlled force with a pry bar. Insert a pry bar between the trailing arm and its mounting bracket. Apply steady force in three directions — vertical, lateral, and fore-aft — while watching for relative movement between the bushing shell and the arm or bracket. Look for movement exceeding normal elastomer flex.
Pass criteria: The bushing flexes slightly and returns to position without visible tearing, separation, or metal-to-metal contact. Minor surface cracking on the rubber is normal for aged bushings and does not alone justify replacement.
Fail criteria:
- Excessive movement — roughly more than a few millimeters of slop between the bushing and its housing
- Cracked or separated rubber that allows the inner sleeve to move independently
- Fluid leakage from a hydraulic bushing (if equipped)
- Audible clunk during the pry test itself
Step 4: Inspect both sides. Bushings rarely fail symmetrically. A single failed side still justifies paired replacement because the rear axle locates asymmetrically if only one side is renewed.
The pry-bar test is more reliable than visual inspection alone because surface cracks can be cosmetic while internal separation — invisible from outside — causes the real handling problem. The pry bar loads the bushing in the same directions it sees during driving, revealing play a static visual check misses.
Isolating the Bushing from Shocks, Sway Bar Links, and Control Arm Bushings
Three components commonly produce rear-end noises that mimic trailing arm bushing failure. Ruling them out before buying parts prevents wasted money and repeat labor.
Worn shocks. A blown shock leaks oil from the damper body and produces a sharper rap — not a dull clunk — that follows vertical wheel travel. Perform a bounce test: push down firmly on one rear corner and release. The body should rebound once and settle. Continued bouncing indicates a worn damper. Shock noise is typically higher-pitched and more metallic than bushing noise.
Sway bar links and bushings. Disconnect one sway bar link and secure it out of the way, then test drive over the same road that produced the clunk. If the noise disappears, the link or bar bushing is the source. Sway bar noise is often a lighter rattle or clink on uneven pavement at low speed, distinct from the heavier thud of a trailing arm bushing.
Control arm and toe-link bushings. These sit inboard of the trailing arm and can produce similar rear-end looseness. Pry them separately at their own pivot points using the same pass/fail criteria. If the trailing arm bushing passes the pry test but the control arm bushing shows excessive play, the control arm bushing is your problem.
Wheel bearings and loose lug hardware. Spin the wheel by hand and listen for roughness or growl. Grab the tire at 12 and 6 o'clock and rock it — play indicates a worn bearing or loose suspension component. Check lug nut torque before condemning any bushing.
The most common misdiagnosis is replacing trailing arm bushings when the actual noise comes from a sway bar link. The disconnect-and-drive test is the fastest way to eliminate that false positive.
OEM Rubber vs. Polyurethane Trailing Arm Bushings: Choosing by How You Drive
The right bushing material depends on how the vehicle is used, not on mileage or noise level alone. OEM rubber and polyurethane serve different priorities.
OEM rubber bushings are the correct choice for daily driving, commuting, and family hauling. They absorb road harshness, isolate noise, and last well when the rest of the suspension is healthy. Rubber is compliant by design — it flexes to absorb impact and vibration. If the vehicle sees mixed real-world roads and the owner prioritizes comfort, rubber is the answer.
Polyurethane bushings reduce deflection under load, sharpening rear-end response and keeping rear toe more consistent during hard cornering or heavy towing. Poly also resists oil and ozone degradation better than rubber. The trade-off is increased road noise and vibration transmitted into the cabin. Choose poly if the vehicle sees track use, autocross, spirited driving, or frequent heavy towing where rear-end stability matters more than NVH.
Durometer matters. Polyurethane is available in different hardness grades. Street-grade poly is a middle ground — firmer than rubber but still tolerable for regular driving. Race-grade poly is too harsh for a daily driver and will make the cabin uncomfortably loud on rough roads.
| Decision factor | OEM rubber bushing | Polyurethane bushing |
|---|---|---|
| Deflection under load | Higher; absorbs impact and vibration | Lower; keeps rear toe more consistent |
| NVH and cabin comfort | Quieter, smoother ride | More road noise and vibration |
| Handling response | Softer, comfort-oriented | Sharper rear-end response |
| Chemical resistance | Degrades with oil and ozone exposure | Resists oil and ozone better |
| Hardness options | Fixed OE compliance | Multiple durometers, street-grade to race-grade |
| Best application | Daily driving, commuting, family hauling | Track, autocross, spirited driving, heavy towing |
Do not choose bushing material by mileage or noise alone. The deciding factor is how the vehicle is actually driven and how much NVH the owner will tolerate. A commuter with 150,000 miles still benefits from rubber. A weekend track car with 40,000 miles benefits from street-grade poly.
For Hyundai and Kia applications, rear trailing arm bushings are available under multiple OEM part numbers, including 55274-2W000, 55274-D3000, 55274-4T000, 55274-4Q000, 55274-2S000, and 55274-2H000. These correspond to different platforms and model years. Always verify fitment by VIN or model-year lookup before ordering.
What Happens If You Delay Replacement: Tire Cupping, Secondary Damage, and Alignment Drift
Driving on failed trailing arm bushings accelerates wear on tires and adjacent components. The cost of deferring repair is always higher than the cost of the bushings themselves.
Dynamic rear toe change causes tire damage. As the bushing flexes under load, rear toe changes with every bump and corner. The tire scrubs across the road surface unevenly, producing inner-edge scalloping or cupping. This wear pattern is irreversible — the tire is ruined — and it makes the vehicle feel unstable in wet conditions because the contact patch is no longer flat.
Adjacent components wear faster. A loose trailing arm shifts load to control arm bushings, toe links, and sometimes the trailing arm itself. What starts as a single bushing replacement can become a multi-component repair if you wait. The trailing arm can also develop elongated mounting holes or cracks if the bushing allows metal-to-metal contact.
Alignment drift cannot be corrected without new bushings. The trailing arm locates the rear axle. When the bushing collapses, rear toe and thrust angle change. An alignment machine can measure the error, but no adjustment can compensate for a bushing that moves under load. You must replace the bushings before the alignment will hold.
Safety-relevant handling symptoms worsen progressively. Rear-end wag during lane changes and unpredictable behavior on wet roads are not self-correcting. They degrade as the bushing deteriorates further. Delaying replacement means driving a vehicle with compromised rear stability.
Replacement Cost Reality: DIY vs. Independent Shop vs. Dealer
Cost varies significantly by service tier. Understanding what each tier includes helps you decide where to spend your money.
DIY. Your cost is bushings plus tools. You will need a press or bushing driver set, a pry bar, jack stands, and a torque wrench. If the bushing is not serviceable separately — some arms require replacing the entire arm — parts cost rises. Labor is your time. For a first-time DIYer, expect a full afternoon for both sides, including setup and cleanup. A second attempt takes half the time.
Independent shop. Labor is billed at shop rate for removal, pressing, and reinstallation. Total cost is parts plus a few hours of labor. The shop will usually recommend an alignment as a separate line item. Independent shops are often the best value because they have the press tools and experience to do the job efficiently.
Dealer. Highest labor rate and often OEM-only parts. The dealer may replace the entire trailing arm rather than pressing in a new bushing, which raises parts cost significantly. Dealer service is appropriate if the vehicle is under warranty or if you want OEM parts installed by factory-trained technicians.
Always replace in pairs. A single-side replacement leaves the rear axle located asymmetrically, causing handling and wear issues. Both sides must be renewed together.
Alignment is a separate cost at every tier. Budget for it. It is not optional.
Post-Replacement Alignment: Why It Is Non-Negotiable
An alignment after trailing arm bushing replacement is mandatory, not optional. The trailing arm locates the rear axle. Replacing its bushing changes the arm's static position, which changes rear toe and thrust angle. Even if the new bushings are installed perfectly, the rear geometry is now different from what it was before.
Driving without an alignment after replacement can cause rapid and uneven tire wear, an off-center steering wheel, and handling pull. These symptoms appear even when the new bushings are correct because the rear thrust angle is no longer aligned with the vehicle centerline.
The alignment must be performed after the bushings are seated and the vehicle is at ride height with the suspension settled. A four-wheel alignment is required. Rear toe and thrust angle are the critical adjustments. Front alignment alone will not correct a rear-end geometry change.
Think of the alignment as part of the repair, not a follow-up service. If you replace the bushings and skip the alignment, you have completed half the job. The vehicle will not drive correctly, and you will accelerate tire wear on brand-new tires.

FAQ
How long do rear trailing arm bushings last?
There is no fixed interval. Lifespan depends on driving conditions, road quality, and load. Inspect them whenever you have rear-end noise, handling complaints, or uneven tire wear.
Can I replace just one trailing arm bushing?
No. Replace both sides. A single-side replacement leaves the rear axle located asymmetrically, causing handling and wear issues.
Do I need an alignment after replacing trailing arm bushings?
Yes. The trailing arm locates the rear axle. Replacing the bushing changes rear toe and thrust angle. A four-wheel alignment is required.
How do I know if my trailing arm bushings are bad?
Perform a pry-bar test. Excessive movement, cracked or separated rubber, or an audible clunk during the test indicates failure. See the pass/fail criteria above.
What happens if I don't replace worn trailing arm bushings?
You will experience accelerated tire wear (cupping, scalloping), secondary damage to adjacent components, alignment drift that cannot be corrected, and worsening rear-end handling instability.
---
Related