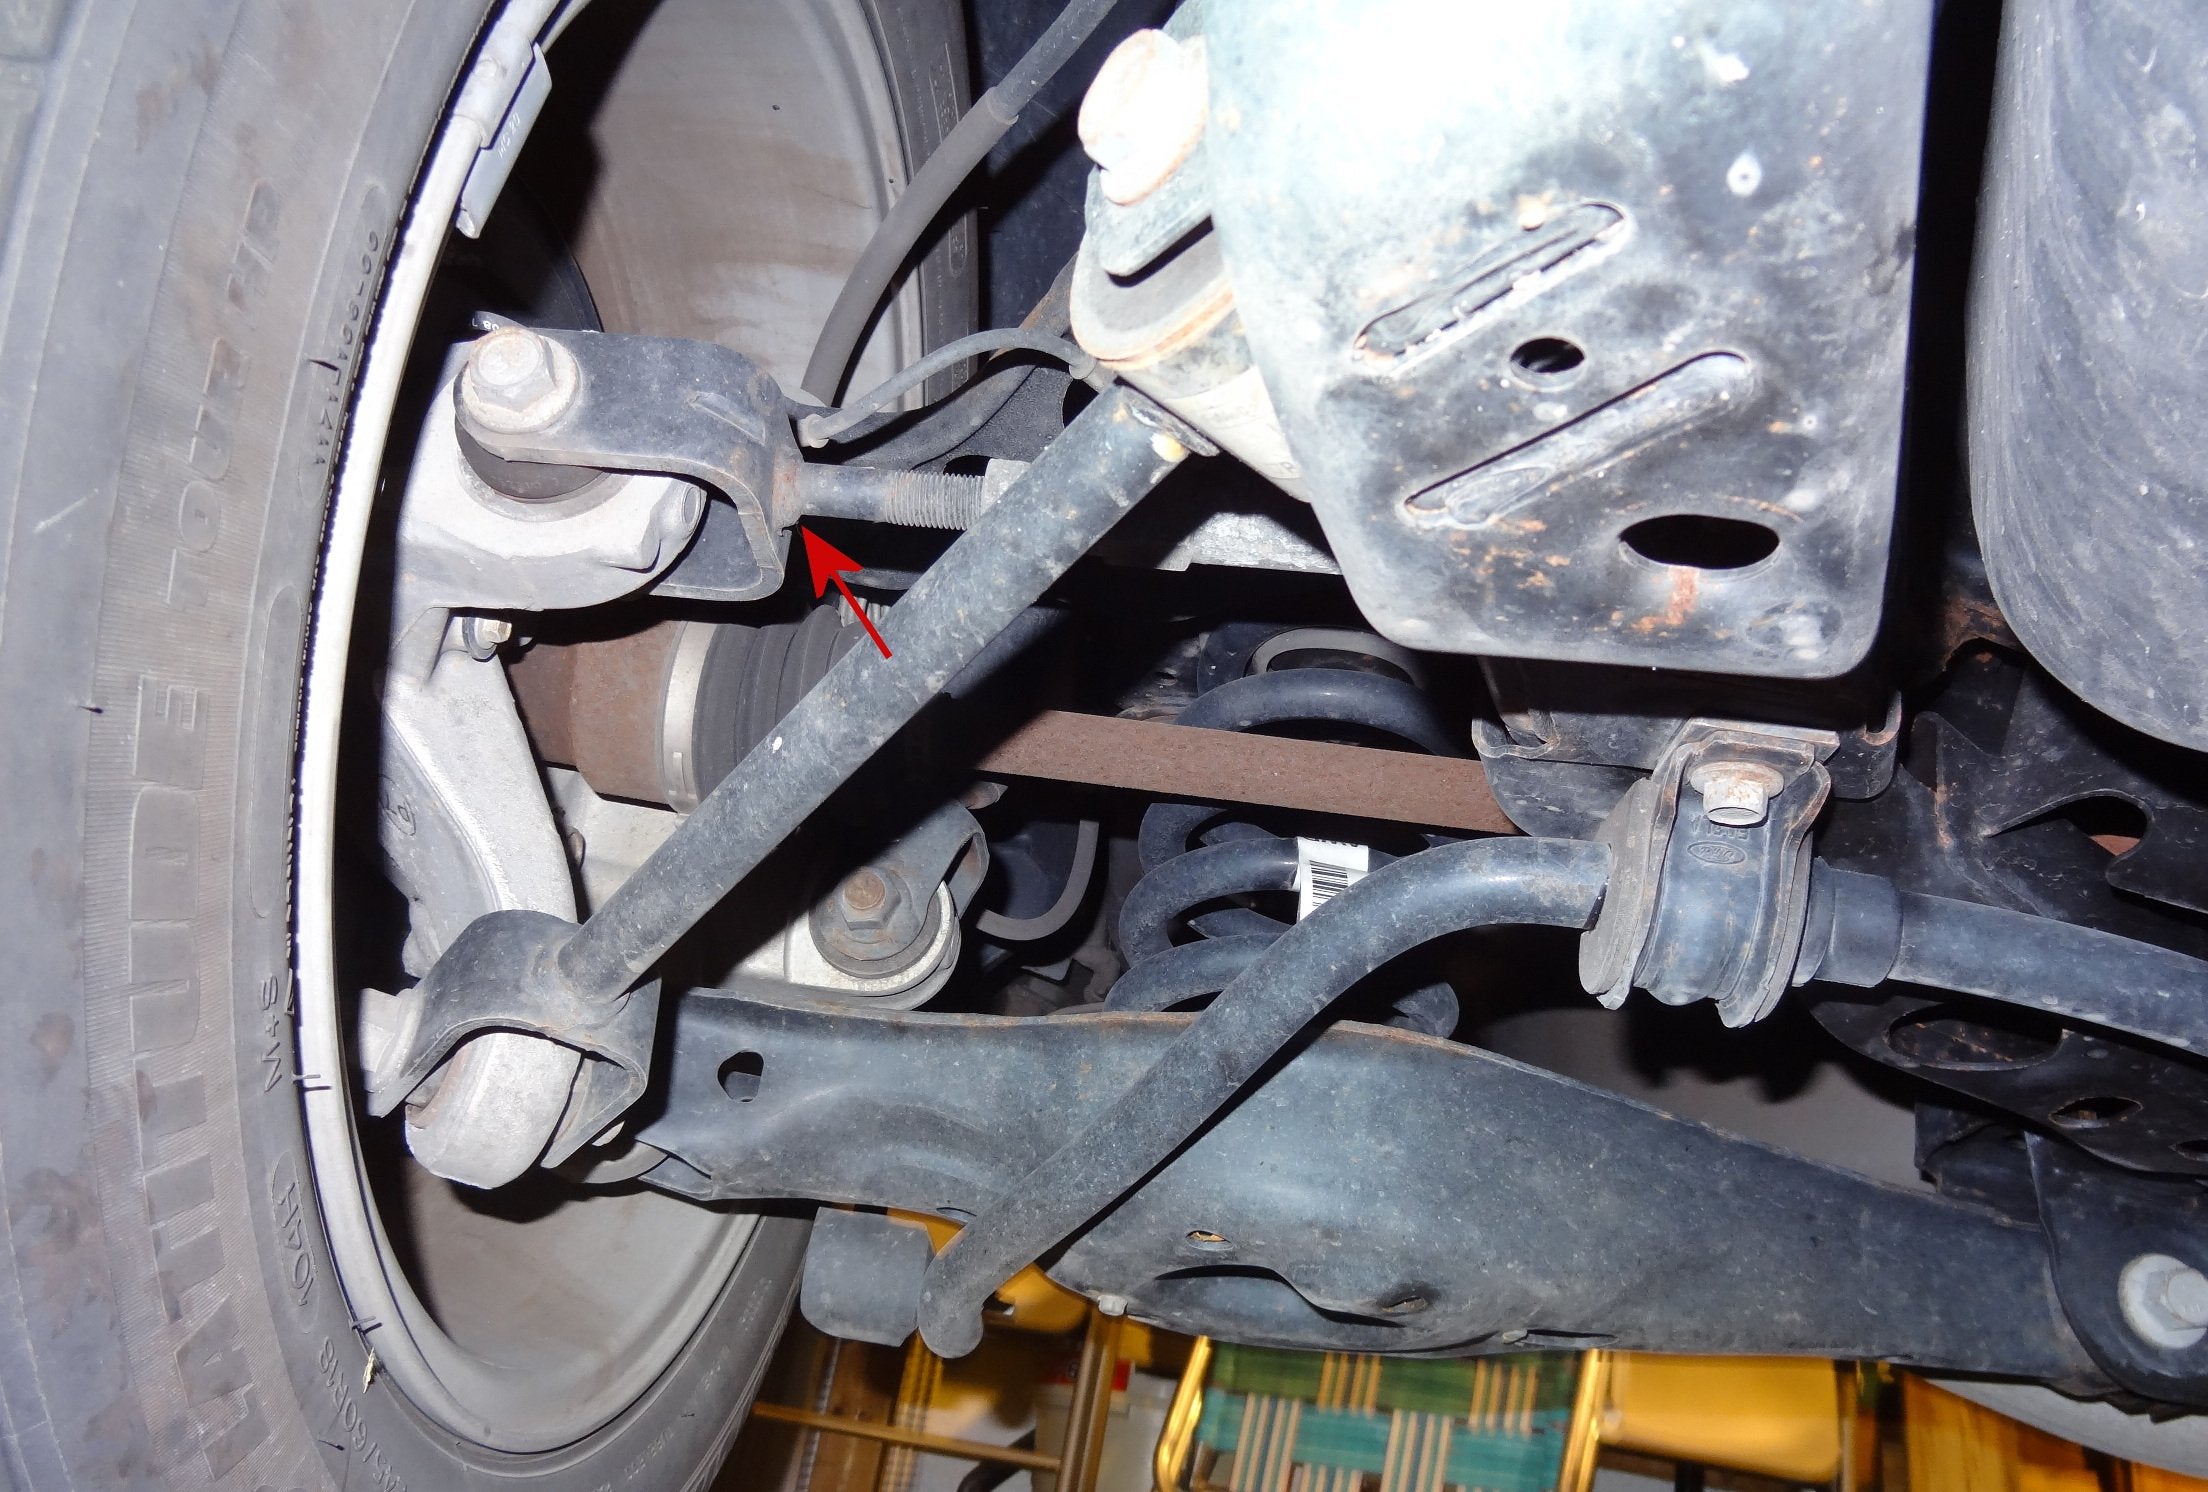
Rear Toe Link Symptoms, Diagnosis and Replacement Guide
A rear toe link fails in one of three ways: a worn ball joint, a seized adjuster, or a bent link body. Each produces a different symptom, and matching the complaint to the failure mode tells you whether the toe link is even the right suspect before you crawl under the car.
Match the Symptom to the Failure Mode
Clunking over bumps or during lane changes
A worn ball joint or an elongated mounting hole—not a seized adjuster. The ball joint develops radial play, and every suspension compression lets the link shift. You feel the metallic knock through the floor rather than the steering wheel.
Rear-end wander and a vague on-center feel at highway speed
Excessive toe change under load. As the ball joint wears or the link's bushing collapses, rear toe moves dynamically with cornering and braking forces. The car feels like it's steering from the rear because it is—the thrust angle is changing as you drive.
Uneven rear tire wear—inner or outer shoulder scalloping—with a thrust angle that won't hold after alignment
A bent link or a seized adjuster. A seized adjuster often presents as "the alignment shop couldn't get rear toe in spec" rather than a noise. This is the symptom most often misdiagnosed as a bent knuckle or subframe issue. Before condemning the knuckle, confirm the adjuster actually turns. If it doesn't, the link is the problem, not the structure.
| Symptom | Most Likely Failure Mode | Confirming Check |
|---|---|---|
| Clunking over bumps or during lane changes | Worn ball joint or elongated mounting hole | Wheel play test at 9 and 3 o'clock; have a helper watch the link while you rock the tire |
| Rear-end wander and vague on-center feel at highway speed | Ball joint wear or bushing collapse causing dynamic toe change | Alignment reading shows thrust angle shifting under cornering and braking load |
| Uneven rear tire wear with a thrust angle that won't hold after alignment | Bent link body or seized adjuster | Confirm the adjuster actually turns; inspect the link for straightness |
Recall Context: Ford Explorer 21S32/19S17
Ford Explorer recall 21S32 and 19S17 address rear toe link fractures. The recall repair typically replaces the toe link assembly but does not guarantee a four-wheel alignment or address corrosion on the opposite side. That distinction matters: a recall repair is a safety campaign, not a suspension overhaul.
A recall repair may use an updated part design, but it does not automatically mean both sides are replaced or that the adjuster will be free-moving after the job. If the technician installs a new link and leaves the old, corroded adjuster sleeve in place, you can still have an alignment that won't hold.
Check your VIN against the NHTSA or Ford recall portal before assuming your vehicle is covered. A recall is not a substitute for a diagnosis if symptoms persist after the recall work. If the recall has already been performed and symptoms return, the diagnostic framework in this article still applies—the recall does not exempt the vehicle from normal wear or corrosion.
Diagnostic Flowchart: From Symptom to Root Cause in Four Steps
Step 1: Wheel play test. Raise the rear, grab the tire at 9 and 3 o'clock, and check for lateral play. Toe link play will show as in-and-out movement at the front of the rear tire. If you feel movement, have a helper watch the link while you rock the tire—you'll see exactly where the play is.
Step 2: Visual corrosion check. Inspect the link body, ball joint boot, and adjuster sleeve for rust jacking, cracked boots, or seized threads. Corrosion severity is the primary decision driver, not mileage. A 60,000-mile car in the rust belt can have a worse link than a 150,000-mile car in Arizona.
Step 3: Alignment reading. A thrust angle that cannot be brought into spec after adjuster movement indicates a bent link or seized adjuster. Compare before and after readings. If the tech can't move the adjuster, stop—you've found the root cause.
Step 4: Differentiate. Trailing arm bushing wear shows as fore-aft play and clunk over bumps. Wheel bearing noise changes with cornering load. A bent knuckle shows as a static camber/toe error that cannot be adjusted out. If the toe link is tight and the adjuster moves freely but the alignment still won't come in, look at the knuckle or subframe.
Replacement Decision: DIY vs. Professional Service
DIY is viable when the adjuster turns freely, the mounting bolts are not rust-welded, and you have a jack, stands, hand tools, and a torque wrench—plus a plan for a professional alignment immediately after. On a clean, Southern car, this is a 1–2 hour job per side.
Professional service is the safer call when the adjuster is seized, the link is heavily corroded, or the mounting points show rust jacking. Cutting or heating may be required, and a lift makes the job safer and faster. If you're in the rust belt and the link has been on the car for a decade, assume the hardware will fight you.
Tool requirements: a breaker bar, penetrating oil, wire brush, and possibly a torch or reciprocating saw for seized hardware. A lift is not mandatory but highly recommended for rust-belt vehicles. If you cannot get the rear toe into spec after replacement, the job is not finished—a four-wheel alignment is mandatory, which may push the decision toward a shop that can do both.
Aftermarket vs. OEM Toe Links: Selection Criteria That Actually Matter
Corrosion-resistant coatings—zinc plating, e-coat, or stainless hardware—matter more than the OEM-vs-aftermarket label in rust-belt regions. A painted OEM link will rust through just as fast as a cheap aftermarket one if the coating is inadequate.
Ball joint design: a sealed, greaseless ball joint with a reinforced boot resists water intrusion better than an open design. Serviceable joints require maintenance but can last longer if greased. For a daily driver in a salt state, sealed is usually the better choice.
Adjuster accessibility: a hex or flat-sided adjuster that can be turned with a common wrench is easier to align than a smooth sleeve that requires a pipe wrench. If your alignment tech has to fight the adjuster, you'll pay for it in labor—and you may not get a precise setting.
Availability: aftermarket parts are often easier to source quickly, but OEM may be the only option for recall-related or specific trim levels. Check both before deciding. For Hyundai/Kia applications, our Rear Trailing Arm Bushing — 55274-2W000 and Rear Assist Arm — 55250-2S000 illustrate the kind of corrosion-resistant hardware and sealed joint design that survives road salt.
Post-Replacement Alignment and the Case for Replacing Both Sides
A four-wheel alignment is mandatory because the toe link directly sets rear toe and thrust angle. Skipping it will cause rapid tire wear and handling instability. Replacing both sides simultaneously avoids a second alignment cost and prevents the older, worn link from causing uneven wear on the opposite tire.
The alignment procedure should include a before-and-after printout. If the rear toe cannot be brought into spec, the new link may be defective or the knuckle/subframe may be bent. If the recall repair only replaced one side, the other side should be inspected and replaced if corroded or worn—the recall does not guarantee both sides are new.
Preventive Inspection Intervals
Inspect rear toe links visually at every oil change or tire rotation—look for cracked boots, rust jacking, and free play. Check rear tire wear patterns monthly; inner or outer shoulder scalloping is an early warning of toe misalignment. Have a four-wheel alignment checked annually or after any rear suspension work, even if the car drives straight—thrust angle errors are not always felt by the driver. In rust-belt regions, increase inspection frequency to twice a year, focusing on the adjuster and ball joint boot.

FAQ
How do I know if my rear toe link is bad?
Clunking over bumps, rear-end wander, and uneven rear tire wear are the classic signs. A wheel play test at 9 and 3 o'clock will show lateral movement if the ball joint is worn.
Can I drive with a bad rear toe link?
It's not safe. A worn link can cause sudden toe changes and loss of control. If you suspect a failure, have it inspected immediately.
Do I need an alignment after replacing a toe link?
Yes. The toe link sets rear toe and thrust angle. Without an alignment, you'll wear tires rapidly and the car may handle unpredictably.
Should I replace both rear toe links at once?
Yes. Replacing both sides avoids a second alignment and prevents the older link from causing uneven wear on the opposite tire.
What causes rear toe links to fail?
Corrosion, worn ball joints, and bent link bodies from potholes or curb strikes. Mileage is less important than exposure to road salt and moisture.
---
Related