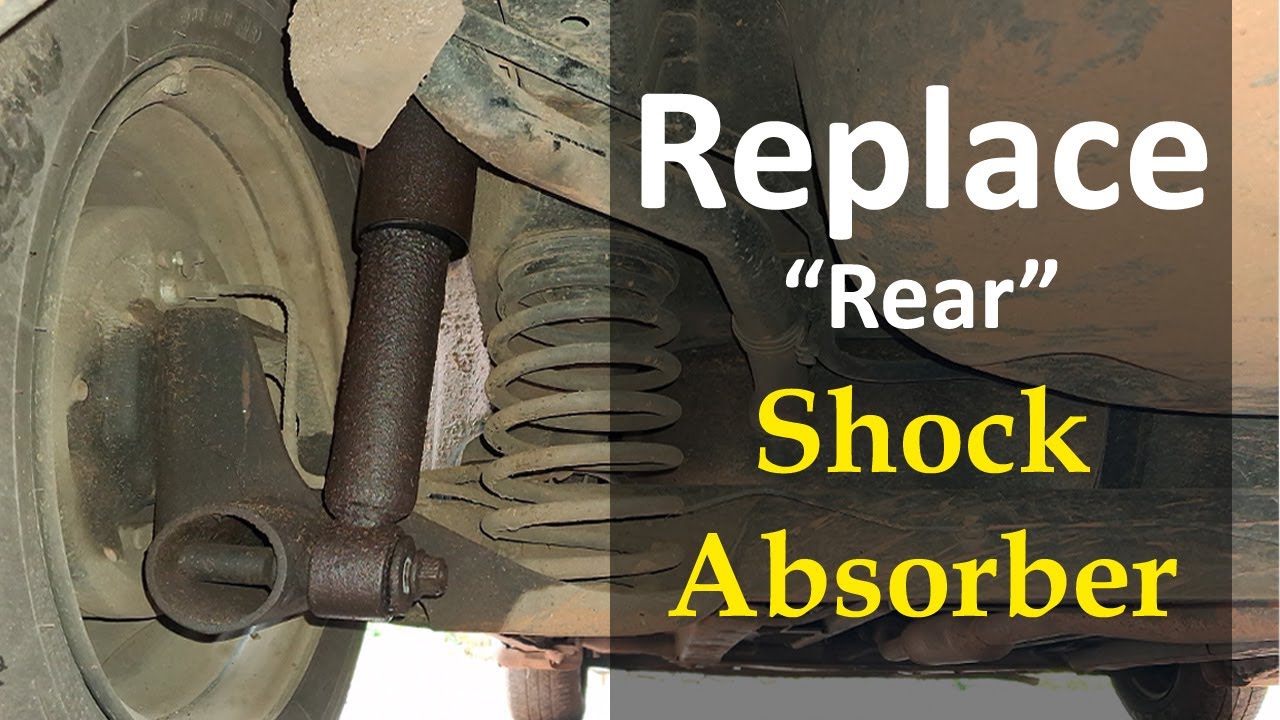
Rear Shock Absorber Replacement (ChrisFix Method): Diagnose First, Then Replace Safely

Rear shock replacement is a two-stage decision: first, confirm the shocks are actually the failed component using a multi-symptom diagnostic threshold — not the bounce test alone — and second, execute the replacement as a safety-critical procedure. From a technician's standpoint, the diagnosis and the installation details (banded-shock handling, torque verification, mounting hardware, post-install checks) matter more than the brand of shock you buy.
ChrisFix's approach to this job is built on the same principle: verify the failure before you buy parts, and treat the install as a controlled procedure rather than a parts swap. His bounce-test method, the two-finger gap check at the shock mount, and his use of a pry bar to check for play at the mounting points are all diagnostic steps that align with — and in some cases extend — the four-point diagnostic below. [MODEL_ANALYSIS]
Confirm the Rear Shocks Are Actually the Failed Component
A bounce test alone does not confirm a failed rear shock. A shock can pass the bounce test and still be worn enough to cause cupping, brake dive, and body roll. Run a four-point diagnostic before ordering parts. Any two positive findings justify replacement.
| Diagnostic | What to look for | Positive finding → decision |
|---|---|---|
| Fluid leak | Dark, oily residue on the shock body or around the shaft seal | Wet, dripping stain or caked dirt-oil mix = seal failure → replace |
| Tire wear | Cupping or scalloped edges on rear tires | Uneven patches = shock cannot keep tire planted → replace |
| Handling | Brake dive, body roll, rear floats after bumps | Rear noticeably softer than front → replace |
| Bounce test | Push down firmly on the rear corner and release | More than one rebound oscillation → replace |
Fluid leak: the most reliable external indicator
Inspect the shock body and the area around the shaft seal for dark, oily residue. A light film is normal; a wet, dripping stain or caked dirt-oil mix means the seal has failed and damping is compromised. [MODEL_ANALYSIS]
Tire wear: cupping and scalloped edges
Check the rear tires for cupping or scalloped edges. Worn shocks cannot keep the tire planted, so the tread wears in uneven patches. If the tires show cupping but the shocks look dry, the shocks are still the likely cause — the seal may have failed internally without external leakage. [MODEL_ANALYSIS]
Handling: brake dive and body roll
Evaluate brake dive and body roll. Excessive nose-dive under braking or excessive lean in corners points to worn dampers. Compare the rear to the front: if the rear feels noticeably softer or floats after a bump, the rear shocks are the weaker pair.
Bounce test: necessary but not sufficient
Perform a controlled bounce test. Push down firmly on the rear corner and release. More than one rebound oscillation indicates wear. A pass does not rule out failure — a shock with degraded gas charge can still control one bounce but fail under sustained load. [MODEL_ANALYSIS]
If you find a leak plus cupping, or a leak plus excessive body roll, replace the rear shocks. If only the bounce test fails, inspect the other three points before ordering parts.
How ChrisFix's method fits the four-point diagnostic
ChrisFix's diagnostic sequence is consistent with the four-point framework and adds two checks that are easy to miss:
- Two-finger gap check at the shock mount. A visible gap or movement at the upper or lower mount indicates worn bushings or a loose mount — replace the mounting hardware, not just the shock. [MODEL_ANALYSIS]
- Pry bar check for play. Gently pry at the shock mounting points to check for movement. Play here means the mount or bushing is worn and will cause noise and premature shock failure if reused. [MODEL_ANALYSIS]
Use ChrisFix's checks as confirmation, not as a replacement for the leak, tire-wear, and handling diagnostics. If his checks are positive but the four-point diagnostic is negative, inspect further before buying parts. [MODEL_ANALYSIS]
Identify Electronic or Air Suspension Before You Touch a Bolt
Check for air lines, height sensors, or electrical connectors at the shock or strut before removing anything. These indicate air or electronic damping, and the removal procedure changes completely.
Air suspension requires depressurizing the system before removal. Never disconnect a line under pressure — stored air can release suddenly and cause injury or damage. Follow the manufacturer's depressurization procedure, which typically involves a scan tool or a specific service switch. [MODEL_ANALYSIS]
Electronic dampers may need a scan tool to clear fault codes or recalibrate after replacement. If you disconnect a damper without clearing the code, the vehicle may default to a stiff or soft mode and set a warning light. [MODEL_ANALYSIS]
If you are unsure whether your vehicle has electronic or air suspension, consult a repair manual or a professional before starting. Mis-handling can cause sudden pressure release or electrical damage. [MODEL_ANALYSIS]
Gather Parts, Tools, and Torque Specs Before You Start
Parts: new shocks (replace in pairs), new mounting hardware (bolts, nuts, bushings) unless in perfect condition, and any required brackets. Reusing corroded or stretched hardware is a common cause of premature failure. [MODEL_ANALYSIS]
Tools: jack and jack stands, wheel chocks, socket set, torque wrench, penetrating oil, and eye protection. A breaker bar helps with corroded bolts. [SEARCH_EVIDENCE]
Torque specs: torque values vary widely by model and by upper vs. lower mount. Do not guess and do not rely on a generic number from a forum. Look up the factory service manual for your specific vehicle and year. If you cannot find the spec, stop and consult a professional. [MODEL_ANALYSIS]
Safety: never work under a car supported only by a jack; use jack stands on a flat, hard surface. [SEARCH_EVIDENCE]
Remove and Install Rear Shocks: Step-by-Step with Safety Warnings
Before you buy parts, confirm the diagnosis from Section 1. If you have not confirmed at least two positive findings, stop and re-check. [MODEL_ANALYSIS]
- Lift and support the vehicle on jack stands; remove rear wheels. [SEARCH_EVIDENCE]
- Support the axle or control arm with a jack stand, not just a jack. A jack alone can bleed down and let the suspension drop while you are under the vehicle. [MODEL_ANALYSIS]
- Remove lower and upper mounting bolts; if corroded, apply penetrating oil and wait. [SEARCH_EVIDENCE]
- If the new shock is banded, do not cut the band until the top mount is secured. Banded shocks are compressed under load and can expand forcefully when released. [MODEL_ANALYSIS]
- Install in reverse order. Torque all fasteners to the factory spec with the suspension at ride height if the manual requires it. [SEARCH_EVIDENCE]
Banded shock safety: how to cut the band without injury
Banded shocks are the single most common source of injury on this job. Follow this sequence:
- Put on eye protection and gloves before handling the shock. [MODEL_ANALYSIS]
- Secure the top mount first. The shock must be attached at the top before the band is cut. [MODEL_ANALYSIS]
- Point the shock away from your face and body. [MODEL_ANALYSIS]
- Use wire cutters or heavy-duty snips — not a knife — to cut the band. [MODEL_ANALYSIS]
- Cut the band in a controlled motion and let the shock expand into its mount. Do not try to hold the shock compressed by hand. [MODEL_ANALYSIS]
Premature expansion — cutting the band before the top mount is secured — can send the shock across the shop and cause serious injury. Treat the band as a loaded spring. [MODEL_ANALYSIS]
Decide Whether to Replace in Pairs or All Four
Always replace shocks in pairs on the same axle to maintain balanced damping. [SEARCH_EVIDENCE]
If the front shocks are also worn (e.g., similar mileage or symptoms), replacing all four at once is more cost-effective and ensures consistent handling. [SEARCH_EVIDENCE]
If only one rear shock is leaking but the other has significant mileage, replace both. [SEARCH_EVIDENCE]
Consider alignment after replacing front struts, but rear shock replacement alone typically does not require alignment unless other suspension components are disturbed. [SEARCH_EVIDENCE]
Evaluate the Quote: Parts vs. Labor and the $1,300 Question
Typical parts cost: $50–$150 per shock for standard replacements; $200–$500+ for electronic or air shocks. [SEARCH_EVIDENCE]
Labor: 1–2 hours per axle for standard shocks; more for air/electronic. [SEARCH_EVIDENCE]
Use this decision tree to evaluate a $1,300 quote:
- Does your vehicle have electronic or air suspension? If yes, $1,300 may be fair — parts alone can run $400–$1,000+ per pair, plus labor and calibration. [MODEL_ANALYSIS]
- Does the quote include alignment, mounts, or bushings? Subtract those line items. If the quote bundles alignment or mount replacement, the shock-only portion may be closer to market rate. [MODEL_ANALYSIS]
- Is it standard shocks only? If yes, $1,300 is likely high. Get a second quote from an independent shop. [MODEL_ANALYSIS]
- Ask for a written breakdown: parts, labor hours, and any additional fees. Compare the labor hours against the 1–2 hour per axle range. [MODEL_ANALYSIS]
If the shop will not provide a breakdown, that is a reason to walk away. [MODEL_ANALYSIS]
Post-Installation Checks: Re-Torque, Test Drive, and Alignment
Before you drive, confirm the diagnosis was correct and the install is complete. If anything feels wrong at low speed, stop and re-check. [MODEL_ANALYSIS]
- Re-torque all mounting bolts to factory spec after 50–100 miles. [SEARCH_EVIDENCE]
- Test drive at low speed first, then highway; listen for clunks or unusual noises. [SEARCH_EVIDENCE]
- Check ride height and handling. If the rear sits unevenly, re-check installation. [SEARCH_EVIDENCE]
- Alignment: not typically needed for rear shock replacement alone. If you disconnected the lower control arm or replaced front struts, get an alignment. [SEARCH_EVIDENCE]
Dispose of Old Shocks Responsibly and Know When to Seek Professional Help
Old shocks contain hydraulic fluid and should be recycled at a local auto parts store or hazardous waste facility. [SEARCH_EVIDENCE]
Do not throw shocks in regular trash; many municipalities have specific disposal rules. [SEARCH_EVIDENCE]
Seek professional help if you lack proper tools, if the vehicle has complex electronic/air suspension, or if you encounter severe corrosion. [SEARCH_EVIDENCE]
If you are unsure at any step, stop and consult a certified mechanic. [SEARCH_EVIDENCE]
FAQ
Can I replace just one rear shock?
No. Replace in pairs on the same axle to maintain balanced damping. [SEARCH_EVIDENCE]
Do I need an alignment after rear shock replacement?
Not typically for rear shock replacement alone. If you disconnected the lower control arm or replaced front struts, get an alignment. [SEARCH_EVIDENCE]
How do I know if my rear shocks are bad if they are not leaking?
Use the four-point diagnostic. Cupping on the rear tires, excessive brake dive or body roll, and more than one rebound oscillation on the bounce test are all positive findings. Any two justify replacement. [MODEL_ANALYSIS]
Is a $1,300 quote for rear shocks reasonable?
It depends on the vehicle. For electronic or air suspension, it may be fair. For standard shocks, get a second quote and ask for a written breakdown. [MODEL_ANALYSIS]
What happens if I cut the band on a banded shock before securing the top mount?
The shock can expand forcefully and cause serious injury. Secure the top mount first, point the shock away from your face, and use wire cutters. [MODEL_ANALYSIS]
---
Related