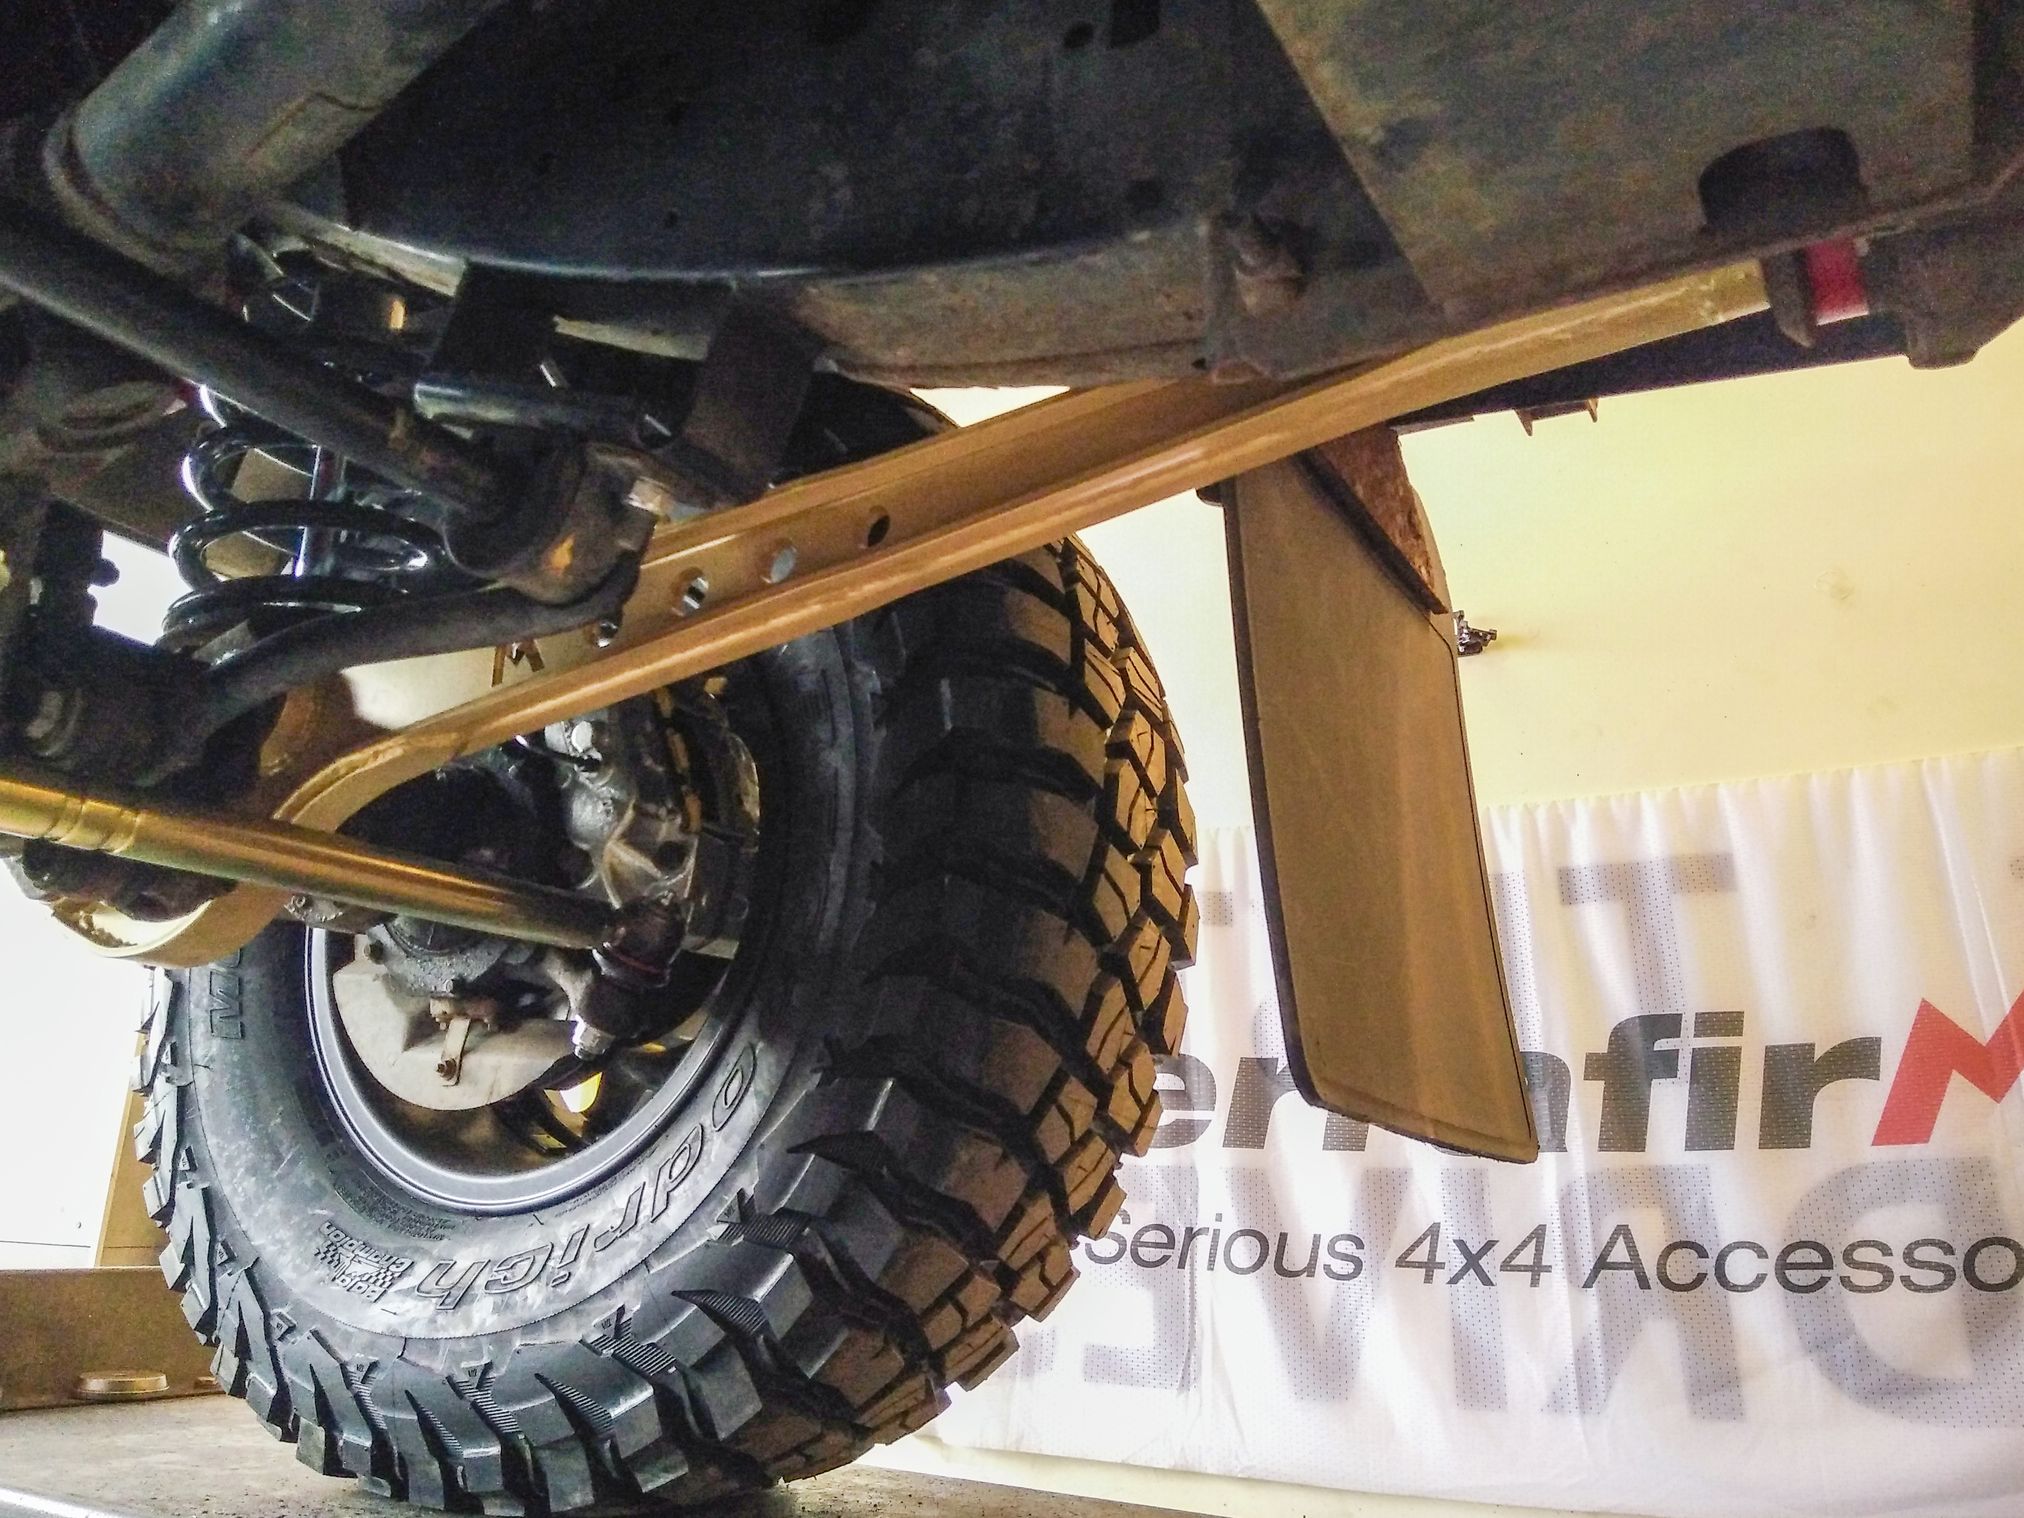
Radius Arm Function, Symptoms and Replacement Guide
A radius arm locates the wheel fore-aft and sets caster; a control arm controls lateral and vertical geometry. Because their load paths differ, their failure modes and symptom signatures differ. Diagnose the radius arm with a structured symptom-to-cause check — not by mileage or noise alone — then decide between bushing-only repair and full arm replacement based on bushing material and alignment consequences, not price alone.
Scope: Which Suspension Layouts Actually Use a Radius Arm
"Radius arm," "trailing arm," and "control arm" naming varies by chassis. Before you apply any diagnostic step below, confirm your vehicle has a true radius arm.
- True radius arm: a longitudinal arm pivoting at the frame and connecting to a beam axle or rear spindle, primarily resisting fore-aft loads and influencing caster. Common on older RWD/4WD front suspensions and some rear beam-axle layouts.
- Trailing arm: a longitudinal arm locating a beam axle or rear spindle, but without the caster-setting role of a front radius arm. Same pivot geometry, different alignment function.
- Lower control arm: handles lateral and vertical geometry on MacPherson-strut and double-wishbone layouts. Many FWD cars have no radius arm at all — the part you are looking at is a lower control arm or a trailing arm.
If your vehicle uses a MacPherson strut front end, the fore-aft locating function is typically handled by the lower control arm and its rear bushing, not a separate radius arm. Applying radius-arm diagnostic steps to that layout will send you after the wrong part.
Radius Arm vs Control Arm: Function and Failure Modes
The radius arm pivots at the frame and connects to the spindle or axle housing. Its primary job is to resist braking and acceleration forces that push the wheel rearward and forward. It also sets caster angle, which affects steering stability and returnability. When its bushing wears, the arm moves fore-aft under load, causing a clunk and caster wander.
The control arm handles lateral forces and vertical suspension travel. Its bushings fail from lateral shimmy and uneven camber wear. A control arm bushing failure typically presents as a shimmy at speed or uneven tire wear on the inner or outer edge, not as a fore-aft clunk.
| Function | Load Direction | Pivot Type | Alignment Angle Influenced |
|----------|----------------|------------|----------------------------|
| Radius Arm | Fore-aft (longitudinal) | Frame pivot, axle/spindle mount | Caster |
| Control Arm | Lateral and vertical | Frame pivot, ball joint | Camber, caster, toe (depending on design) |
Use this table to orient your diagnosis. If the complaint is a clunk under braking or acceleration, suspect the radius arm. If it is a shimmy or camber wear, suspect the control arm.
Symptom-to-Cause Map: Clunk, Wander, Tire Wear, and Shimmy
Each symptom maps to a specific radius arm failure mode. Clunking over bumps indicates a worn or separated bushing allowing metal-to-metal contact. Vague steering or wander points to loss of caster control from a collapsed bushing. Uneven or accelerated front tire wear results from geometry shift due to bushing deflection. Shimmy often involves combined bushing play and worn adjacent components.
Symptom-to-cause reference:
- Clunk over bumps — Worn or separated bushing; metal-to-metal contact. Inspect immediately; replace if separation is visible.
- Vague steering / wander — Collapsed bushing causing caster loss. Stop driving if sudden; monitor if gradual.
- Uneven or accelerated tire wear — Geometry shift from bushing deflection. Replace soon; align after repair.
- Shimmy — Bushing play plus worn ball joints, tie rod ends, or control arm bushings. Diagnose all components before ordering parts.
A clunk that occurs only over large bumps and without steering change may be early-stage bushing wear. A clunk under braking or acceleration that worsens over time indicates the bushing has separated and the arm is moving fore-aft. Do not confuse this with a sway bar link clunk, which is typically a lighter rattle over small bumps.
Diagnostic Flowchart: Isolating Radius Arm Faults From Look-Alike Problems
Follow this sequence to rule out control arm bushings, ball joints, tie rod ends, and sway bar links before ordering any parts. All pass/fail limits below must be confirmed against the OEM service manual for the specific vehicle. Do not substitute generic numbers.
- Static bounce and pry-bar test on the radius arm bushing. With the vehicle on a lift or jack stands, apply fore-aft force with a pry bar on the radius arm near the bushing. Watch for separation, cracking, or movement beyond the OEM-specified deflection limit. Pass: no movement beyond the OEM bushing deflection limit. Fail: visible separation, cracking through the bushing wall, or metal-to-metal contact — replace.
- Check control arm bushings. Pry laterally on the control arm near its frame pivot. Pass: deflection within the OEM limit. Fail: cracked or separated bushing — replace control arm or bushing.
- Check ball joints. With the suspension unloaded, pry up and down on the ball joint stud. Pass: vertical play within the OEM ball joint limit. Fail: play exceeding the OEM limit — replace.
- Check tie rod ends. Grasp the tie rod and rock it. Pass: no play. Fail: any play — replace.
- Check sway bar links. Disconnect one sway bar link and test-drive. If the clunk persists, the sway bar link is not the cause. Reconnect and proceed.
- Confirm the fault is the radius arm. After isolating adjacent components, re-test the radius arm bushing. A clunk that persists after sway bar link removal and with all other components passing points to the radius arm.
This sequence prevents the common mistake of replacing a control arm when the radius arm bushing is the actual culprit. If your vehicle uses a trailing arm or lower control arm instead of a true radius arm, apply the same pry-bar logic to that component's bushing and confirm the OEM deflection limit before condemning it.
Bushing Material Decision: Rubber vs Polyurethane by Use Case
Choose rubber for daily-driven and comfort-focused vehicles; choose polyurethane for performance, towing, or off-road use where geometry control matters more than ride softness. The trade-off is explicit: stiffer bushing = better geometry control but more road noise and vibration transmitted to the cabin.
Material by use case:
- Daily driver, comfort priority — Rubber. Better NVH isolation, more articulation.
- Performance / track — Polyurethane. Firmer, less deflection, longer service life.
- Towing / heavy load — Polyurethane. Resists deflection under load, maintains geometry.
- Off-road / articulation — Rubber or soft poly. Rubber offers more articulation; poly offers durability.
Rubber bushings are bonded to metal sleeves and provide superior vibration damping. They degrade over time from ozone, heat, and load, but they are the default for OEM comfort. Polyurethane bushings are typically stiffer, resist oil and ozone, and last longer under heavy load, but they transmit more road noise and require periodic lubrication to prevent squeaking.
Decision criteria beyond material: if the vehicle is a daily driver and the OEM bushing lasted 100k+ miles, replacing with the same rubber compound preserves the NVH profile the owner expects. If the vehicle tows or sees track use and the OEM bushing has failed early, polyurethane's reduced deflection is the functional upgrade — accept the NVH penalty as the cost of geometry control.
Bushing-Only vs Full Arm Replacement: Decision Criteria
Replace the bushing only if the arm is straight, uncorroded, and the bushing seat is intact. Replace the full arm if the arm is bent, heavily corroded, or the bushing seat is damaged — pressing a new bushing into a compromised seat will fail again.
Use this checklist:
- Arm straightness: Pass = no bends or dents. Fail = any bend — replace arm.
- Corrosion: Pass = surface rust only, no pitting. Fail = pitting or scale that weakens the arm or reduces wall thickness — replace arm.
- Bushing seat: Pass = smooth, round, no cracks, no deformation. Fail = cracks, out-of-round bore, deformation, or metal loss at the seat — replace arm. A seat that has been wallowed out by a separated bushing will not hold a new bushing's press fit.
- Labor economics: Bushing-only is cheaper in parts but requires press time. Full arm is faster to install but higher parts cost. The break-even depends on corrosion and seat condition, not just price.
If the arm passes all checks, a bushing-only repair is viable. If any check fails, replace the complete arm assembly. Always confirm fitment by VIN or OEM part number.
Alignment and Caster After Replacement: Why It Is Non-Negotiable
The radius arm influences caster; replacing the bushing or arm changes caster and possibly camber/toe, so a professional alignment is required after any radius arm repair. Skipping alignment causes uneven tire wear, pull, and vague steering — the same symptoms you were trying to fix.
Alignment specs must come from the OEM or a verified alignment database. Do not use generic numbers. Caster is not adjustable on all vehicles. If the radius arm is shimmed or has an adjustable mount, caster can be set — but the adjustment method and range are vehicle-specific and must come from the OEM service manual.
Decision branch if caster is out of spec after replacement:
- Confirm the arm has a caster adjustment (shim, slotted mount, or eccentric). If yes, adjust to OEM spec and re-measure.
- If the arm has no caster adjustment, inspect for a bent arm, a collapsed bushing seat, or a shifted subframe before recommending aftermarket caster kits.
- Only after ruling out those mechanical causes should you consider a caster correction kit. This step prevents the comeback.
Frame alignment as part of the repair cost, not an optional add-on. Budget for a professional alignment before you start the job.
Safety Threshold: When to Stop Driving and When to Monitor
Immediate replacement is required for visible bushing separation, metal-to-metal contact, a cracked or bent arm, or sudden caster loss with steering wander. Monitor early bushing cracking without separation, a minor clunk only over large bumps, and no steering change.
Stop driving immediately if you find:
- Visible bushing separation
- Metal-to-metal contact
- Cracked or bent arm
- Sudden caster loss with wander
Monitor (inspect at every oil change) if you find:
- Early bushing cracking, no separation
- Minor clunk over large bumps only
- No steering change
Driving on a failed radius arm can cause loss of directional control and accelerated tire failure. This is a safety decision, not a convenience decision. If you are unsure, err on the side of replacement.
Parts, Torque, and Cost: What to Confirm Before Ordering
Confirm fitment by VIN or OEM part number — do not rely on generic year/make/model alone. Torque specs and alignment numbers must come from the OEM service source or a verified product database; do not use forum values. Torque values vary by fastener size and vehicle; the OEM spec for your specific chassis is the authority — pull it before you torque anything.
Pre-order checklist:
- VIN: Verify the exact vehicle identification number.
- OEM number: Cross-reference the OEM part number from the vehicle or a verified database.
- Bushing material: Choose rubber or polyurethane based on use case.
- Arm condition: Inspect for bends, corrosion, and seat damage before deciding bushing-only vs full arm.
- Alignment budget: Include a professional alignment in the repair budget.
Cost framing: bushing-only is lower parts cost but higher labor time; full arm is higher parts cost but faster install. Compare total cost, not parts cost alone. Always verify the part number against your VIN before ordering.

FAQs
Q: Can I drive with a bad radius arm bushing?
A: If the bushing is cracked but not separated and there is no steering change, you can monitor it. If there is separation, metal-to-metal contact, or sudden wander, stop driving and replace immediately.
Q: How long does a radius arm bushing last?
A: Service life varies by material, load, and environment, but mileage is not the right trigger. Once any clunk or wander appears, inspect at every oil change. Replace at the first sign of separation or metal-to-metal contact regardless of mileage.
Q: Do I need an alignment after replacing a radius arm bushing?
A: Yes. The radius arm influences caster, and any change to the bushing or arm affects alignment angles. Skipping alignment causes uneven tire wear and vague steering.
Q: What is the difference between a radius arm and a control arm?
A: A radius arm controls fore-aft wheel location and caster; a control arm controls lateral and vertical geometry. Their failure modes and symptoms differ.
Q: Can I replace just the bushing, or do I need the whole arm?
A: If the arm is straight, uncorroded, and the bushing seat is intact, bushing-only is viable. If the arm is bent, corroded, or the seat is damaged, replace the complete arm.
Q: Can I replace a radius arm bushing with the arm on the vehicle, or does it need to come off?
A: On most vehicles the arm must be removed and the bushing pressed out and in with a hydraulic press or a dedicated bushing tool. That makes it a shop job for most DIYers unless you have a press and the OEM procedure. Confirm the procedure in the OEM service manual for your chassis before starting.
---
Related