Nissan Altima Control Arm Replacement: A Decision Framework for DIYers and Buyers
Replacing a control arm on a Nissan Altima typically costs $200–$600 per arm including parts and labor, or $80–$250 per arm if you DIY. But the real question isn't just cost—it's whether you can do the job safely and choose the right part for your driving needs. This guide gives you a decision framework: how to confirm the control arm is the culprit, whether to choose OEM or aftermarket, and when to DIY versus hire a professional.
Symptoms of a Failing Control Arm on a Nissan Altima
If your Altima exhibits any of these symptoms, the control arm—or its bushings/ball joint—may be worn. Ignoring them can lead to unsafe handling and premature tire wear.
- Clunking noises over bumps: A metallic clunk from the front suspension, especially at low speeds over potholes or speed bumps, often indicates a loose control arm bushing or ball joint.
- Uneven tire wear: Check for accelerated wear on the inner or outer edge of the front tires. This suggests the wheel is moving out of alignment due to control arm play.
- Steering wheel vibration: Excessive play in the control arm can cause the wheel to wobble, leading to vibration at highway speeds.
- Poor alignment: If the car pulls to one side or the steering wheel is off-center even after a recent alignment, the control arm may be bent or its bushings worn.
Distinguishing from other issues: These symptoms can also come from worn tie rods, ball joints, or struts. To confirm, perform a visual inspection: look for cracked or torn bushings, play in the ball joint, or a bent arm. Jack up the car and use a pry bar to check for movement in the control arm—more than a few millimeters of play means replacement is needed.
Year-specific variations: On 2013–2018 Altimas, the lower control arm bushings are prone to premature wear, often showing cracks by 60,000 miles. On 2019+ models, the design is similar, but some owners report fewer issues. Always verify the correct part number for your specific year.
OEM vs. Aftermarket Control Arms: Which Should You Choose?
For most Altima owners, aftermarket control arms offer the best value, provided you choose a reputable brand. OEM parts guarantee perfect fit and durability, but they cost more. Aftermarket arms can be just as reliable if they meet quality standards.
Quality and materials: OEM control arms are typically stamped steel or aluminum with high-quality rubber bushings. Aftermarket arms vary: some use the same materials, others use polyurethane bushings that last longer but transmit more road noise. Look for brands that use OEM-equivalent materials. Avoid cheap arms with thin metal or poor bushing quality.
Fitment considerations: Fitment is critical. Altima control arms differ by year and trim. For example, 2013–2018 models use a specific lower arm, while 2019+ may have a different design. Always verify the part number matches your VIN. Aftermarket brands often list compatibility, but double-check with the manufacturer if unsure.
Warranty and returns: OEM parts come with a Nissan warranty, typically 12 months or 12,000 miles. Aftermarket warranties vary: some offer lifetime warranties, others only 1–2 years. Check the return policy—some online retailers allow returns if the part doesn't fit, but you may pay restocking fees.
Cost comparison: OEM arms cost $150–$300 each; aftermarket $80–$150. Over the life of the car, aftermarket can save you $100–$200 per arm. However, if you plan to keep the car for many years, OEM might be worth the extra cost for peace of mind.
Decision framework: If you want the safest bet and don't mind paying more, choose OEM. If you're budget-conscious and willing to research brands, a quality aftermarket arm can be a smart choice. Look for brands with good reviews and solid warranties. Avoid no-name brands with no support.
Step-by-Step DIY Replacement Guide for Nissan Altima Control Arms
Replacing a control arm on a Nissan Altima is a doable DIY job if you have intermediate skills. This guide covers the process for 2013–2018 models, with notes for other years. Always consult your service manual for exact specs.
Tools and parts needed:
- Jack and jack stands
- Lug wrench
- Socket set (10mm, 14mm, 17mm, 19mm, 21mm)
- Torque wrench (ft-lb and in-lb)
- Breaker bar
- Pry bar
- Penetrating oil (e.g., WD-40)
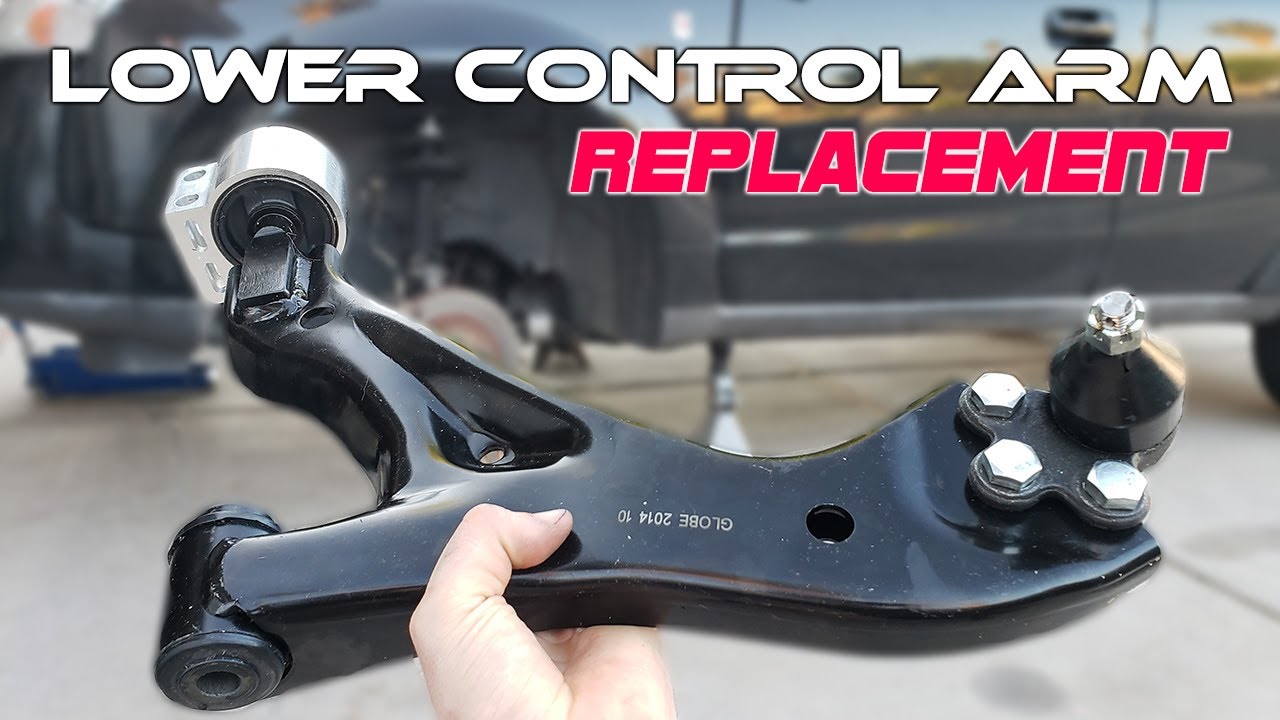
- New control arm (with ball joint and bushings)
- New bolts and nuts (if not included)
- Safety glasses and gloves
Step-by-step process:
- Preparation: Park on a level surface, chock the rear wheels, and loosen the lug nuts on the front wheels. Jack up the front and support on stands. Remove the wheel.
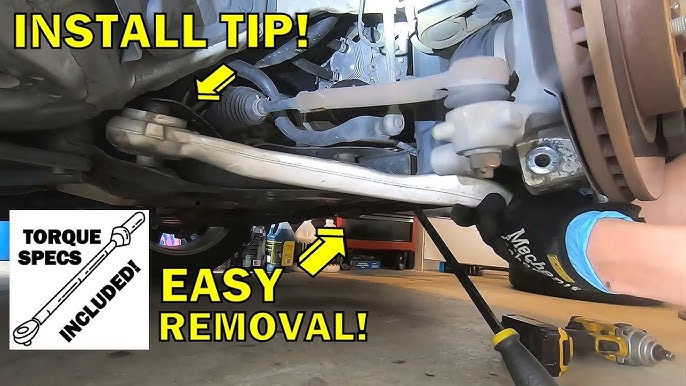
- Access the control arm: Locate the lower control arm. It connects the subframe to the steering knuckle. Remove any underbody panels if needed.
- Remove the ball joint nut: Use a 19mm socket to remove the castle nut on the ball joint stud. Tap the knuckle with a hammer to separate the ball joint from the knuckle. Be careful not to damage the threads.
- Remove the rear bushing bolt: Use a 17mm socket to remove the bolt securing the rear of the control arm to the subframe. This bolt may be tight; use penetrating oil and a breaker bar.
- Remove the front bushing bolt: Similarly, remove the front bolt. The control arm should now be free. You may need to pry it out.
- Install the new control arm: Position the new arm in place. Hand-thread the bolts. Torque the front and rear bolts to 85 ft-lb (115 Nm) for 2013–2018 models. For 2019+, check your manual; it may be 90 ft-lb.
- Reattach the ball joint: Insert the ball joint stud into the knuckle. Torque the castle nut to 40 ft-lb (54 Nm). Install a new cotter pin.
- Reinstall the wheel: Put the wheel back on, tighten lug nuts to 80 ft-lb (108 Nm) in a star pattern. Lower the car.
- Final check: After lowering, re-torque the control arm bolts to spec, as they should be tightened with the suspension loaded. Then, get a wheel alignment.
Torque specifications (2013–2018 Altima):
- Front control arm bolt: 85 ft-lb (115 Nm)
- Rear control arm bolt: 85 ft-lb (115 Nm)
- Ball joint nut: 40 ft-lb (54 Nm)
- Lug nuts: 80 ft-lb (108 Nm)
Year-specific variations: For 2007–2012 Altimas, the process is similar, but torque specs may differ: front bolt 90 ft-lb, rear bolt 75 ft-lb. For 2019+ models, the control arm design is slightly different, but the steps are the same. Always verify with a service manual.
Safety warning: Never work under a car supported only by a jack. Use jack stands. Wear safety glasses. If bolts are rusted, use penetrating oil and heat if necessary, but avoid open flames near fuel lines.
When to Seek Professional Help: Safety and Alignment Considerations
You should seek professional help if you lack the tools, experience, or confidence to perform the replacement safely. The job requires lifting the car, dealing with rusted bolts, and precise torque. Mistakes can lead to suspension failure, causing accidents.
Complexity and tools: The job is moderately complex. You need a torque wrench, jack stands, and possibly a ball joint separator. If you don't have these, buying them adds to the cost. Also, if your car has significant rust, bolts may break, turning a simple job into a nightmare.
Importance of alignment: After replacing a control arm, a wheel alignment is mandatory. Without it, your tires will wear unevenly, and the car may pull. A professional alignment costs $80–$120. If you DIY, you'll need to pay for this anyway.
Risks of improper installation: If you don't torque bolts to spec, they can loosen, causing the control arm to detach. This can lead to loss of steering control. Also, if you damage the ball joint boot, it will fail quickly. Improper installation can also cause premature bushing wear.
Signs you should not DIY: If you have limited mechanical experience, no access to proper tools, or the car is severely rusted, take it to a professional. Also, if you're short on time or patience, the risk of mistakes increases. A professional can do the job in 2–3 hours, while a DIYer might take a full day.
Decision framework: Evaluate your skill level honestly. If you've done brake jobs or suspension work before, you can likely handle this. If not, it's safer to pay a shop. The extra cost is worth the peace of mind.
Preventive Maintenance Tips to Extend Control Arm Life
To extend the life of your Altima's control arms, inspect the bushings and ball joints regularly, maintain proper alignment, and avoid harsh driving habits. These steps can prevent premature failure and save you money.
- Regular inspection: Every oil change, visually inspect the control arm bushings for cracks, tears, or excessive play. Use a pry bar to check for movement. If you see any damage, replace the arm before it worsens.
- Wheel alignment and tire rotation: Get a wheel alignment every 12,000 miles or if you notice uneven tire wear. Rotate tires every 5,000–7,000 miles to ensure even wear. Proper alignment reduces stress on control arms.
- Driving habits: Avoid hitting potholes and curbs at high speed. Slow down over speed bumps. These impacts stress the control arms and bushings. Also, avoid overloading the vehicle, which increases suspension load.
- When to replace bushings vs. entire arm: If only the bushings are worn and the arm is otherwise fine, you can replace just the bushings. However, this is often not cost-effective because the labor is similar. Also, aftermarket arms come with new bushings and ball joints, so replacing the whole arm is usually better value.
- Additional tips: Keep the undercarriage clean to prevent rust. Apply anti-corrosion spray if you live in snowy areas. Also, check the ball joint boot for tears; if torn, grease can leak out, causing wear.
By following these tips, you can extend the life of your control arms to 100,000 miles or more, depending on driving conditions.
FAQs
How long does a Nissan Altima control arm last?
Typically 60,000 to 100,000 miles, but it varies with driving conditions and maintenance.
Can I drive with a bad control arm?
It's not recommended. A bad control arm can cause loss of steering control and lead to accidents. Replace it promptly.
Do I need to replace both control arms at once?
It's often recommended to replace both sides if they have similar wear, but it's not mandatory. If only one is bad, you can replace just that one, but expect the other to fail soon.
What is the difference between upper and lower control arms?
The Altima has lower control arms in the front. Some models have upper arms in the rear. Lower arms are more commonly replaced due to wear.
Can I replace just the bushings instead of the whole arm?
Yes, but it's often not cost-effective. The labor is similar, and aftermarket arms are reasonably priced.
How much does an alignment cost after control arm replacement?
Typically $80 to $120, depending on location.
What tools do I need for DIY replacement?
You'll need a jack, jack stands, sockets, torque wrench, breaker bar, and penetrating oil.
Are aftermarket control arms as good as OEM?
Quality aftermarket arms can be just as good, but you need to choose reputable brands. Check reviews and warranties.
How do I know if my control arm is bad?
Look for clunking noises, uneven tire wear, steering vibration, and poor alignment. Perform a visual inspection for worn bushings.
Can a bad control arm cause vibration at high speeds?
Yes, excessive play can cause wheel wobble, leading to vibration.
Conclusion
Replacing a control arm on your Nissan Altima is a manageable job for a DIYer with intermediate skills, but it requires careful attention to torque specs and alignment. The cost ranges from $200 to $600, depending on parts and labor. Symptoms like clunking and uneven tire wear signal the need for replacement. Choose between OEM and aftermarket based on your budget and quality preferences. If you're unsure, seek professional help to ensure safety. Regular maintenance can extend the life of your control arms, saving you money in the long run.