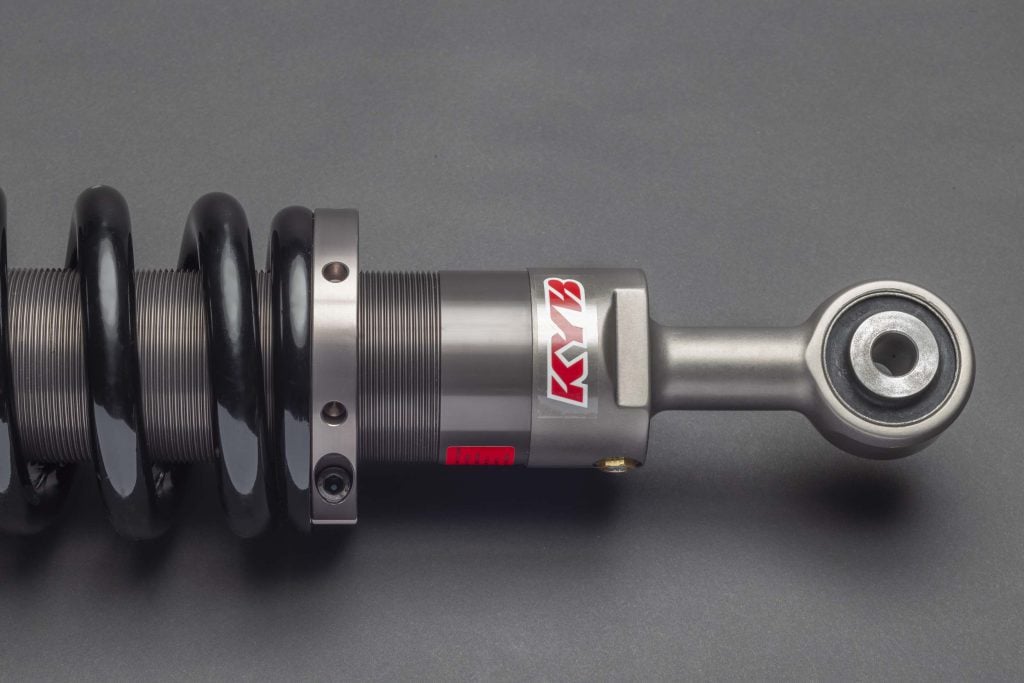
Identify the KYB Mounting Type Before You Lift the Vehicle
Before you raise the vehicle or remove a single fastener, identify the KYB shock's mounting type: eyering, stem, or bar-pin. That identification determines the tool set, the tightening sequence, and the torque source. Skipping it is the most common cause of stripped stem threads, misaligned mounts, and comebacks.
An eyering mount has a circular bushing at each end with a through-bolt. A stem mount has a threaded stud protruding from the upper mount, usually secured with a stem nut. A bar-pin mount has a horizontal pin or crossbar that seats into a bracket — common on front struts and some rear applications. Visually confirm by looking at the upper attachment: a threaded stud means stem; a bolt through a rubber bushing means eyering; a horizontal pin means bar-pin.
Why this matters: the stem nut must be hand-tightened first and torqued with a wrench while holding the rod. Eyering bolts can be tightened in a cross pattern to avoid binding. Bar-pin designs often require the suspension to be loaded before final torque. Each sequence is different, and using the wrong one damages hardware or the shock itself.
If the Shock Is Already Installed or Partially Disassembled
Mid-job identification is still possible. Look at the upper attachment point where the shock meets the body or mount: a threaded stud with a nut is a stem mount; a bolt passing through a rubber bushing is an eyering; a horizontal pin seated in a bracket is a bar-pin. If the upper mount is hidden, check the lower attachment — the same three patterns apply. If you have already removed the old shock, compare the new KYB unit's upper and lower ends to the old one before installing. If the new shock's mounting style does not match the old unit, stop and verify the part number against the application before proceeding.
Tool Selection by Mounting Type: Torque Wrench, Spring Compressor, and the Impact Wrench Warning
Match your tools to the mounting type before you start. For eyering, you need hand tools (ratchet, sockets, combination wrenches), a torque wrench, and possibly a pry bar for alignment. No spring compressor is needed unless you are replacing a complete strut assembly. For stem mounts, add an open-end or flare-nut wrench for the stem nut and a hex, Torx, or flat key to hold the rod if applicable; a spring compressor is required if servicing a strut. For bar-pin, you need a torque wrench, sockets, and a punch or drift for pin removal; a spring compressor if applicable.
Never use an impact wrench on the shock rod or stem nut. The shock rod is a precision surface; impact torque can spin the rod, damage the seal, or strip the stem threads. Hand-tighten first, then torque to specification. When using a spring compressor, choose a quality unit with safety pins and compress the spring evenly and slowly — never use makeshift methods. Impact wrenches should never be used on spring compressor bolts either; the same rule that protects the shock rod applies to the compressor's threaded rods.
Step-by-Step Installation: Eyering, Stem, and Bar-Pin Procedures with Tightening Sequences
Follow the sequence for your mounting type.
Eyering Mounting
Support the suspension, remove old hardware, install the new shock, insert bolts hand-tight. For a two-bolt eyering, torque in a cross pattern — tighten the first bolt, then the diagonally opposite bolt, then the remaining two in sequence — to avoid binding the bushing. For a single-bolt eyering, torque the single bolt to spec after hand-tightening. Reuse or replace hardware based on condition.
Stem Mounting
Install the shock into the mount. Hand-tighten the stem nut first — never impact. Hold the rod with the correct key: a hex key for a hex-socket rod, a Torx key for a Torx-socket rod, or a flat wrench for a flat-sided rod. Then torque the stem nut to spec. For a strut, compress the spring, install the mount, and torque the stem nut before releasing the compressor. For a shock (non-strut), the sequence is the same but without spring compression: hand-tighten the stem nut, hold the rod, torque to spec.
Bar-Pin Mounting
Seat the bar-pin into the bracket, install retaining hardware hand-tight, load the suspension if required, then torque to spec. Some bar-pin designs require the vehicle weight on the suspension before final torque — place a jack under the lower control arm and raise it until the suspension is at ride height, then torque the retaining hardware. Check pin retention hardware specifics: some designs use a through-bolt and nut, others use a pin with a cotter key or clip. Replace any bent, worn, or loose retention hardware before torquing.
Always start all fasteners by hand to avoid cross-threading, then torque to spec. For stem nuts, hand-tighten the nut onto the rod before applying torque.
Where to Find the Correct Torque Values
Do not use a generic torque table. Torque values vary by application — vehicle make, model, year, and even trim — and the correct value must come from the vehicle service manual or the KYB application-specific instruction sheet. The KYB instruction sheet is typically included in the box with the shock or strut. If it is missing, use KYB's application lookup on their website to find the sheet for your part number, or contact KYB technical support with the specific part number and your VIN. If neither source is available, contact the vehicle manufacturer with the same information. No generic torque table is provided here because no single table can cover the range of applications.
New Hardware: What to Replace (Nuts, Bolts, Mounts, Boots) and How to Decide
Replace nuts, bolts, and mounts if they show corrosion, thread damage, or if the vehicle manufacturer specifies torque-to-yield or single-use fasteners. When in doubt, replace. Inspect upper and lower mounts for cracks, separation, or compression set; replace if degraded. Boots (dust covers) should be replaced if torn or missing to protect the rod seal. Stem nuts often include a nylon locking insert or are staked; if the locking feature is compromised, replace it. Reusing a worn stem nut can lead to loosening. Bar-pin retaining hardware should be replaced if bent, worn, or if the pin shows play in the bracket.
Troubleshooting Installation Failures: Stripped Stem Threads, Misaligned Mounts, Cross-Threaded Nuts
Stripped Stem Threads
Stripped stem threads are caused by cross-threading or impact wrench use. Use this decision rule:
- If the rod threads are damaged, replace the shock. Never chase rod threads with a die — it removes material from a precision surface and compromises the seal.
- If only the nut threads are damaged, replace the nut.
- If the damage is minor and only on the nut, a thread file or tap may clean it, but replace the nut if there is any doubt.
Misaligned Mounts
Misaligned mounts result from the suspension not being loaded or an incorrect sequence. Recovery steps:
- Loosen the fasteners on the misaligned mount.
- Align the mount by hand or with a pry bar.
- Hand-tighten the fasteners.
- Load the suspension if the mounting type requires it (bar-pin, some stem struts).
- Torque to spec, sourced from the vehicle service manual or KYB sheet.
Cross-Threaded Nuts
Cross-threaded nuts come from starting by hand incorrectly or forcing with tools. Recovery steps:
- Remove the nut.
- Inspect the threads on both the nut and the stud or bolt.
- If the stud or bolt threads are damaged, replace the shock or the bolt.
- If only the nut is damaged, replace the nut.
- If minor, chase the nut threads with a tap, but do not chase rod threads with a die.
- Always start by hand.
Prevention: hand-tighten first, never impact on the rod, use the correct holding tool for stem mounts, and ensure alignment before torque. Torque values must come from the vehicle service manual or KYB application-specific sheet — no generic table applies.
Post-Installation Checks: Torque Verification, Ride Height, and When Alignment Is Required
After a short drive (50–100 miles), re-check torque on all fasteners. Re-torque in this order: stem nut first, then bar-pin retainers, then eyering bolts. These are the fasteners most likely to settle. Inspect for shiny wear marks around mounts — they indicate movement or misalignment. Check ride height side-to-side; if the vehicle sits unevenly or significantly different, re-check installation and spring seating. After strut replacement (stem or bar-pin on front), an alignment is required because camber and toe can change. For rear shock replacement (eyering or stem), alignment may not be required unless suspension geometry was disturbed. Drive at low speed first, listen for noises, and check for leaks.
How Installation Technique Changes Across KYB Product Lines: Gas-a-Just, MonoMax, and Excel-G
Gas-a-Just has a high-pressure gas charge; the rod may extend forcefully. Keep the rod protected and do not let it slam. Hand-tighten stem nuts carefully — start the nut by hand before the rod is fully extended, because the gas charge will push the rod out and make it harder to start the nut once the rod is extended. MonoMax is a monotube design with high gas pressure; similar caution with rod extension. It may require more effort to compress for installation. Excel-G is twin-tube with a lower gas charge; easier to compress. Still follow hand-tighten-first and no impact on the rod. Regardless of product line, the mounting type dictates the procedure. The gas charge affects how you handle the shock during installation, not the torque sequence.
Your Installation Decision Path: Mount Type → Tools → Sequence → Torque Source
Recap: identify mount type (eyering, stem, bar-pin) → select tools accordingly → follow the mount-specific tightening sequence → hand-tighten first, never impact on rod → source torque from vehicle service manual or KYB sheet. Next steps: order new hardware if needed, download or locate KYB application-specific instruction sheet, schedule alignment if struts replaced. Do not guess torque values; incorrect torque can cause damage or safety issues.
---
Related