Symptoms of a Bad Control Arm: When to Replace vs. Repair
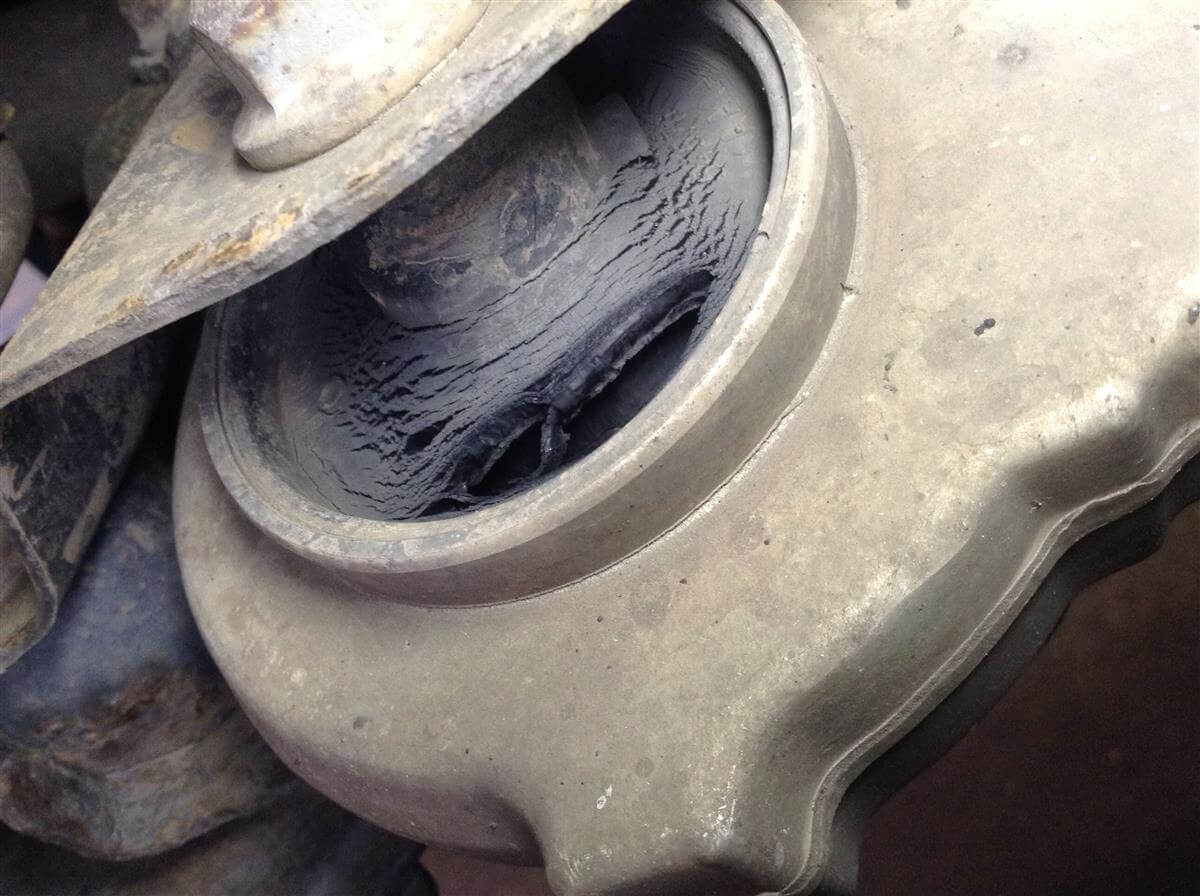
A failing control arm often announces itself through clunking or knocking noises from the front suspension, especially when driving over bumps or during turns. You might also notice uneven tire wear, a wandering steering wheel, or vibrations that intensify with speed. These symptoms point to worn bushings or ball joints, which are integral parts of the control arm assembly.
But not every issue requires replacing the entire arm. If the ball joint is replaceable (some are pressed in, others bolt on) and the bushings are serviceable, you can swap just those components. However, if the arm itself is bent, cracked, or rusted through, or if the ball joint is integral and worn, the whole arm must be replaced. A visual inspection can reveal cracks, rust, or deteriorated bushings—look for dry rot, tears, or excessive play.
Tools and Parts Needed for Control Arm Replacement
Before starting, gather the right tools and parts. You'll need:
- Jack and jack stands (never rely on a jack alone)
- Lug wrench
- Socket set with extensions
- Breaker bar for stubborn bolts
- Torque wrench (critical for proper tightening)
- Ball joint separator (pickle fork or press)
- Penetrating oil (like PB Blaster)
- Safety glasses and gloves
Parts required include the new control arm, new bolts (often recommended to replace), and possibly new bushings or ball joints if not included. Some vehicles, especially those with strut-type suspensions, may require a coil spring compressor—check your service manual.
Step-by-Step Control Arm Replacement Process
Follow these steps for a typical lower control arm replacement. Always consult your vehicle's service manual for exact torque specs and procedures, as they vary by make and model.
- Safety and preparation: Park on a level surface, chock the rear wheels, and loosen the lug nuts on the front wheels before lifting.
- Lift vehicle and remove wheel: Jack up the front, secure on jack stands, and remove the wheel.
- Disconnect stabilizer bar link: Unbolt the end link from the control arm. This may require holding the stud with a wrench while loosening the nut.
- Remove ball joint and bolts: Depending on design, either unbolt the ball joint from the steering knuckle or separate it using a ball joint separator. Then remove the control arm mounting bolts (typically two at the subframe).
- Remove old control arm: Carefully lower the arm and slide it out. You may need to pry it free if rusted.
- Install new control arm: Position the new arm in place, loosely install the mounting bolts, and connect the ball joint. Torque the ball joint nut to spec (often 40-60 ft-lbs, but verify).
- Reconnect components: Reattach the stabilizer bar link and tighten to spec.
- Torque all fasteners to spec: With the vehicle still on stands, tighten the control arm mounting bolts to the specified torque (commonly 80-120 ft-lbs). Critical: Lower the vehicle to the ground (or use a jack to load the suspension) before final tightening of the control arm bolts. This prevents preloading the bushings, which would cause premature failure and harsh ride.
Always use a torque wrench—never guess. Over-tightening can strip threads or damage bushings; under-tightening leads to looseness and noise.
Cost Breakdown: DIY vs Professional, OEM vs Aftermarket
The cost of control arm replacement varies widely. On average, a single control arm part costs:
- Aftermarket: $50–$150
- OEM: $150–$400
Professional labor adds $150–$300 per arm, depending on shop rates and vehicle complexity. So, a professional replacement with OEM parts can run $300–$700 per side. DIY saves the labor cost but requires your time, tools, and confidence. If you already own a torque wrench and jack stands, DIY is significantly cheaper.
OEM vs Aftermarket Control Arms: Which Should You Choose?
OEM (Original Equipment Manufacturer) control arms are made by the vehicle's manufacturer or their suppliers. They guarantee exact fit, reliability, and often come with a warranty. The downside is cost—often double or triple aftermarket prices.
Aftermarket arms are cheaper and vary in quality. Reputable brands like Moog, AC Delco, or Delphi offer reliable options, sometimes with upgraded bushings or ball joints. However, cheap no-name parts may have poor fitment or short lifespan. Check reviews and warranty policies. Some aftermarket arms come with a lifetime warranty, which can be a good value.
If you're keeping the car long-term, OEM or high-quality aftermarket is wise. For a quick fix or budget build, a mid-range aftermarket arm may suffice.
Importance of Wheel Alignment After Control Arm Replacement
Replacing a control arm alters suspension geometry. Even if you marked the old arm's position, the new part may shift camber, caster, or toe. Driving without an alignment will cause uneven tire wear, pulling, and poor handling. Plan to get a professional alignment immediately after replacement. It's a small cost ($50–$100) that protects your tires and ensures safe handling.
Common Mistakes to Avoid During Control Arm Replacement
- Not torquing bolts to spec: This is the #1 mistake. Use a torque wrench.
- Tightening bolts without loading the suspension: This preloads the bushings, causing them to tear. Always tighten with the vehicle's weight on the wheels.
- Using wrong parts: Double-check part numbers for your exact make, model, and year.
- Ignoring worn bushings or ball joints: If they're worn, replace them while you're in there.
- Improper jacking: Always use jack stands. Never work under a car supported only by a jack.
- Rushing rusted bolts: Use penetrating oil and patience. Heat can help, but be careful near fuel lines.
FAQs
How long does a control arm replacement take?
For a DIYer with basic tools, expect 2–4 hours per side, depending on rust and complexity.
Can I drive with a bad control arm?
It's risky. A failing control arm can lead to loss of steering control. Replace it promptly.
Do I need to replace both control arms?
If one is worn, the other is likely close behind. Replacing both at once saves labor and ensures even handling.
Conclusion
Replacing a control arm is a manageable DIY job if you have the right tools and follow torque specs. It saves money and gives you confidence in your vehicle. Remember to load the suspension before final tightening and get an alignment afterward. Choose quality parts—whether OEM or reputable aftermarket—and avoid shortcuts. Your suspension will thank you.
For more information on control arms and bushings, check out our [automotive suspension components](/products) or learn about [our manufacturing facility](/manufacturing) and [quality control](/quality).