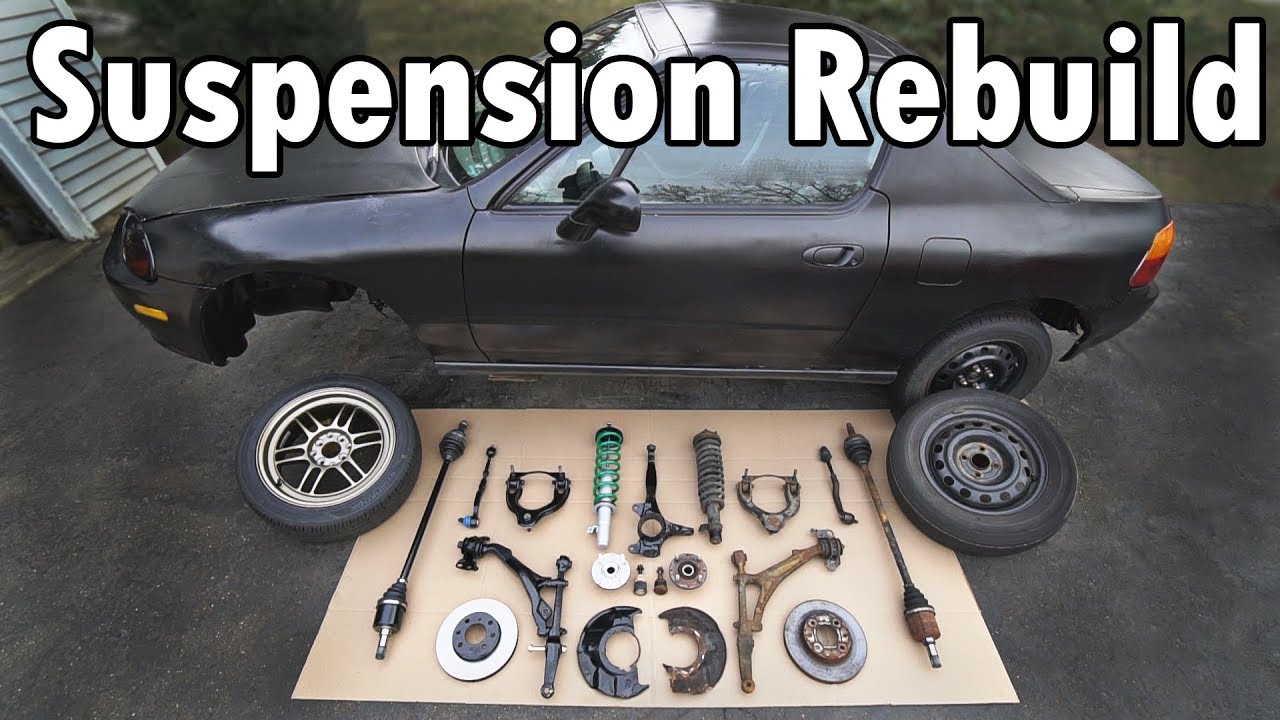
Do You Actually Need a Front Suspension Rebuild? Start With Inspection, Not Mileage

Mileage alone is a weak trigger for a front suspension rebuild. A 120,000-mile car driven on smooth highways may have tighter front-end components than a 60,000-mile car that has spent its life on potholed city streets. The real decision drivers are inspection findings and drivability symptoms — clunks, wander, uneven tire wear, and play you can feel with your hands. If you are searching for "how can I tell if I need front suspension work," the answer starts with a pry bar and a jack, not an odometer reading.
A front suspension rebuild is only justified when the core structure — control arms, knuckles, and subframe — is sound and wear is limited to serviceable components like ball joints, bushings, tie rod ends, and struts. If the control arm itself is rusted through, bent, or has elongated mounting holes, complete assembly replacement is often more cost-effective and safer for a daily driver. That distinction — rebuild the serviceable wear items versus replace the structural assembly — governs every decision in this article.
Before ordering a single part, put the front end in the air and inspect. Grab the tire at 12 and 6 o'clock and rock it to check ball joints and wheel bearings. Grab at 3 and 9 o'clock to check tie rod ends and steering rack play. Look at every rubber bushing for cracks, separation, or missing chunks. Check struts for fluid streaks and torn boots. Only after that inspection can you decide whether you are rebuilding, replacing assemblies, or simply addressing one worn component.
Symptom-Based Diagnosis: Which Front Suspension Components Are Actually Worn?
Match the symptom to the component before you buy anything. A clunk over bumps with steering wander and uneven tire wear points to ball joints. Test them by lifting the vehicle so the suspension hangs free, then use a pry bar under the tire to lever upward while watching the ball joint for vertical play. Any visible movement or a torn, leaking boot means replacement. A ball joint that has separated or has excessive play is a safety-critical failure, not a maintenance item to defer.
Vague steering, a shimmy at speed, or visible cracks and separation in the control arm bushings point to bushing failure. Inspect bushings under load — a bushing that looks fine with the suspension hanging may reveal cracks when the weight of the vehicle is on it. Loose steering with uneven toe wear — feathered edges on the tires — points to tie rod ends. Shake the tire at 3 and 9 o'clock; any free play before the steering wheel moves indicates worn tie rod ends or inner tie rod sockets. Leaking fluid, a bouncy ride, and excessive nose dive under braking point to struts. The bounce test — pushing down on a corner and releasing — should produce one rebound and settle; more than one bounce means the strut is done.
A common misdiagnosis is replacing struts to cure a clunk that actually comes from a worn sway bar link or control arm bushing. Another is replacing tie rod ends when the play is actually in the steering rack. Isolate each joint with a helper rocking the steering wheel while you watch and feel each component. This sequence prevents unnecessary parts replacement and ensures you address the actual worn component.
Replace vs. Rebuild: A Decision Framework for Control Arms, Ball Joints, and Bushings
Rebuild individual components when the control arm itself is solid and you have access to a press and specialty tools. Pressing in new bushings and ball joints can save money on parts, but it requires more labor and the right equipment. If you are paying a shop by the hour, the labor to press bushings often exceeds the cost difference between rebuilding and replacing the complete arm. For a DIY mechanic with a press, rebuilding is viable and can extend the life of a quality OEM arm.
Replace the complete control arm assembly when the arm is rusted, damaged, or when labor time is a concern. A complete assembly — arm, bushings, and ball joint pre-installed — bolts on in a fraction of the time and eliminates the risk of damaging the arm during bushing removal. For daily drivers, this is often the more cost-effective and safer choice. For example, a front lower control arm for a Hyundai KIA application such as the Control Arm — 54500-S1AA0 arrives as a complete unit, while a rebuild would require sourcing the Large suspension bushing — 54584-3S100 and a separate ball joint, then pressing them in.
Consider OEM versus aftermarket. OEM offers original fit and durability, and for a vehicle you plan to keep long-term, that matters. Quality aftermarket can be a cost-effective alternative for older vehicles where the OEM part is discontinued or priced high. The decision framework: if the vehicle is a keeper and the OEM part is available at a reasonable price, OEM is the safer bet. If the vehicle is a daily beater or the OEM part is unavailable, a quality aftermarket assembly from a reputable supplier is a practical choice. Avoid the cheapest no-name parts for safety-critical components like ball joints and tie rod ends.
Tools and Costs: What a Front Suspension Rebuild Really Requires
A front suspension rebuild requires a specific tool set, and missing tools mid-job is the most common cause of frustration. Essential tools include a 1/2-inch drive torque wrench rated 20–250 ft-lbs, a ball joint separator, a tie rod end puller, a spring compressor, an impact wrench, assorted sockets from 10mm to 24mm, and penetrating oil. You will also need a breaker bar, jack stands rated for the vehicle's weight, and a floor jack. If you are rebuilding bushings rather than replacing assemblies, you need access to a hydraulic press and the correct sized drivers.
Parts tiers break down into economy, mid-grade, and premium. Economy is budget aftermarket — acceptable for non-critical components but risky for ball joints and tie rod ends. Mid-grade is quality aftermarket from established brands — the sweet spot for most daily drivers. Premium is OEM or high-end aftermarket — the choice for keepers and performance applications. Cost varies widely by vehicle and brand, so get quotes for your specific application rather than relying on generic estimates.
Hidden costs add up. A professional alignment after the rebuild runs $80–$150 and is non-negotiable. Rusted bolt extraction can add hours of labor or require a torch and extractor set. Damaged fasteners should be replaced, not reused. If you are rebuilding bushings, the press work may require a shop if you do not own a press. Budget for these before you start. For a typical DIY rebuild with mid-grade parts, expect to spend several hundred dollars in parts alone, plus tools if you are buying them for the first time.
Safety First: Spring Compressors and Loaded Components
Never use a spring compressor without securing it properly. Follow the manufacturer's instructions exactly and inspect the compressor for damage before every use. A spring compressor that slips or fails under load can release a coil spring with lethal force. Use a spring compressor with safety pins or locking mechanisms, and always work with the spring pointed away from your body. Wear safety glasses and gloves, and keep your body out of the line of fire when releasing tension.
Always support the lower control arm with a jack stand before disconnecting the strut or ball joint. The lower control arm is under spring load, and disconnecting it without support can cause the spring to release violently. Place the jack stand under the control arm at a point that allows you to lower it gradually with a jack. Never rely on the jack alone — a jack stand is the safety backup.
When working with loaded components, think about what happens if a bolt snaps or a tool slips. Position yourself so that your hands and face are not in the path of a sudden release. Use a breaker bar with steady pressure rather than an impact wrench on rusted fasteners that may snap. If you are unsure about any step involving spring compression, stop and consult a professional. The cost of a mistake is not worth the savings.
Rust-Belt Realities: Removing Seized Bolts and Corroded Components
Soak bolts in penetrating oil for days before you start. Apply it repeatedly — morning and night — for two or three days. This is not a five-minute step; it is a multi-day preparation that saves hours of frustration. When you are ready to work, use heat carefully. An induction heater is safer than an open torch because it concentrates heat on the bolt without a flame. If you use a torch, keep it away from fuel lines, brake lines, and any plastic or rubber components. Heat the bolt, not the surrounding area.
Impact wrenches can help, but they may snap rusted bolts. Use a breaker bar with steady pressure instead — a slow, even pull is less likely to shear a bolt than a hammering impact. If a bolt snaps, extract it with a bolt extractor or drill and tap. Consider replacing critical fasteners with new ones coated in anti-seize to make future work easier. For components that are heavily corroded, such as a front subframe, replacement may be more practical than attempting to rebuild. A Front subframe — 62400-A7100 is an example of a structural component where corrosion often dictates replacement rather than repair.
Rust-belt specific advice: work on one side at a time so you have a reference for reassembly. Take photos before disassembly. Label bolts and note their locations. If a control arm is rusted to the point that the bushing housing is compromised, replace the arm rather than trying to press in new bushings. The Control Arm — 54500-2S000 is a complete assembly that eliminates the need to fight a corroded arm.
After the Wrenching: Alignment and Why It's Non-Negotiable
Replacing steering and suspension components changes toe, camber, and caster. Driving without an alignment can destroy tires quickly — sometimes in a few hundred miles. Uneven toe wear, pulling, and off-center steering are the immediate symptoms, but the real cost is premature tire replacement. Schedule an alignment immediately after the rebuild. Most shops recommend within 10 miles of driving. Do not delay.
Provide the alignment shop with any specifications if you have them, but they will have OEM specs for your vehicle. If you have installed aftermarket components that change geometry — such as adjustable camber plates or lowering springs — tell the alignment technician so they can set the alignment to the appropriate specs. A standard alignment assumes stock geometry; modified suspension may require custom settings.
An alignment is not a luxury or an upsell. It is the final step that makes the rebuild successful. Without it, you have new parts and worn tires. With it, you have a front end that tracks straight, wears tires evenly, and delivers the handling you paid for.
Common Mistakes and Final Checks: What to Avoid and How to Verify Success
Tightening bolts under load is a common mistake. Always torque suspension components at ride height unless the manufacturer specifies otherwise. Torquing at full droop can preload the bushings and cause premature failure or a harsh ride. Use a jack to raise the suspension to ride height before final torque. This is especially important for control arm bushings, which are designed to twist within their normal range of motion.
Reusing worn or damaged fasteners is another mistake. Replace critical bolts — especially those that have been stretched, corroded, or have damaged threads. Use new fasteners where specified, and apply anti-seize to threads that will see future service. Do not reuse a bolt that has been torqued to yield; it has lost its clamping force.
Final checks: test drive at low speed first. Listen for noises — clunks, squeaks, or grinding. Check steering feel — it should be tight and responsive, not vague or wandering. After 100 miles, re-torque the suspension components you replaced. This catches any settling or loosening that occurs after the initial drive. If anything feels wrong, stop and inspect. A successful rebuild is one that is safe, quiet, and aligned.
FAQ
How do I know if I need a front suspension rebuild or just an alignment?
An alignment corrects angles but does not fix worn parts. If you have play in ball joints, tie rod ends, or bushings, an alignment will not solve the problem. Inspect for play first; if components are tight, an alignment may be all you need.
Can I rebuild my front suspension without a press?
You can replace complete assemblies — control arms with bushings and ball joints pre-installed — without a press. If you want to press in new bushings, you need a press or access to one. For most DIY mechanics, complete assembly replacement is the practical choice.
How much does a front suspension rebuild cost?
Parts cost varies by vehicle and tier. Economy parts are cheaper but riskier for safety-critical components. Mid-grade is the sweet spot for daily drivers. Add $80–$150 for an alignment and potential costs for rusted bolt extraction or replacement fasteners.
Do I need an alignment after replacing struts?
Yes. Replacing struts changes camber and toe. An alignment is mandatory to prevent tire wear and ensure proper handling.
What is the most dangerous part of a front suspension rebuild?
Working with compressed springs. A spring compressor failure can cause lethal injury. Use a quality compressor, follow instructions, and keep your body out of the line of fire.